Explore the simplicity of data transfer in Microsoft Fabric with Copy Activity – your straightforward guide to understanding its seamless functionality in the realm of data movement.
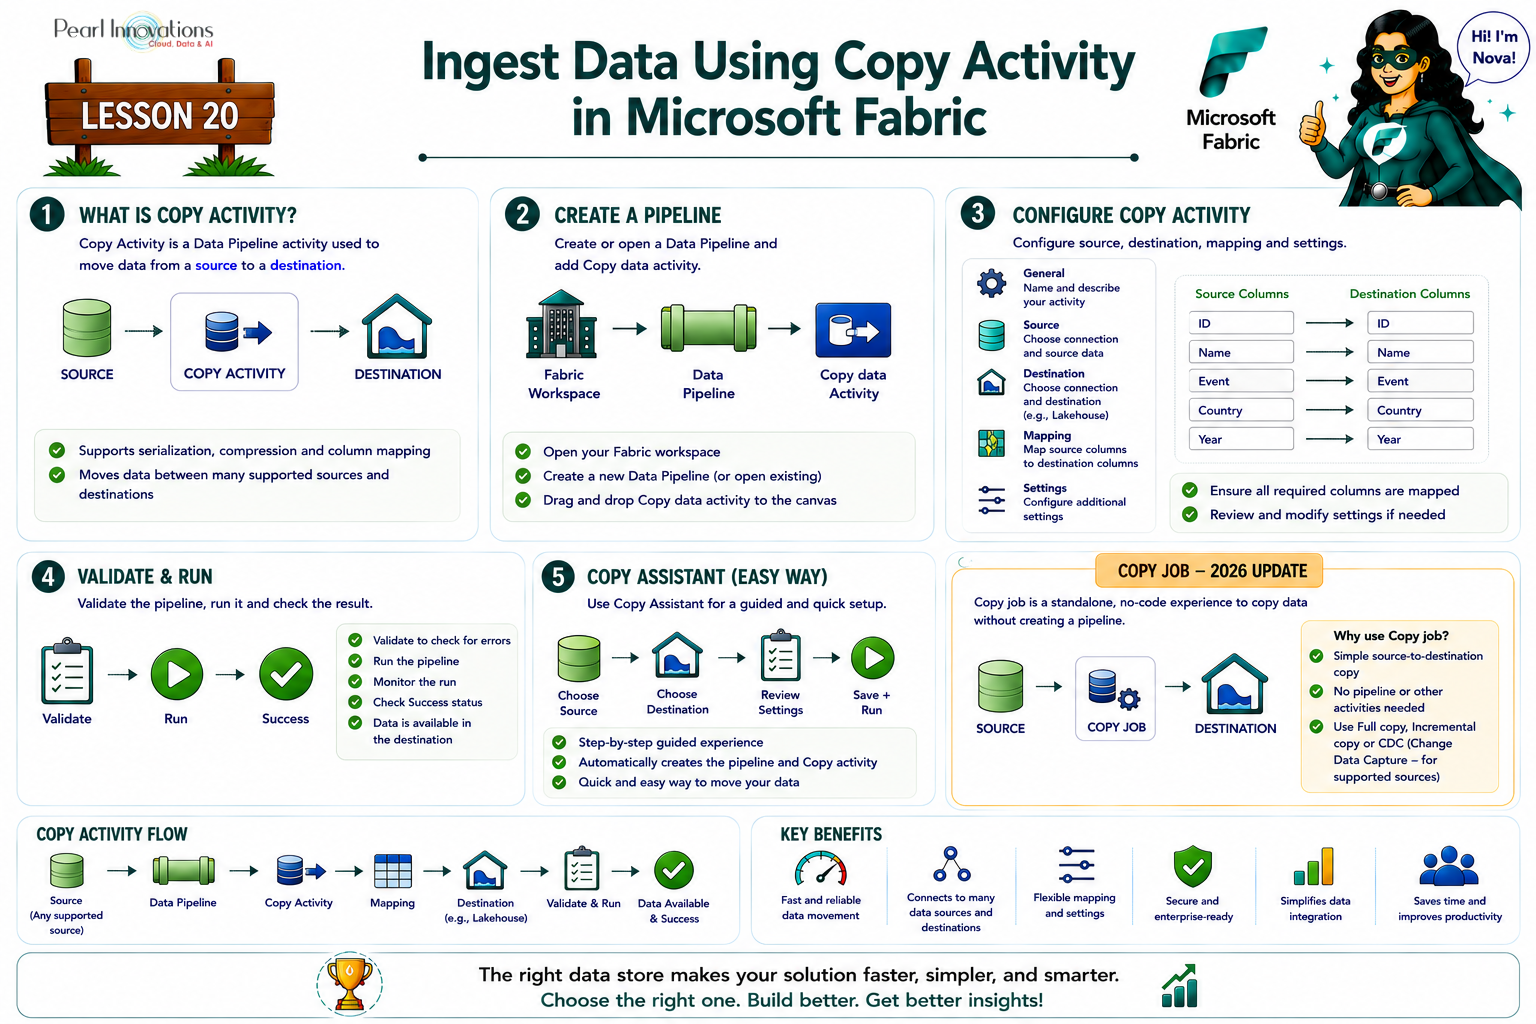
🚀 Learn It in 5 Minutes
Skip the long read.
See the key concepts in one easy-to-follow infographic.
Understanding Copy Activity
Copy Activity is a versatile tool within Microsoft Fabric’s Data Pipeline service. It allows users to effortlessly copy data among various data stores located in the cloud. Whether you need to move data between Azure Storage, SQL databases, or other cloud-based storage solutions, Copy Activity streamlines the process, making it a go-to tool for data engineers and analysts.
If all you need is a straightforward source-to-destination copy — no transformations, no orchestration alongside other activities — Microsoft now also offers Copy job, a simpler dedicated experience for that scenario, including incremental copy. This lesson covers Copy Activity inside a pipeline, which is still the right tool once your copy needs to sit alongside other pipeline steps.
To copy data from one place to another, the Copy activity does three main things
- The Copy activity starts by fetching data from the source data store.
- It performs operations like serialization/deserialization, compression/decompression, and column mapping based on your configuration.
- The processed data is then written to the destination data store, completing the copying process.
How to Ingest data using Copy activity?
Proceed with the steps to execute the Copy Activity.
Prerequisite
- Obtain a Microsoft Fabric tenant account with an active subscription. Refer Lesson 3 – Getting started with Microsoft Fabric
- Verify that you have a Microsoft Fabric-enabled Workspace set up and ready for use. Refer Lesson 4 – Fabric Workspaces and how to create one?
- Create a data pipeline in Fabric. Refer Lesson 18 – Introduction to Data Pipelines in Microsoft Fabric
- Add a copy activity directly
Follow these steps to add a copy activity directly
- Navigate to the workspace where you established the data pipeline and access the Data Pipeline section.
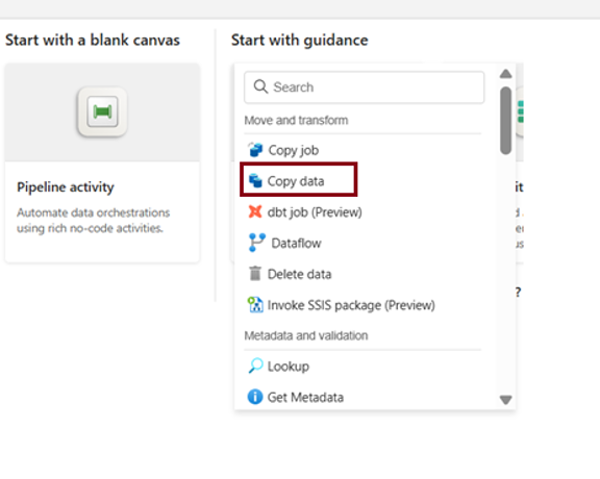
- Add copy activity using either way
- Copy data –> Add to canvas
- Add pipeline activity –> Copy data
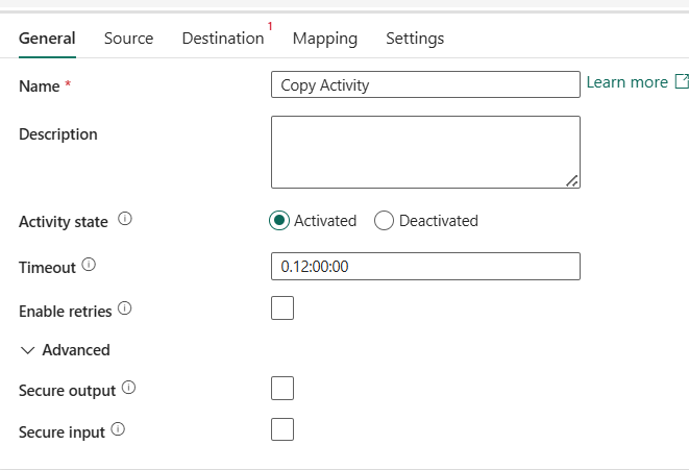
When you add a new copy activity to a pipeline, check the bottom of the screen. There, you’ll find the properties pane showing General, Source, Destination, Mapping, and Settings options.
Configure settings under General tab
General settings include Name and Description of the activity, and some options depends on the activity you choose. You enter all the necessary information and switch to next tab.
Configure settings under Source tab
You now pick your source through a single unified Connection dropdown — select an existing connection or create a new one whether the source is a Fabric item (like a Lakehouse) or an external system (Azure Blob Storage, FTP, SQL Server, and more). Pick the specific table/object and preview the data as before.
If your source is on-premises and behind a data gateway, note that a Copy activity supports only one gateway if both source and destination are on-prem, they must share the same gateway.
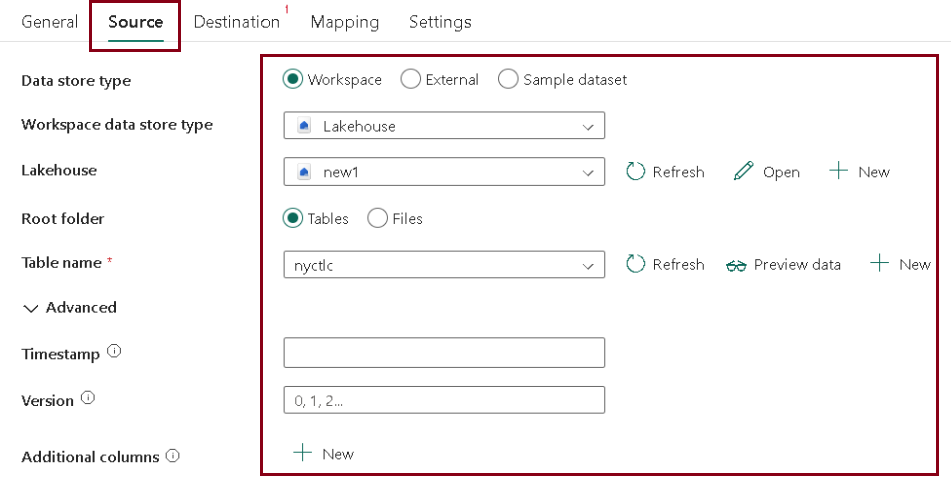
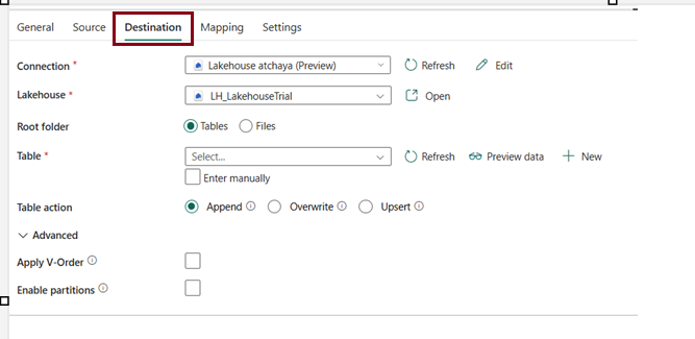
Configure settings under Destination tab Select the Lakehouse name for your desired data destination. Alternatively, you have the option to choose an external destination, such as Azure Blob Storage, Snowflake etc.
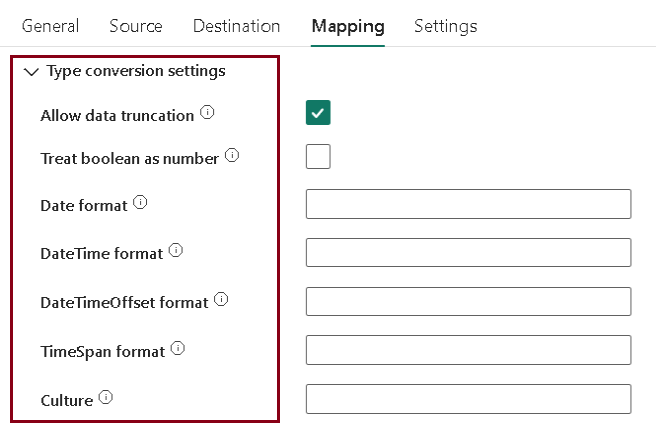
Configure settings under Mappings tab
If the connector you’re using allows mapping, head to the Mapping tab to set up your configuration.
- Expand Type conversion settings to configure type conversion.
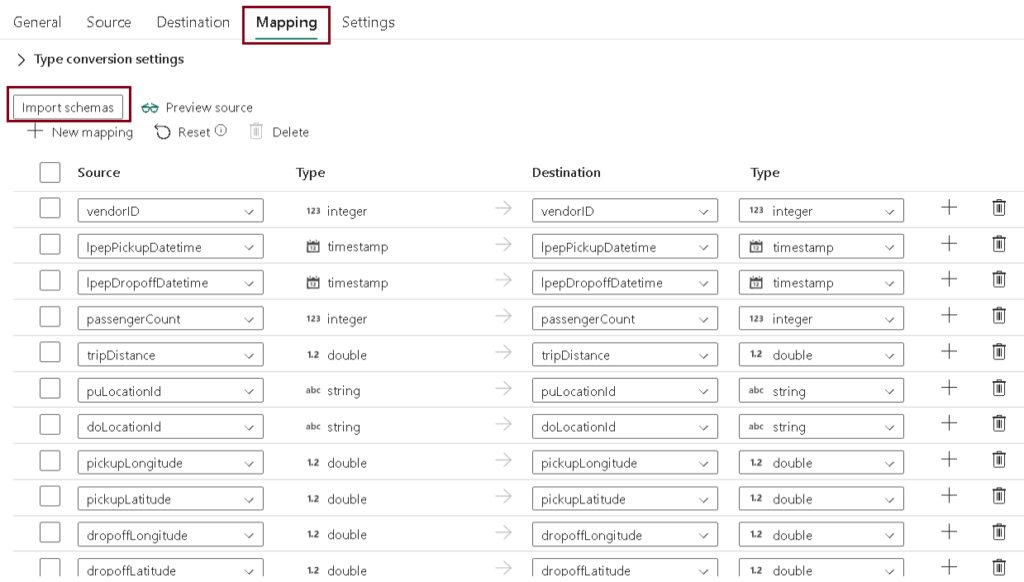
- Select Import schemas to import your data schema, Auto-mapping is done as shown, indicate your source and Destination columns.
- You can customize the Destination column name If you create new table in Destination.
- You are not allowed to modify the destination column name when you write data into existing table.
- You are also view the data type of both source and destination columns.
- You can add new columns or remove existing columns based on your preference.
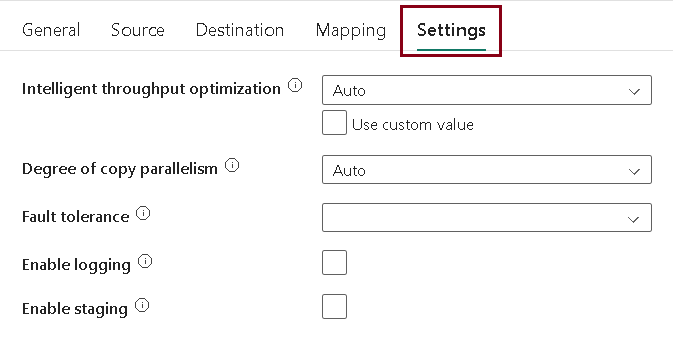
Configure settings under Setting tab
Customize the settings in the Settings tab according to your preferences.
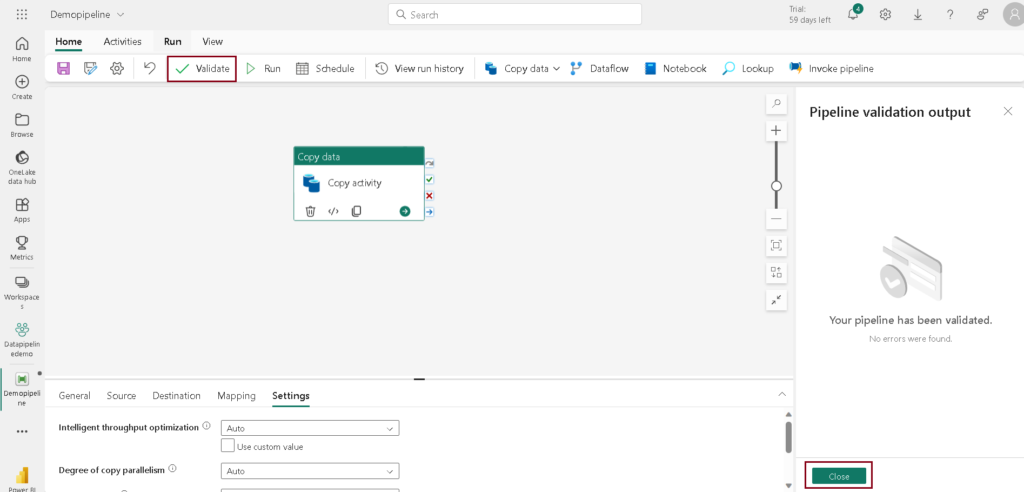
Validate
Click on the “Validate” option in the menu to validate your pipeline.
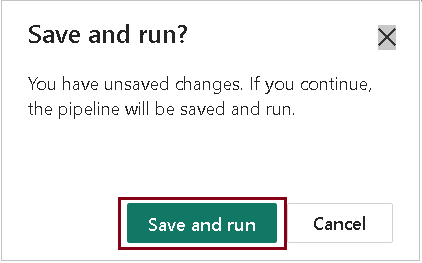
Run
After successful validation, execute the pipeline by clicking “Run“. If the pipeline is unsaved, a dialog box will prompt you to save and run. Click that option to proceed and obtain the desired output.
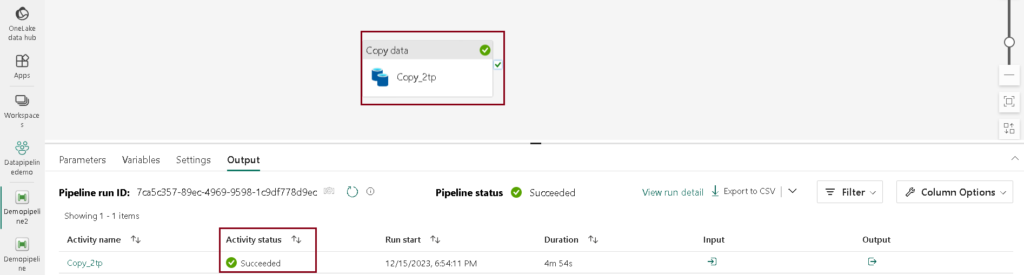
The pipeline status is displayed as “Success” indicating that the execution of the pipeline was completed without errors or issues.

2. Add a copy activity using copy assistant
Follow these steps to add a copy activity using copy data assistant
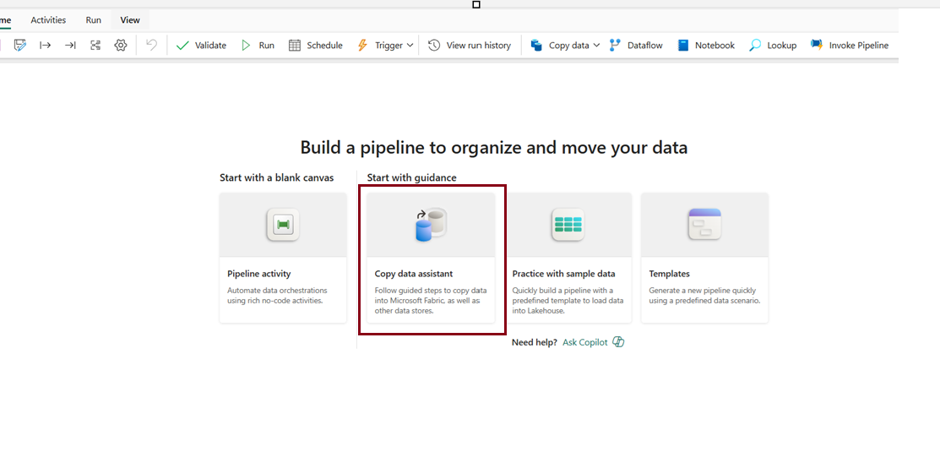
Configure source
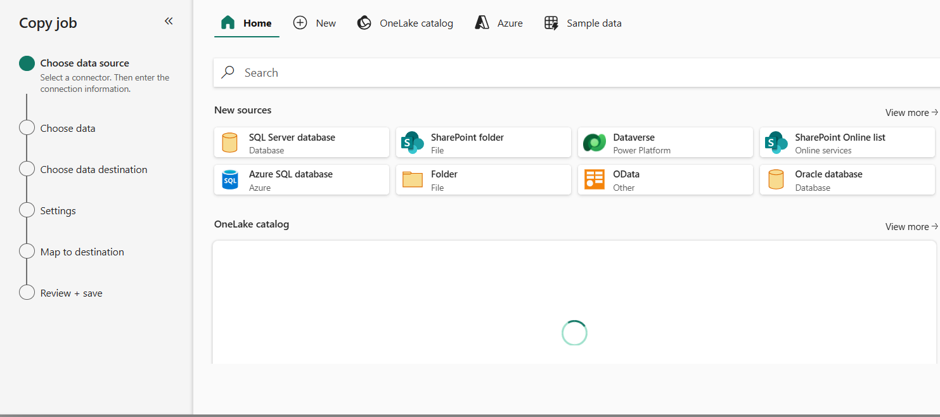
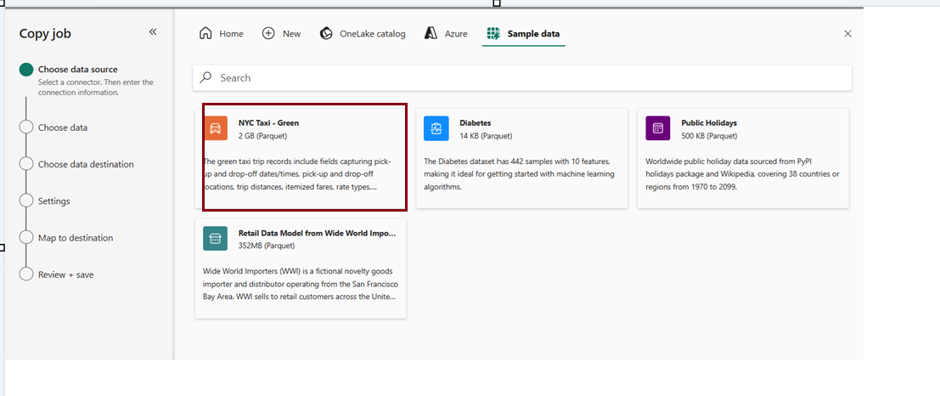
When adding a copy activity using the Copy Assistant, you have the option to choose the data source type from different categories. Click Next.
Configure Destination
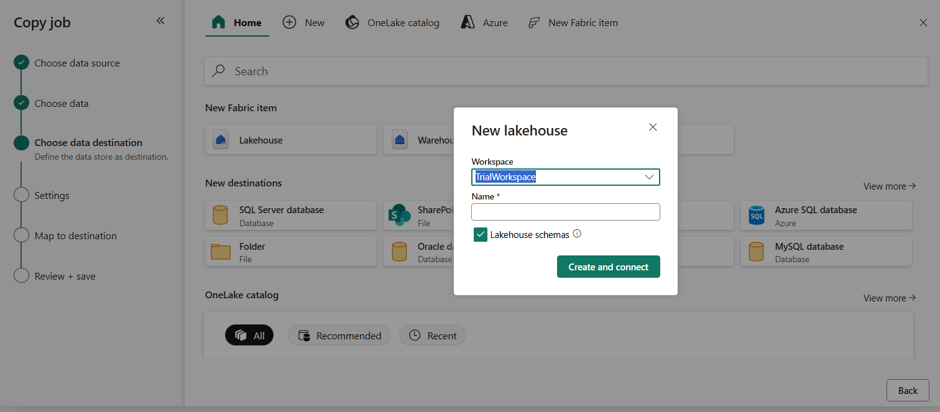
- You can either choose from an existing lakehouse or create a new lakehouse. Click “Next” to continue with the copy activity configuration.
Review and Run your copy activity
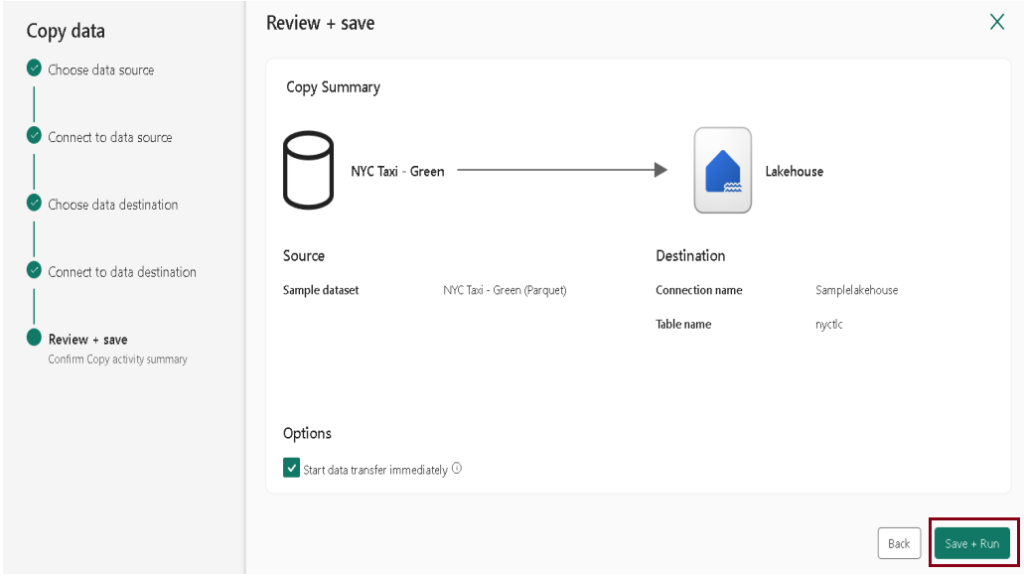
Review the settings for your copy activity in the preceding steps and click “Save + Run” to complete the process. Alternatively, you can return to the previous steps in the tool to make edits if necessary.
The pipeline status is displayed as “Success” indicating that the execution of the pipeline was completed without errors or issues.
Create a standalone Copy job (new in 2026)
If all you need is a simple, repeatable copy from a source into a Fabric destination — no other activities, no orchestration logic — you don’t need a pipeline at all. Copy job is a standalone item built specifically for this.
Create the Copy job
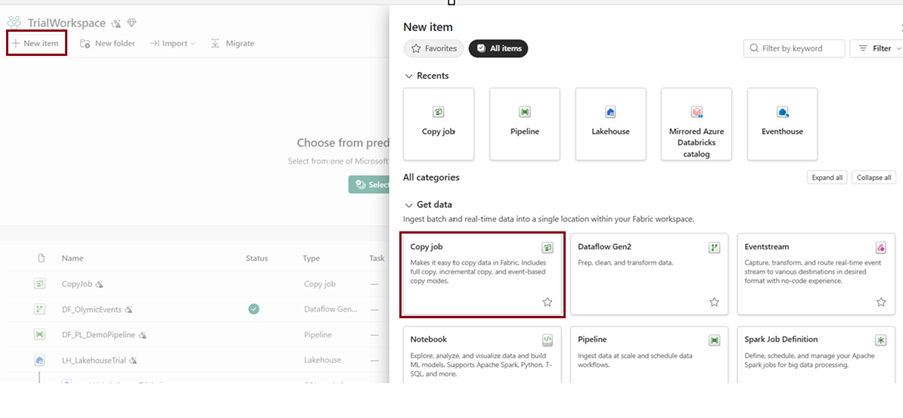
- Navigate to your workspace, select + New item, then search for and choose Copy job.
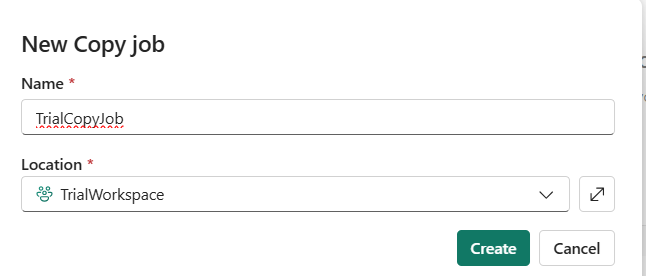
- Provide a name for your Copy job and select Create.
Configure source and destination
- On the Choose data source page, pick your connection (or select Sample data to try it with a dataset like NYC Taxi – Green).
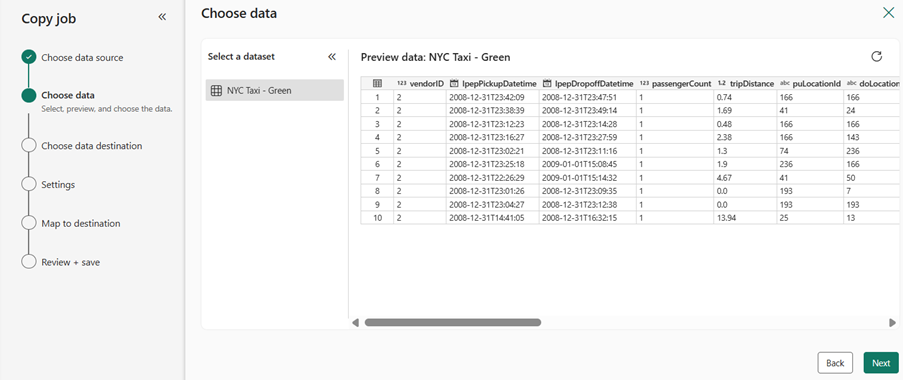
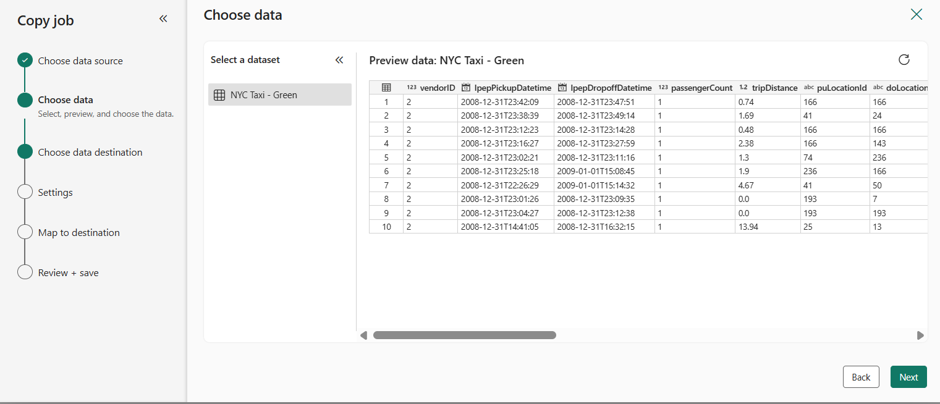
- Review the data preview on the Connect to data source page and select Next.
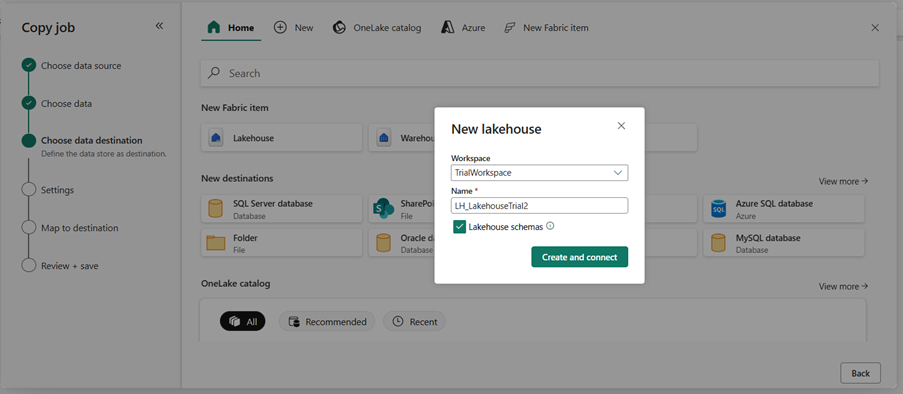
- On Choose data destination, pick your destination type — for example Lakehouse. Enter a name and select Create and connect, then Connect.
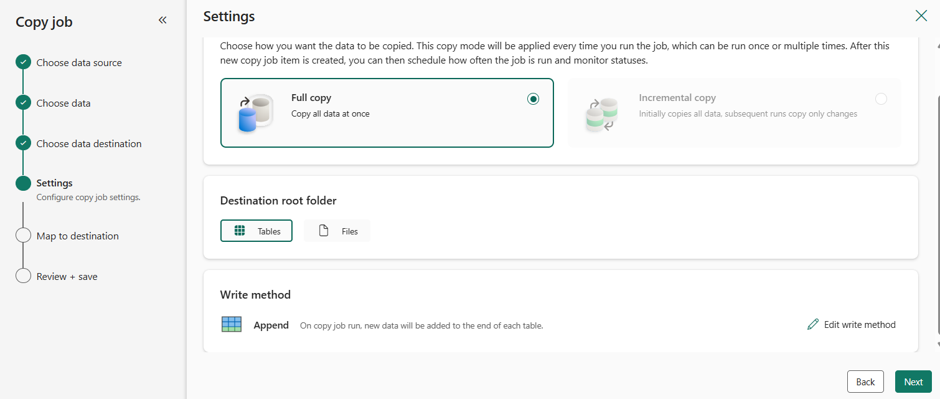
Choose the copy mode
- Select Full copy if you want every run to copy all data from source to destination.
- Select Incremental copy if you only want new or changed rows copied after the first run. Copy job automatically tracks a watermark or checkpoint so it knows what’s already been copied — you don’t have to manage that state yourself.
- For sources that support it (for example Azure SQL Database, Azure SQL Managed Instance, SQL Server), you can instead choose Change data capture (CDC), which reads from the database’s change feed rather than scanning for new rows — more efficient for high-change-volume tables, and it can preserve row history (SCD Type 2) at the destination.
Map and save
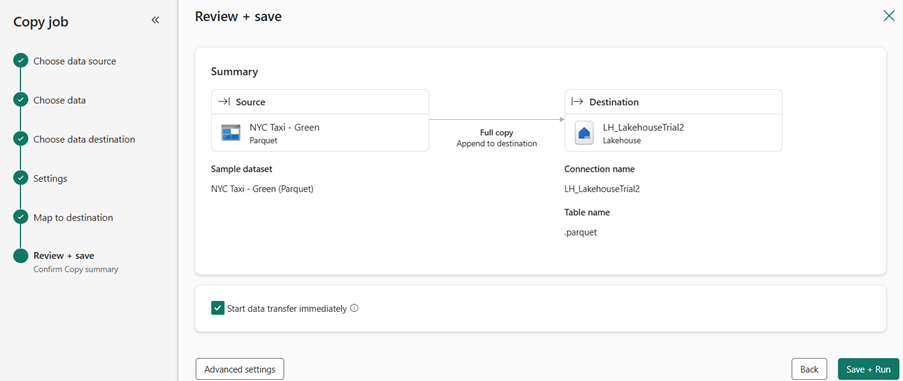
- On the mapping step, choose Tables, select your update method (for example Append), and adjust the destination table name if needed. Select Next.
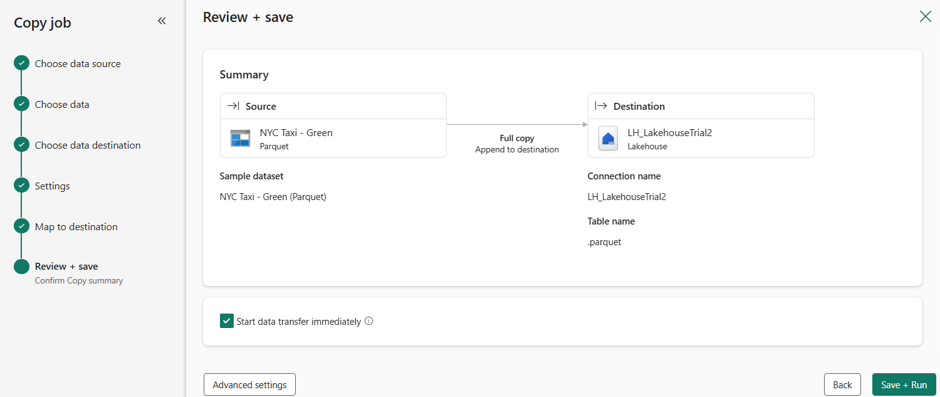
- Review your configuration on Review + save and select Save.
Run and monitor
- Select Run. Larger copies can take a while to complete.
- Monitor progress and check results in the Results pane below the canvas.
Unlike a Copy activity inside a pipeline, a Copy job doesn’t need a pipeline shell around it at all it’s its own item in the workspace, which makes it the faster option for simple, recurring ingestion jobs.
Similarly Copy Assistant is the wizard you use to configure a Copy activity inside a pipeline; Copy job is a separate, simpler item type for when you don’t want a pipeline at all.
| Tags | Microsoft Fabric |
| Useful links | |
| MS Learn Modules | |
Test Your Knowledge |
Quiz |