
Workspaces in fabric are like containers that allows us to create fabric items such as Lakehouses, Warehouses, Reports and Dashboards. Workspaces are created to enable collaboration with colleagues.
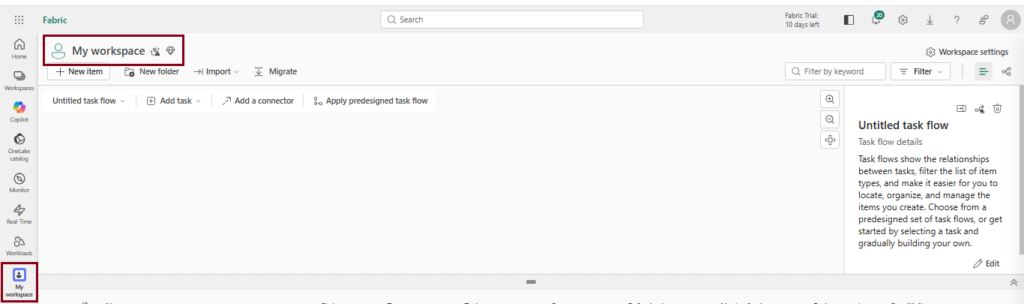
By default, my workspace is created for every fabric user/Tenant.
How to create a Fabric workspace?
Follow the steps to create a workspace in Microsoft Fabric.
Step 1
Launch https://app.powerbi.com/ and sign in with Power BI credentials.
Step 2
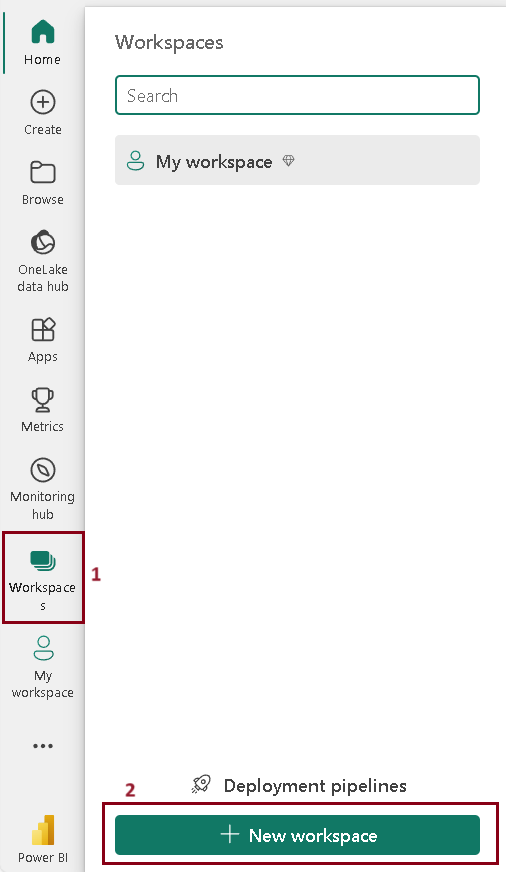
Select Workspace (1) –> New Workspace (2)
Step 3
Create a workspace pane opens as shown below.
Name – Give the name of the workspace and its mandatory.
Description – Give the description about the workspace you created and its optional.
Domain – Assign the workspace with the domain and its optional.
Workspace image – you can provide image for your workspace.
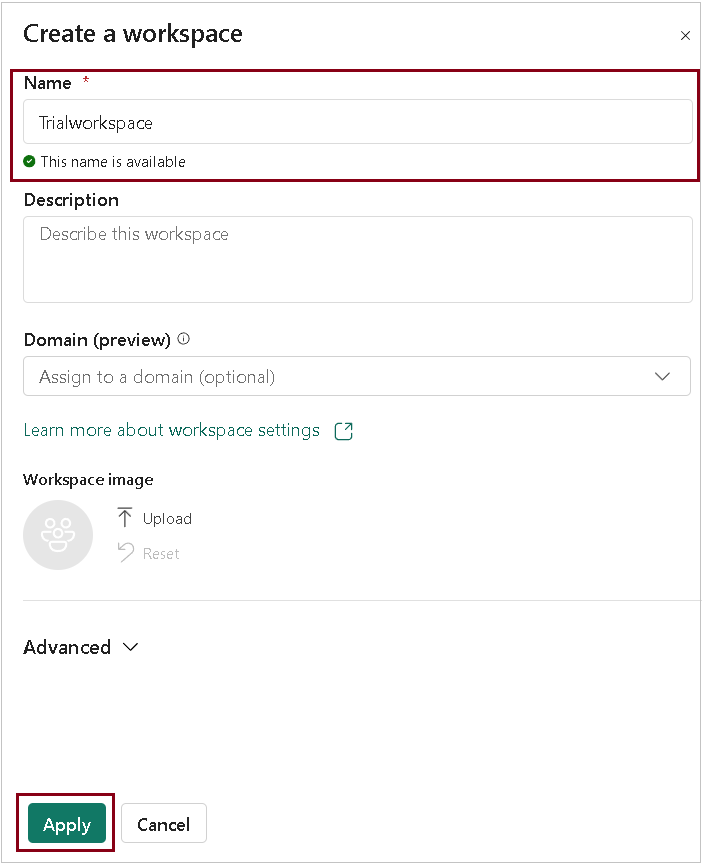
Once you’ve filled out the information in the fields above, you have the option to proceed to advanced settings or simply click on the “Apply” button to save your changes.
Step 4
If you wish to proceed with advanced settings, follow these steps and expand the advanced options for further customization.

Contact list
By default, admin name who created the workspace will be in the contact list. You are permitted to add other users by entering the name of the user in the search box , which facilitates the process of matching users within your organization.
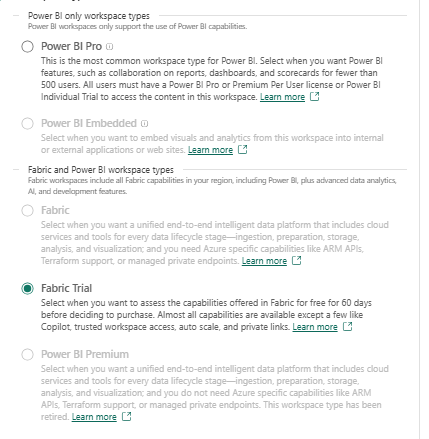
License mode
You are allowed to choose the license mode to proceed with.
Default storage format
You can store Power BI datasets in two different formats as shown below. Premium capacities offer the capability to enable storage of large datasets that exceed the default limit by using the large dataset storage format setting.

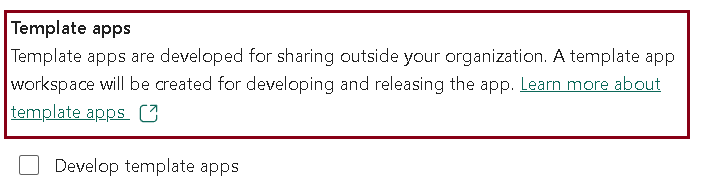
Template apps
Power BI template apps are specifically designed for sharing outside your organization. When you select this option, it creates a distinct workspace known as a template app workspace. It’s important to note that once created, this workspace cannot be converted back to a regular workspace.
Click Apply to create your workspace.
Step 5
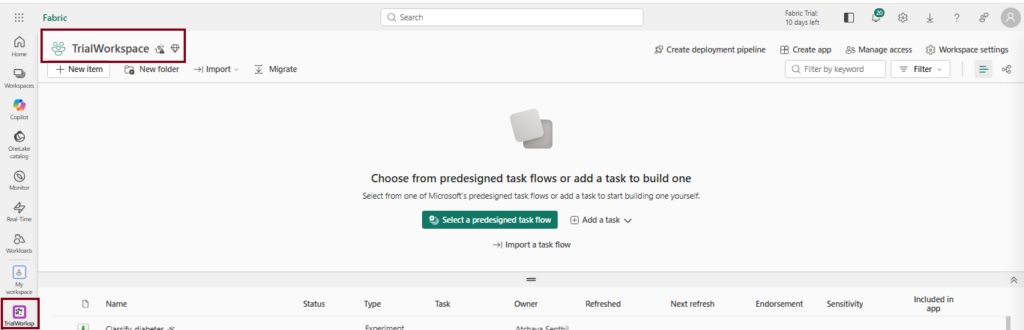
You’ve set up your workspace, enabling you to create fabric items within this environment. You can navigate to your workspace by selecting the workspace icon on the left pane.
In conclusion, by following the steps outlined above, you can successfully create a workspace.
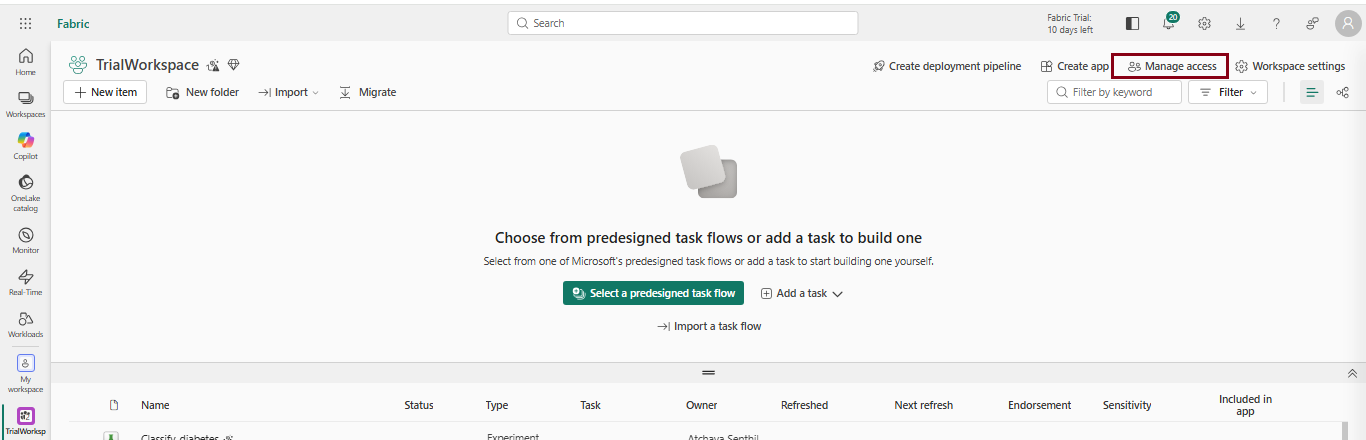
Workspace access
Workspace Admin have the capability to grant access to individuals, allowing them to enter and utilize the workspace.
- Select the “Manage access” option within the workspace window, as shown in the illustration below.
- Once the subsequent window appears, click on “Add people or group” to grant individuals access to the workspace.
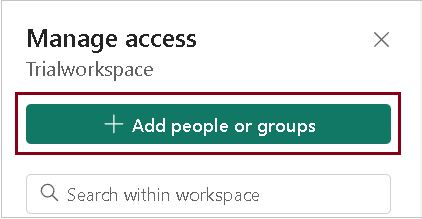
- As an Admin, you have the authority to allocate roles to the individuals you’ve included in this workspace. Only administrators, members, and contributors can make changes and access the workspace, while viewers are limited to viewing access only. By default, it is set to the viewer option.
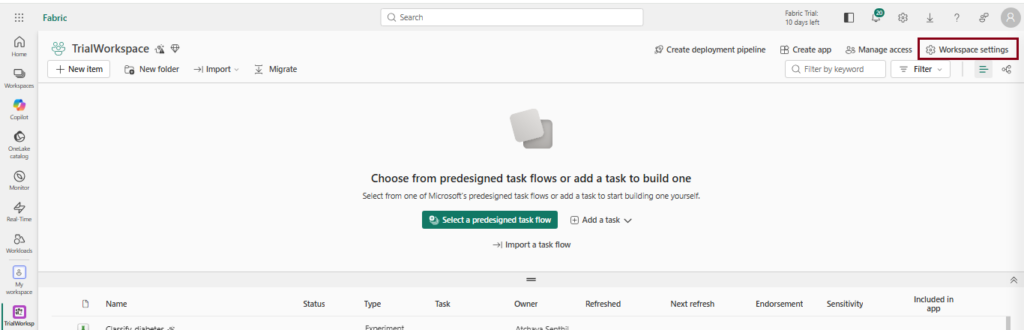
Workspace Settings
Workspace admins have the capability to control and update various aspect of workspace. These settings include basic information about the workspace, Azure connection, Storage, Git integration and various settings specific to different experiences.
- To open workspace settings, select Workspace settings as illustrated in the figure below.
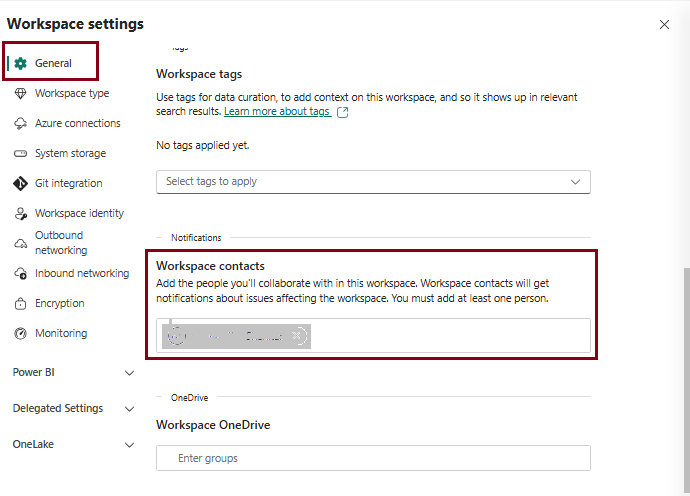
Basic information (General)
The “General” section in workspace settings provides basic details regarding the workspace, such as its name, description, and contact list.
Workspace contacts – This feature allows you choose who gets notified about any problems in the workspace. By default, the creator of the workspace is included in this list. You can add more people to this list when creating the workspace or later in the workspace settings.
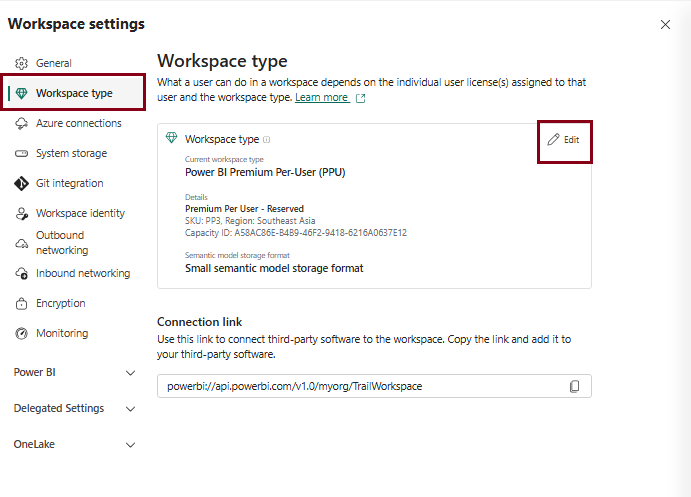
License info (Premium )You have the option to select your license mode either during the creation of a workspace or afterward by selecting Workspace settings –> Workspace Type
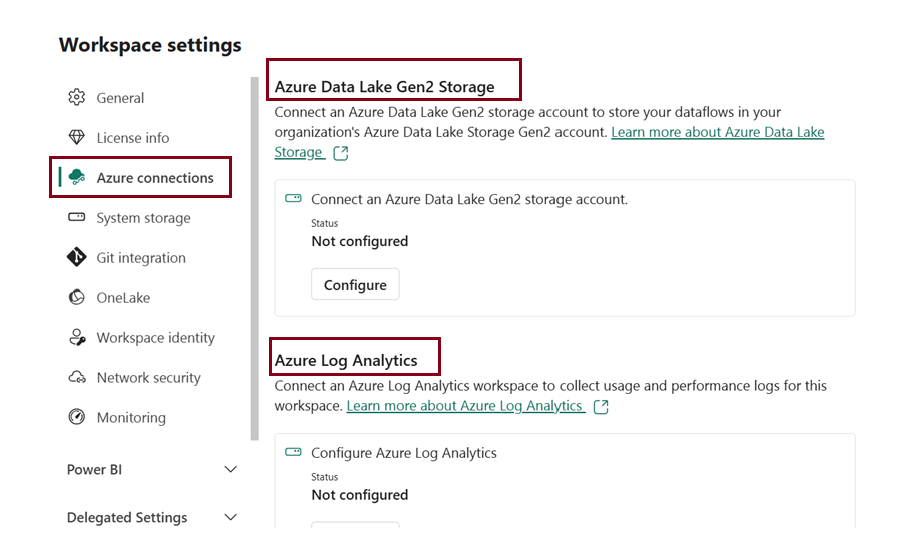
Azure connections
Workspace admins have the ability to set up data storage for dataflows using Azure Data Lake Gen 2 storage. Additionally, they can establish a connection to Azure Log Analytics (LA) to gather logs for workspace usage and performance in the workspace settings.
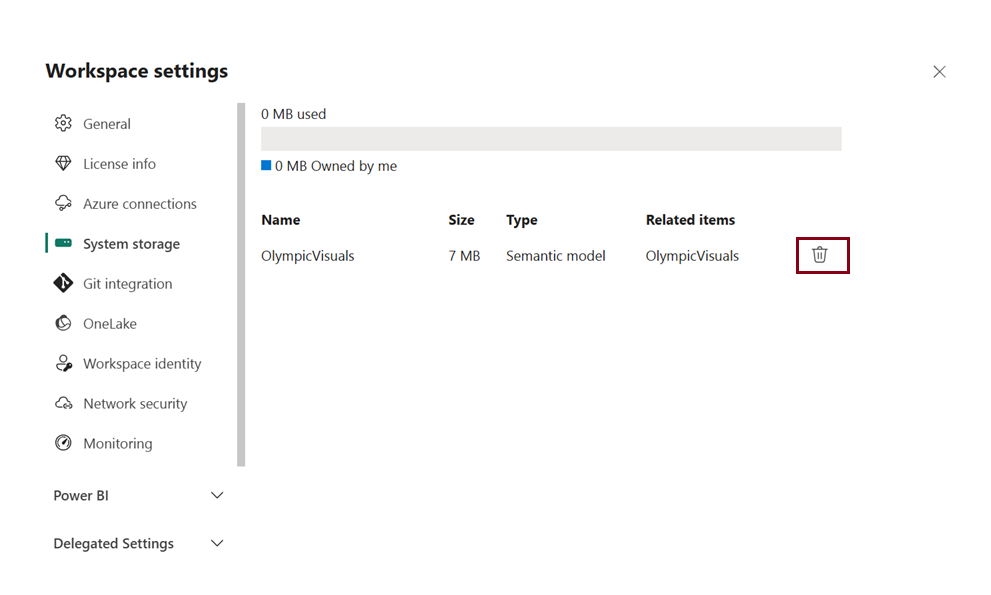
System storage
System storage handles where your reports, datasets, and shared items are stored for your personal or workspace account. It shows how much space is used and lets you clear up space by deleting items stored there.
Note that if you delete a dataset, any reports or dashboards relying on it will no longer function for you or others.
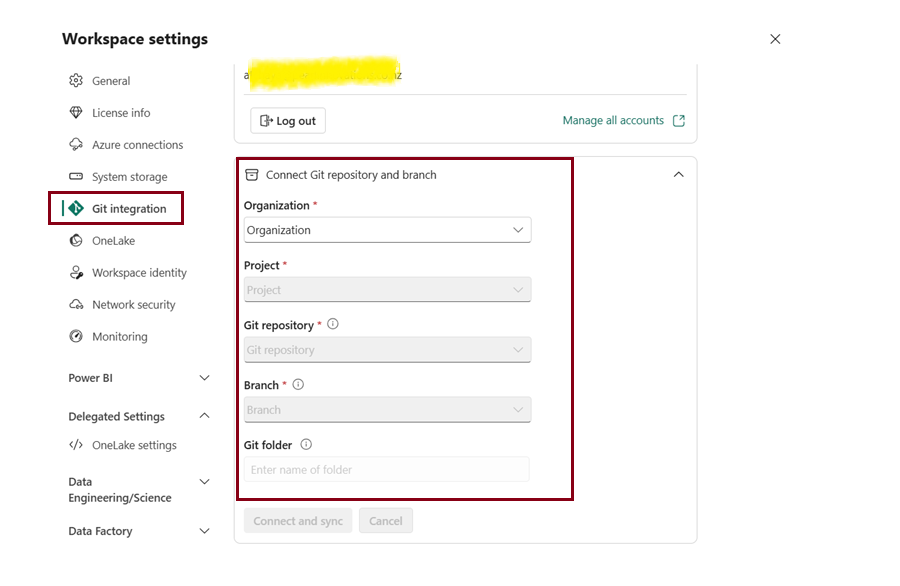
Git integration
Admin can link to the GitHub repository by choosing “Git Integration” in workspace settings and filling in all the required fields.
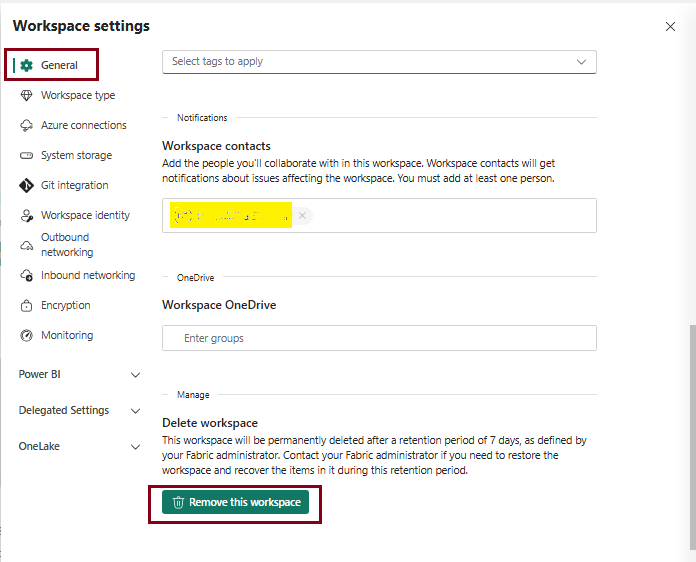
Remove workspace: As an administrator of a workspace, you have the authority to delete it. Deleting the workspace will remove all its contents for all members in the group.
Go to General –> Scroll Down –> Remove this workspace in workspace settings pane
| Tags | Microsoft Fabric |
| Useful links | |
| MS Learn Modules | |
Test Your Knowledge |
Quiz |