
In a Microsoft Fabric workspace, roles determine what task each person is allowed to do. This workspace, created on One Lake, divides the data lake into sections, and each part has its own safety measures. The person in charge, known as the administrator, can pick what roles others have in the workspace.
The admin can give roles to individual people or to bigger groups like security groups, Microsoft 365 groups, or distribution lists. To allow someone or a group to use a workspace, simply put them in one of four roles:
- Admin: Has the ability to manage and adjust the settings, users, and items within the workspace.
- Member: Can see and modify the items within the workspace but lacks the ability to access or modify settings or user-related aspects.
- Contributor: Can view and edit the workspace items, but does not have ability to create new workspace.
- Viewer: Can only view the items in the workspace but lacks the ability to edit or make changes.
Note: Users with admin or member roles can grant access to others by adding them to different roles.
Each person in a user group receives the assigned role. The following chart outlines the capabilities associated with each role.
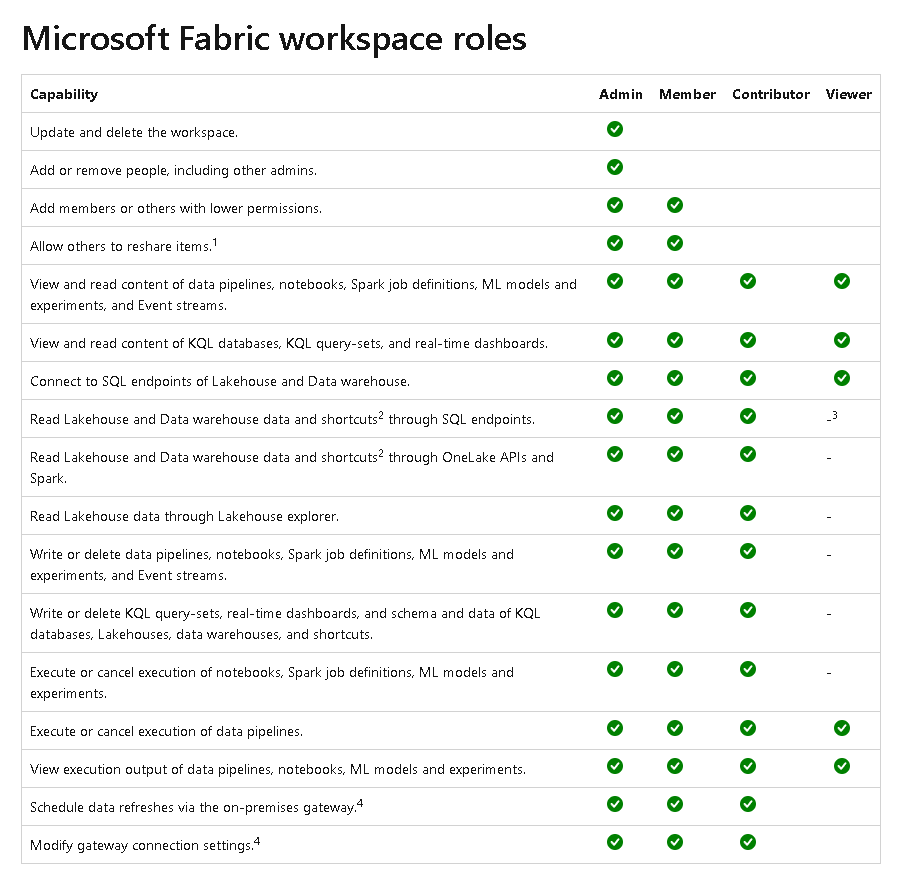
Source: Microsoft learn
How to Assign User Permissions: A Step-by-Step Guide
The Workspace Admin or members holds the ability to provide access to individuals, enabling them to enter and make use of the workspace.
Step 1
Create workspace Refer Fabric workspace blog- Lesson – 4.
Step 2
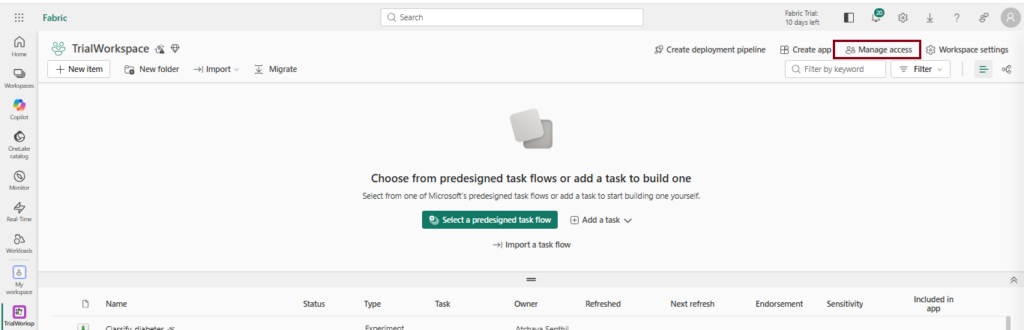
In the workspace window, choose the ‘Manage Access’ option located on the command bar. Occasionally, you may find it under the ‘More options (…)’ menu (More options (…) –> Manage access).
Step 3
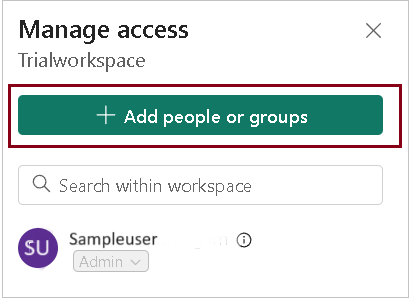
Select “Add people or groups” to add grant access to groups or individual access to the workspace.
Step 4
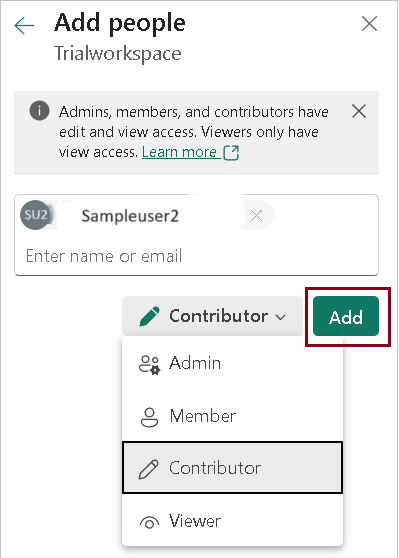
Enter a name or email, choose a role, and click ‘Add’. If you are admin, you have the permission to choose to include security groups, distribution lists, Microsoft 365 groups, or individual users in workspaces, assigning them roles such as admins, members, contributors, or viewers.
However, if you have the member role, you are limited to assigning others to the member, contributor, or viewer roles.
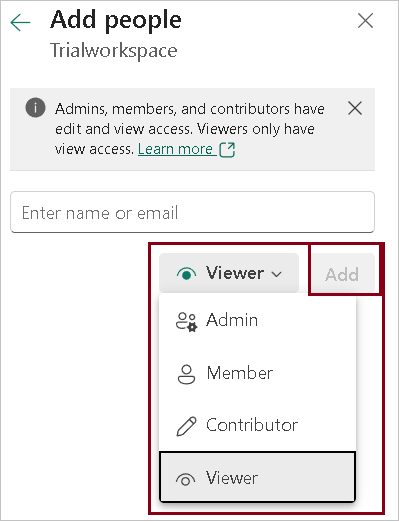
After entering the name in the search box, a list of names from your organization will appear. Choose the name and select the role from the dropdown as shown below, then click ‘Add‘.
Step 5
You have the flexibility to change the role even after adding the user. Simply click the arrow next to their name and select a different role from the dropdown options.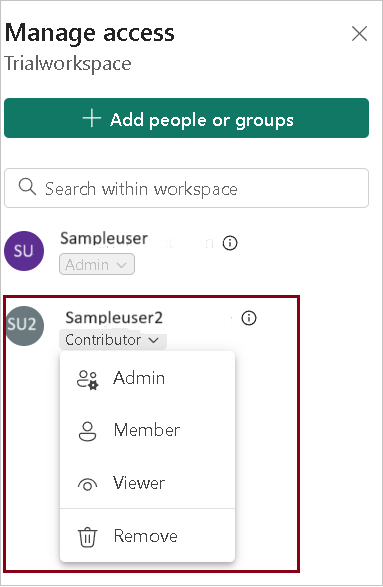
And you also have the option to remove the user by clicking on the ‘Remove’ option from the dropdown menu.
| Tags | Microsoft Fabric |
| Useful links | |
| MS Learn Modules | |
Test Your Knowledge |
Quiz |