
Shortcuts in Microsoft Fabric provide a way to reference data from different locations without duplicating it. They make it possible to access data across domains, clouds, accounts, and Fabric workspaces through OneLake, helping create a unified data lake experience for your organisation.
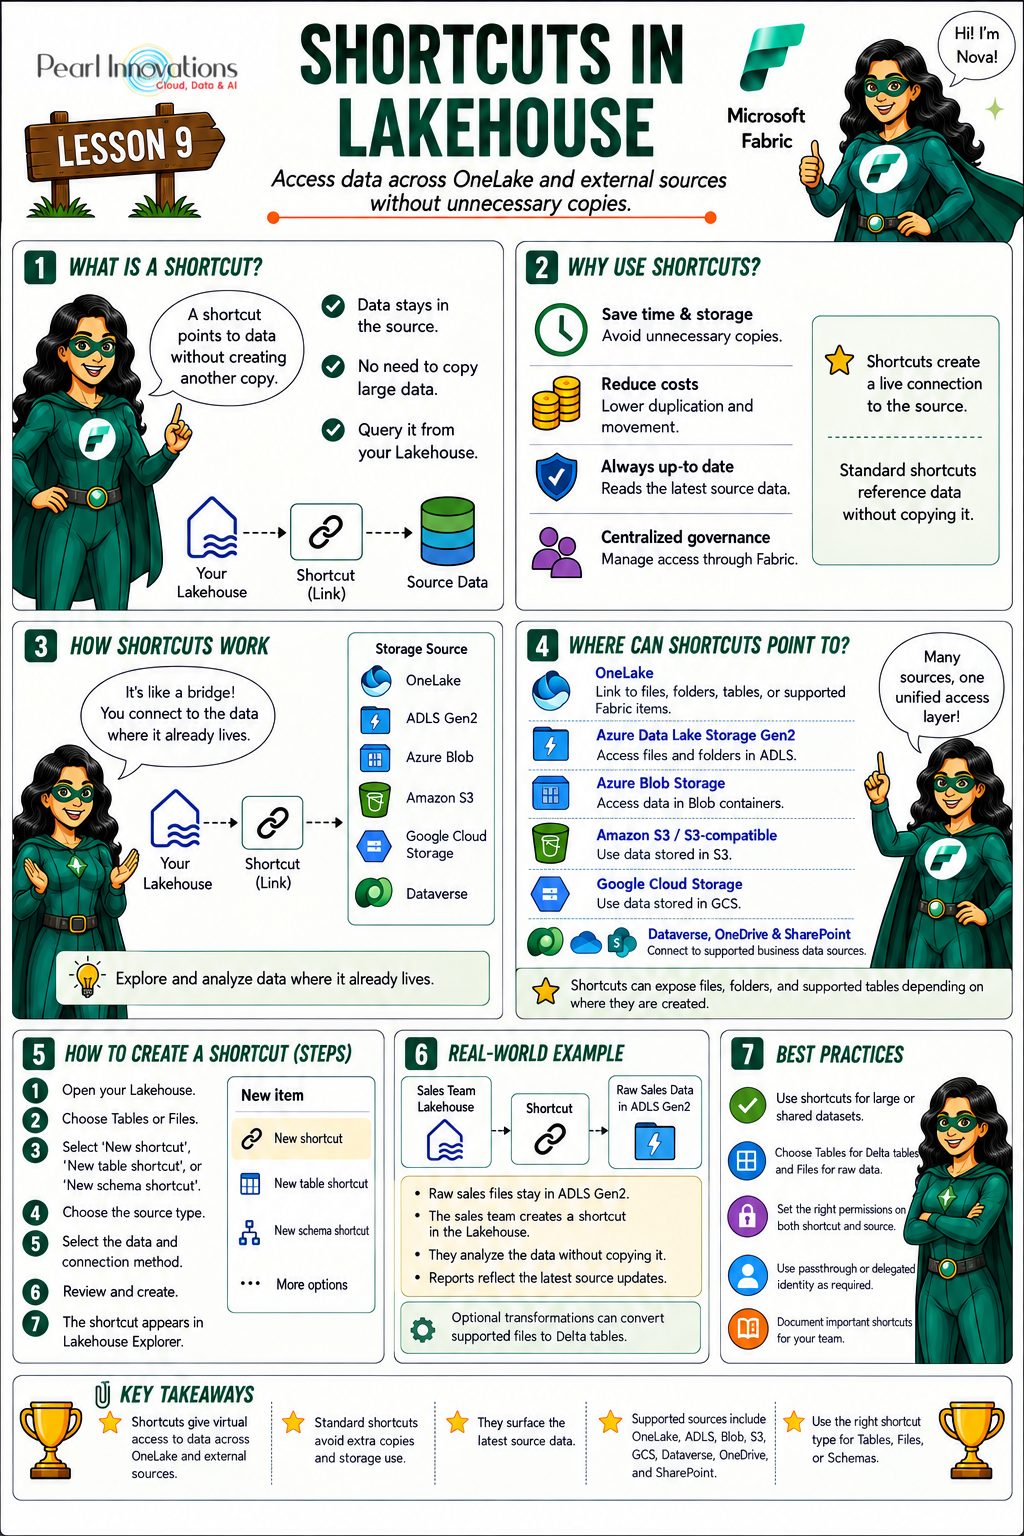
🚀 Learn It in 5 Minutes
Skip the long read.
See the key concepts in one easy-to-follow infographic.
Shortcuts in Microsoft Fabric work like special pointers. They don’t mess with the actual data even if you delete or shift them around. These shortcuts can point to data inside or outside, like in OneLake, Azure, AWS, or Dataverse.
Creating shortcuts in the Fabric Lakehouse is similar to creating a shortcut to a file or folder on your computer. The shortcut points to the original data rather than creating another copy.
Shortcuts in OneLake
- They’re like pointers to other storage locations.
- Can point to locations inside or outside OneLake.
- The location they point to is called the “Target path.”
- The location where the shortcut has been created is the “shortcut path.”
Appearance and Usage of Shortcuts
- Display as folders or tables depending on where they are created.
- Accessible by supported services that can work with OneLake data.
- Shortcut tables can automatically reflect supported schema changes made to the source data.
Characteristics of Shortcuts in OneLake
- Behave like symbolic links.
- Independent of the target – deleting a shortcut doesn’t delete the source data.
- If you move, rename, or delete the target path, the shortcut may break.
- Access through a shortcut depends on permissions associated with the shortcut and its target data.
Where to Create Shortcuts
- Lakehouses
- Kusto Query Language (KQL) databases
Where Shortcuts Can Point To
- Other places in OneLake
- Azure Data Lake Storage (ADLS) Gen2
- Amazon S3 storage accounts
- Dataverse
Microsoft Fabric supports additional shortcut sources, including Azure Blob Storage, Amazon S3-compatible storage, Google Cloud Storage, OneDrive, SharePoint, SQL databases, Warehouses, KQL databases, Mirrored databases, Semantic Models, and other supported Fabric items. Microsoft continues to expand the sources supported by OneLake shortcuts.
Creating shortcuts in Lakehouse
Before you start creating shortcuts in the lakehouse, it’s essential to understand how the folder structure is organized.
When Lakehouse Schemas are enabled, the Tables area can be organised into schemas such as dbo, Sales, or Finance. The Files area remains available for general file-based storage.
A lakehouse has two main folders:
- Tables
- Files
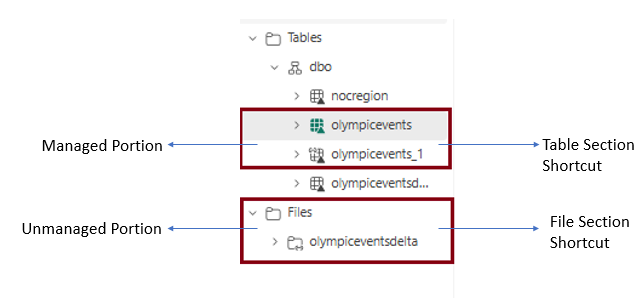
In the Table folder
- Stores structured Lakehouse tables, primarily using Delta Lake format.
- If a shortcut points to supported Delta-formatted data, Fabric can automatically recognise it as a Lakehouse table.
- Tables can be accessed through Spark and the SQL analytics endpoint.
- Shortcuts are created at the appropriate Tables or schema level rather than arbitrary subdirectories.
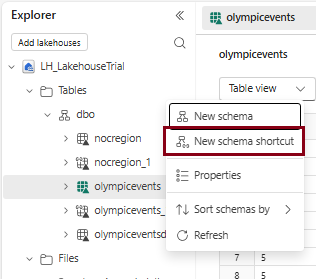
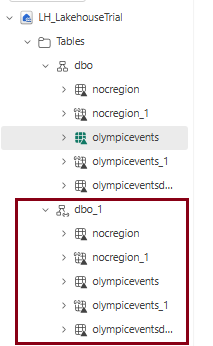
- When Lakehouse Schemas are enabled, you can create a New table shortcut for an individual Delta table or a New schema shortcut for a folder containing multiple Delta tables.
This is an important correction from the older description of Tables as an area containing CSV, Parquet, or Delta tables. Fabric table discovery is based primarily on supported table formats such as Delta.
In the Files folder
- Unmanaged space for storing data in any file format.
- Delta files in this area are not automatically treated as tables.
- Shortcuts in the Files area can be created at different folder levels.
- The Files area doesn’t automatically perform table discovery.
Tip: Use the Files section for raw or semi-structured data that will be processed using Spark. Use the Tables section when the data should be automatically available for SQL queries.
Steps in creating OneLake shortcut
Follow the below steps to create a shortcut in your lakehouse. You have the option to use a lakehouse, a data warehouse, or a Kusto Query Language (KQL) database as the origin for your shortcut.
Here, I am selecting a Lakehouse in Microsoft OneLake as the source.
Prerequisite
Create a shortcut
Refer Lesson 7 -Getting started with Microsoft Fabric Lakehouse blog and create a lakehouse.
- Navigate to “Myworkspace” click on the lakehouse you’ve set up, and the Lakehouse Explorer will open.
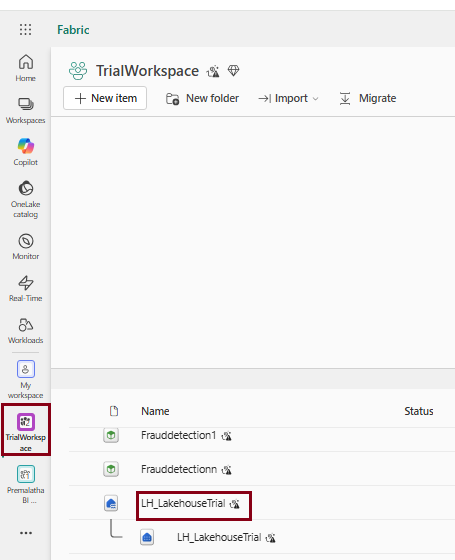
- Select “More Options” in the table or files section where you intend to create a shortcut and click “New shortcut”.
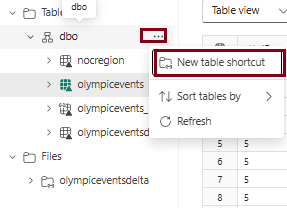
- A new window will appear, displaying options from both internal (One lake) and external sources (Azure storage and Amazon s3). Here I select Microsoft One Lake.
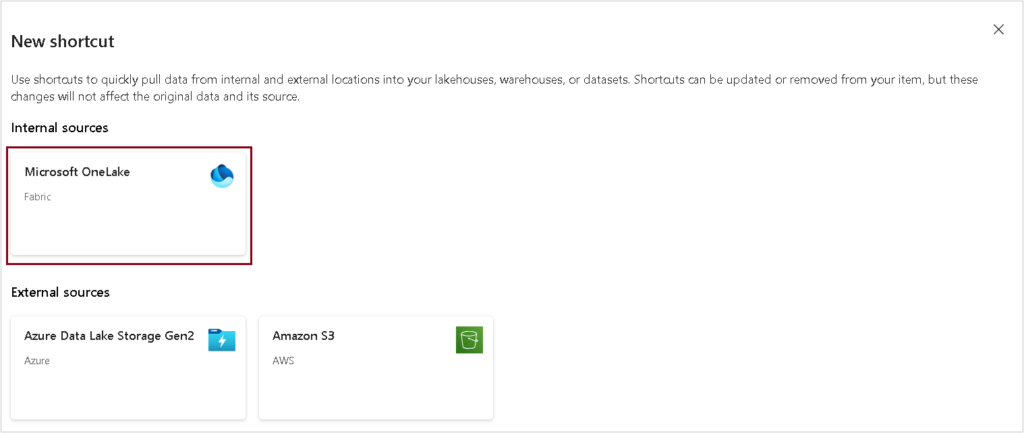
- Choose the data you wish to create a shortcut for and click on “Next.”
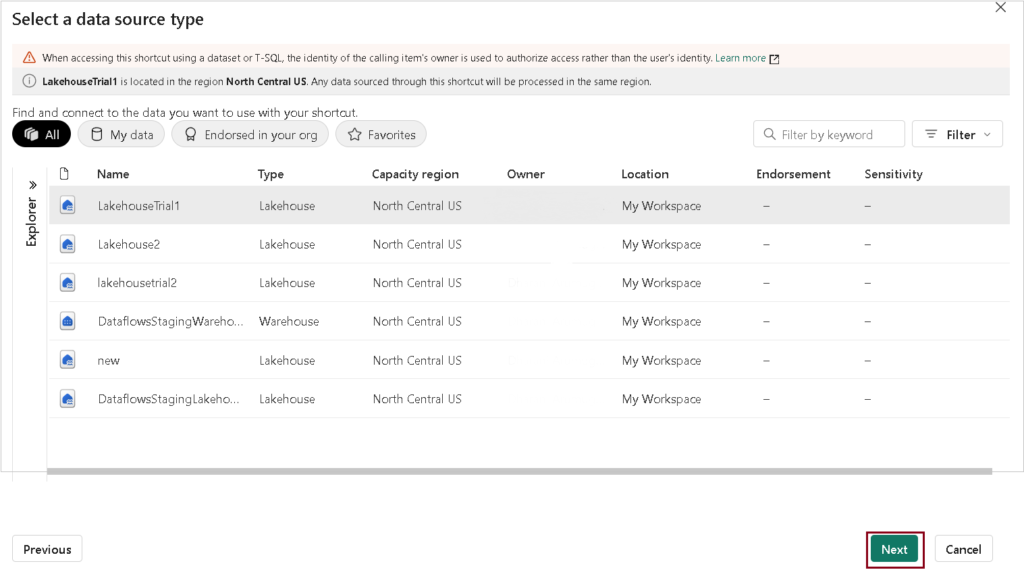
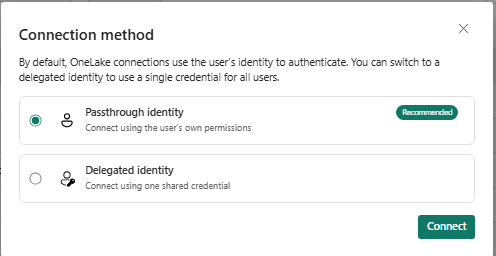
Note: A new “Connection method” screen may appear at this point, asking you to choose between Passthrough identity (Recommended) and Delegated identity.
- Passthrough identity — uses your own sign-in identity to access the source data. This is the default and matches the original shortcut behavior described in this lesson. Select this option and click Connect to continue as normal.
- Delegated identity — uses a single shared credential (organizational account or service principal) for all users of the shortcut, instead of each user’s own permissions. This is useful for cross-team or cross-tenant sharing scenarios, but isn’t needed for this lesson.
For this walkthrough, select Passthrough identity and proceed.
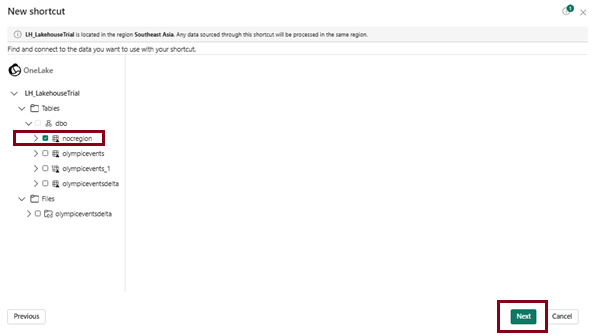
- Expand the “Tables” or “Files” folder, choose the data you want to create shortcuts for, and then click on “Next.”
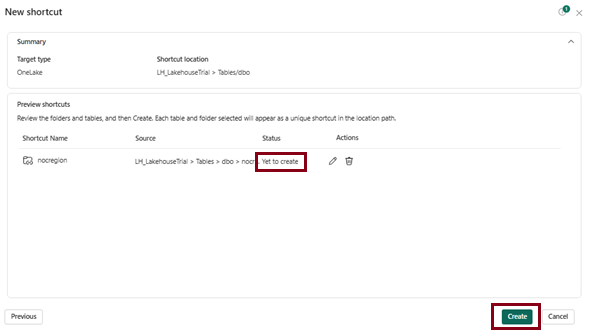
- After that, you’ll be guided to the next window where you can review the shortcuts you’ve created. Utilize the edit action to rename the default shortcut name and use the delete action to remove any selections you don’t want. Click “Create” to generate the shortcuts.
- The next window you see will say “Success,” letting you know that the shortcut has been created without any issues.
- Click close.
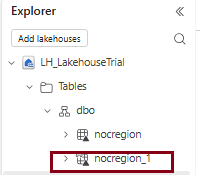
- The lakehouse refreshes automatically, and you’ll see the shortcut listed under the chosen directory (Files) in the Explorer pane.
Creating shortcuts in KQL Databases
Steps in creating shortcuts in KQL Databases
To create a shortcut in your KQL database, follow these steps
Prerequisite
Refer blog Lesson 4-Fabric workspaces to create workspace in Microsoft Fabric.
How to create KQL Database?
- Open the workspace you created.
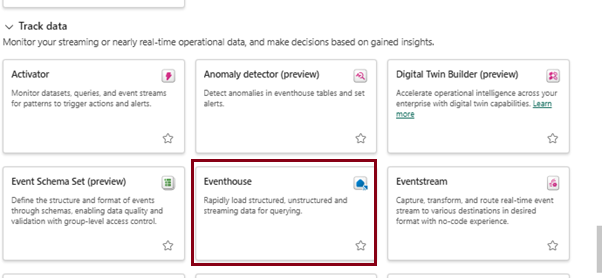
- Click on “New item”. Scroll and click on “Event House” under store data.
- Give a name for “Event House”.
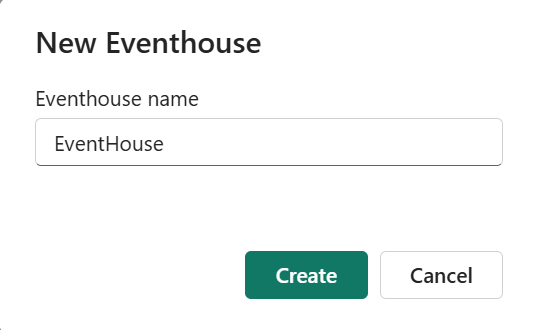
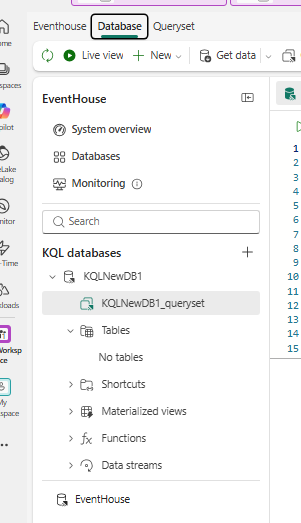
Now you can see the Event House created. Under Event house click on New Database to create KQL Database.
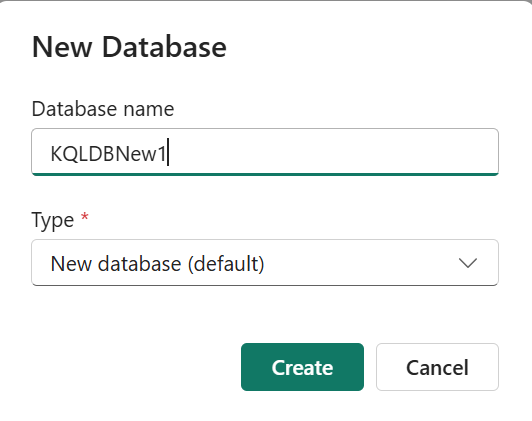
- Enter the desired database name that you want to create. Click Create.
- The KQL database has been successfully created, and you are redirected to the main page of the KQL database where information about the database is displayed.
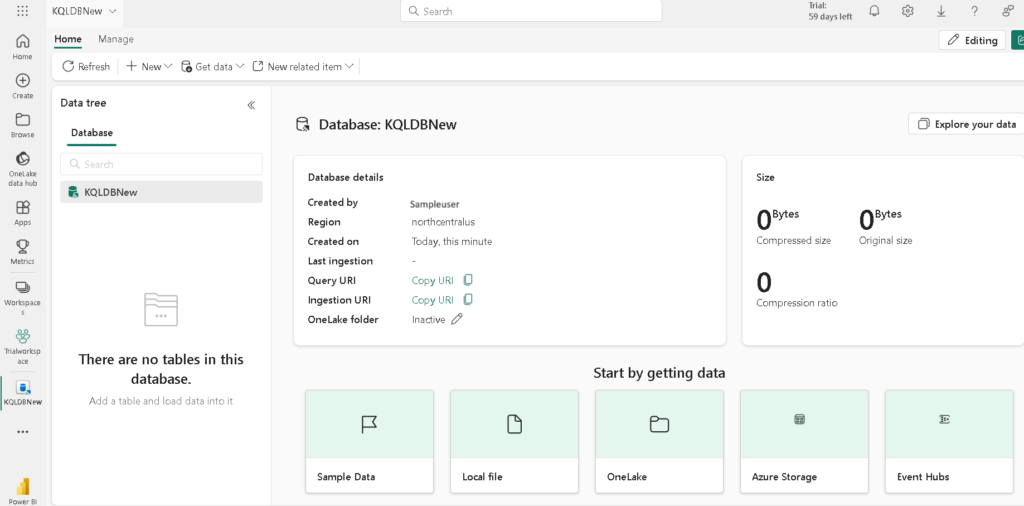
How to create shortcut in KQL database?
Follow the below steps to create shortcut in KQL database.
- On the main page of the KQL database, click on “New” and then select “OneLake Shortcut.
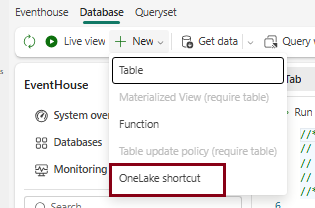
- A new window will appear, displaying options from both internal (One lake) and external sources (Azure storage and Amazon s3). Here I select Microsoft One Lake.
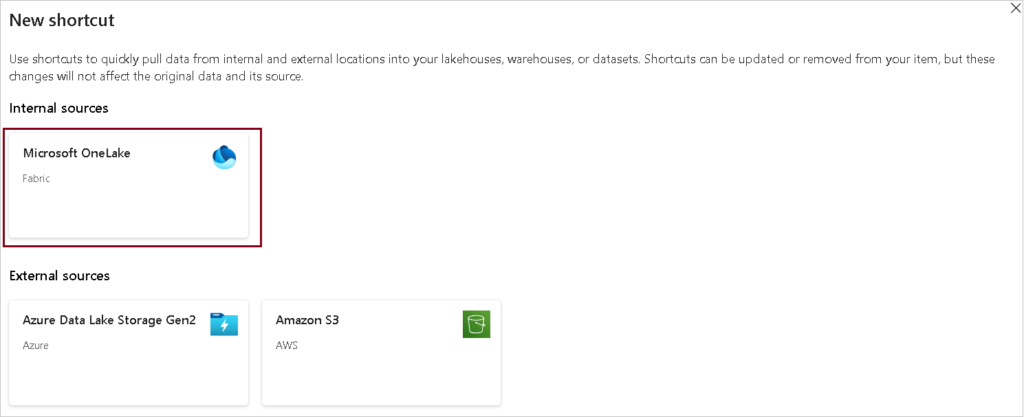
- Choose the data you wish to create a shortcut for and click on “Next.”
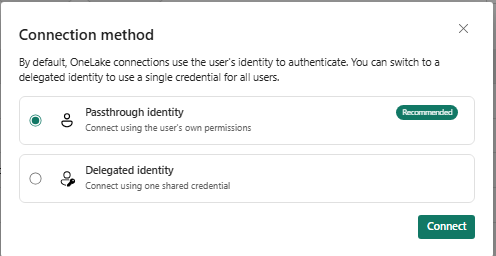
Note: A new “Connection method” screen may appear at this point, asking you to choose between Passthrough identity (Recommended) and Delegated identity.
- Passthrough identity — uses your own sign-in identity to access the source data. This is the default and matches the original shortcut behavior described in this lesson. Select this option and click Connect to continue as normal.
- Delegated identity — uses a single shared credential (organizational account or service principal) for all users of the shortcut, instead of each user’s own permissions. This is useful for cross-team or cross-tenant sharing scenarios, but isn’t needed for this lesson.
For this walkthrough, select Passthrough identity and proceed.
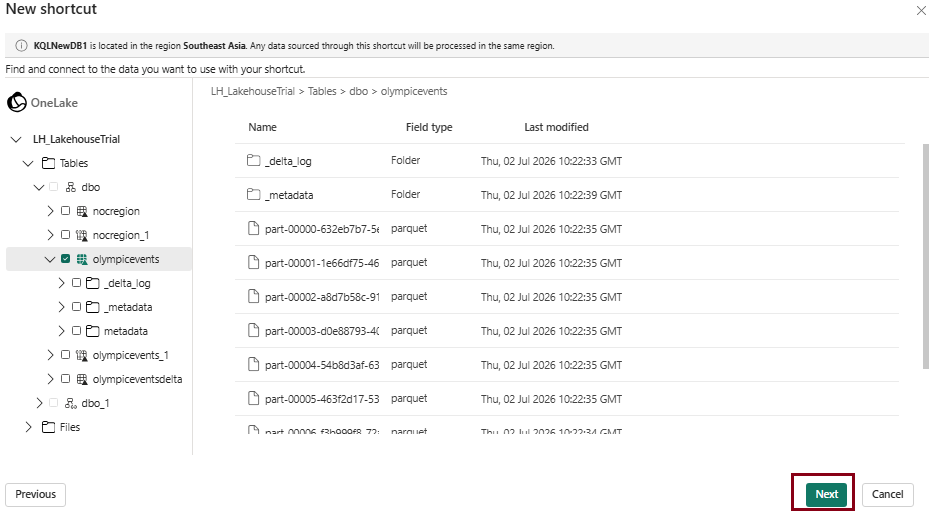
- Expand the “Tables” or “Files” folder, choose the data you want to create shortcuts for, and then click on “Create”.
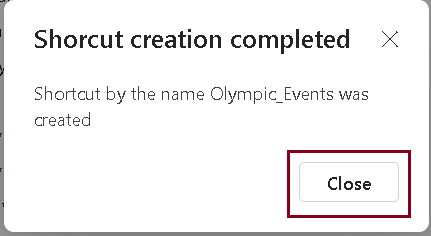
- You’ll receive a prompt confirming the successful creation of the shortcut. Click “Close” to finish.
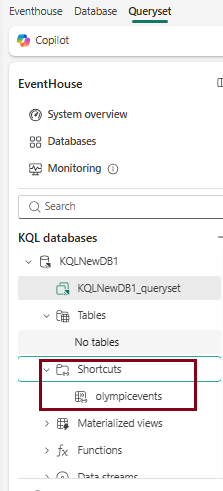
- The KQL database pages refresh automatically, and you’ll find the shortcut created under the “Shortcut” folder.
Transform Your Data to Delta (Optional)
When creating a shortcut, if your source data isn’t already in Delta format, Fabric now shows an optional Transform step in the wizard.
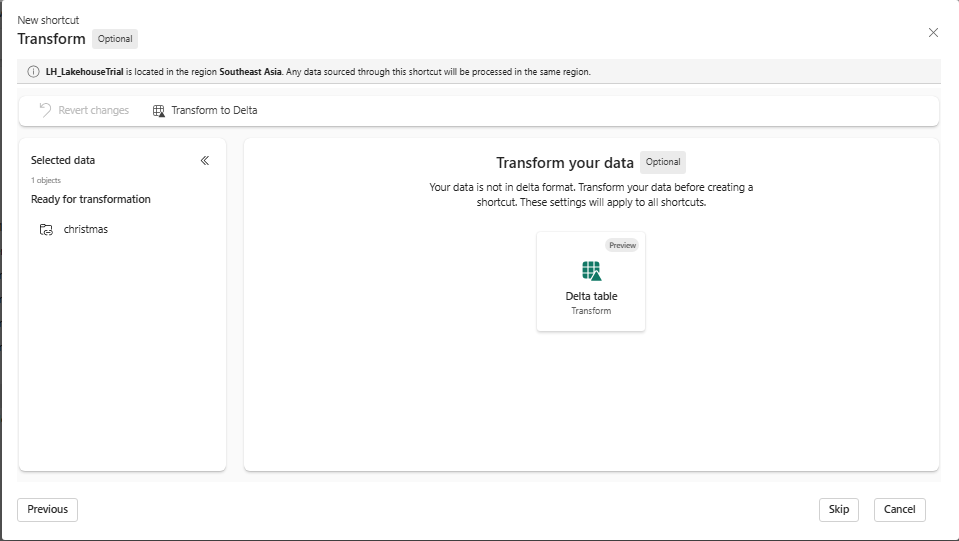
- This step only appears for external sources (e.g., ADLS Gen2, Azure Blob Storage, Amazon S3, Google Cloud Storage, Dataverse, OneDrive, SharePoint) where the source files may be raw CSV, Parquet, JSON, or Excel. Internal OneLake-to-OneLake shortcuts don’t show this step, since internal Tables data is already in Delta format.
- This step lets you convert CSV, Parquet, JSON, or Excel files into a managed Delta table automatically no ETL pipeline required.
- The transformation stays in sync with the source: Fabric checks for changes every 2 minutes and updates the Delta table automatically.
- Excel file transformations are currently in preview; CSV, Parquet, and JSON transformations are generally available.
- This step is optional , select Skip to create a standard shortcut without transformation
| Tags | Microsoft Fabric |
| Useful links | |
| MS Learn Modules | |
Test Your Knowledge |
Quiz |