
This blog serves as a guide to help you kickstart your journey and explore Microsoft Fabric Lakehouse. Within Microsoft Fabric, the option to create a lakehouse is available in any premium-tier workspace. Once created, you can effortlessly import data from various sources, like local files, databases, or APIs. And also, you have the option to automate this data loading using tools like Data Factory Pipelines or Dataflows (Gen2) in Microsoft Fabric.
Ways to create a lakehouse
You have several options to initiate the lakehouse creation process
From Workspace
- In the workspace view, click on “New item“.
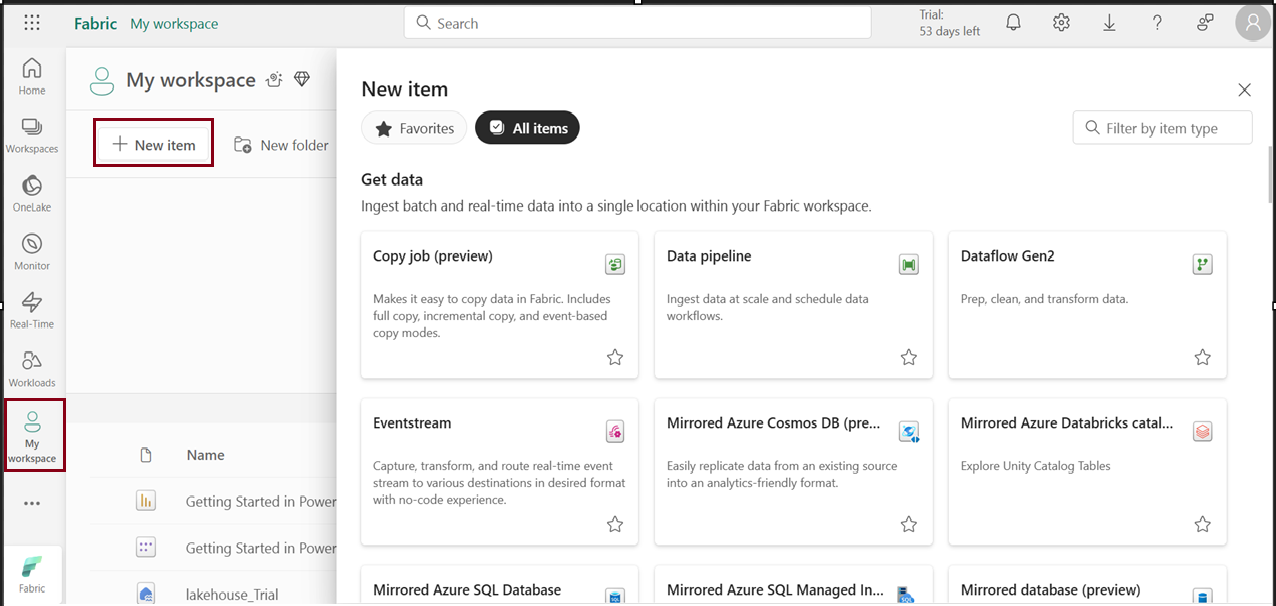
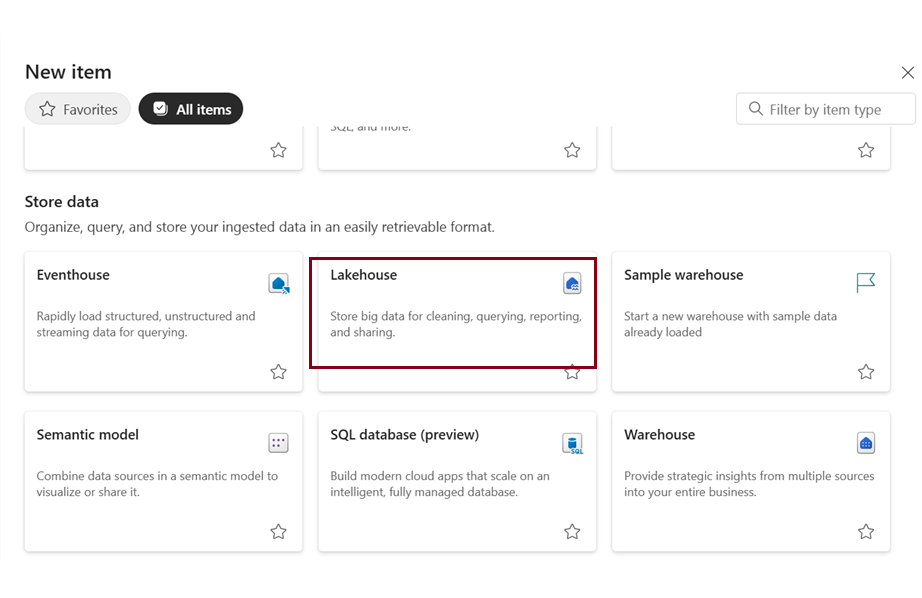
- Choose “Lakehouse ” under the Store data option.
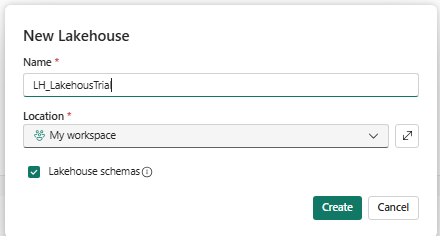
- A prompt window will appear; type the desired name for the lakehouse you want to create and click “Create”.
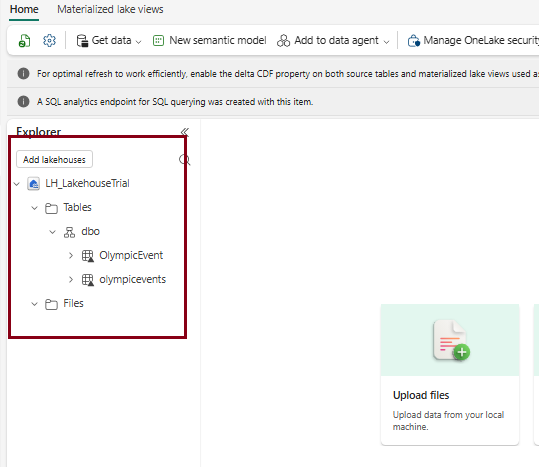
- After creating the Lakehouse, you’ll be directed to the Lakehouse Editor page, where you can begin loading and working with data.
| Tags | Microsoft Fabric |
| Useful links | |
| MS Learn Modules | |
Test Your Knowledge |
Quiz |