
Embark on a data science journey with scikit-learn and MLflow within the Fabric Data Science experience. This blog unveils the power of scikit-learn’s machine learning capabilities, guiding you through installation, data preparation, model training, and evaluation. Experience the effortless integration with MLflow, where parameters, metrics, and models seamlessly log to streamline and enhance experiment tracking efficiency.
Scikit-Learn
Scikit-learn is a popular open-source machine learning library for Python. It provides a comprehensive set of tools for various machine learning tasks, including classification, regression, clustering, dimensionality reduction, and more. Scikit-learn is built on NumPy, SciPy, and Matplotlib, and it is designed to be user-friendly, efficient, and extensible.
Key features of Scikit-Learn
Some of the key features of Scikit -Learn are
- Scikit-learn provides a wide array of machine learning algorithms, from traditional methods to advanced models, for various tasks.
- Its user-friendly and consistent API simplifies the implementation and evaluation of machine learning models.
- Leveraging NumPy and SciPy, scikit-learn is optimized for efficient numerical computations, enabling effective handling of large datasets.
- Scikit-learn offers a rich set of tools encompassing data preprocessing, feature selection, model selection, and performance evaluation, facilitating a comprehensive machine learning workflow.
- Scikit-learn’s integration with Pandas, Matplotlib, and IPython facilitates a unified and efficient machine learning workflow, enhancing data manipulation, visualization, and interactive coding capabilities.
Prerequisites
- Launch https://app.fabric.microsoft.com/
- Sign in to Microsoft Fabric with your subscription or trial account. Refer Lesson 3 – Getting started with Microsoft Fabric – Pearl Innovations
Steps
- Navigate to the menu bar on the left side and choose “Workspaces” to create new workspace.
- Create Lakehouse or you can work in existing Lakehouse.
- Click Open notebook -> New notebook to create new notebook.
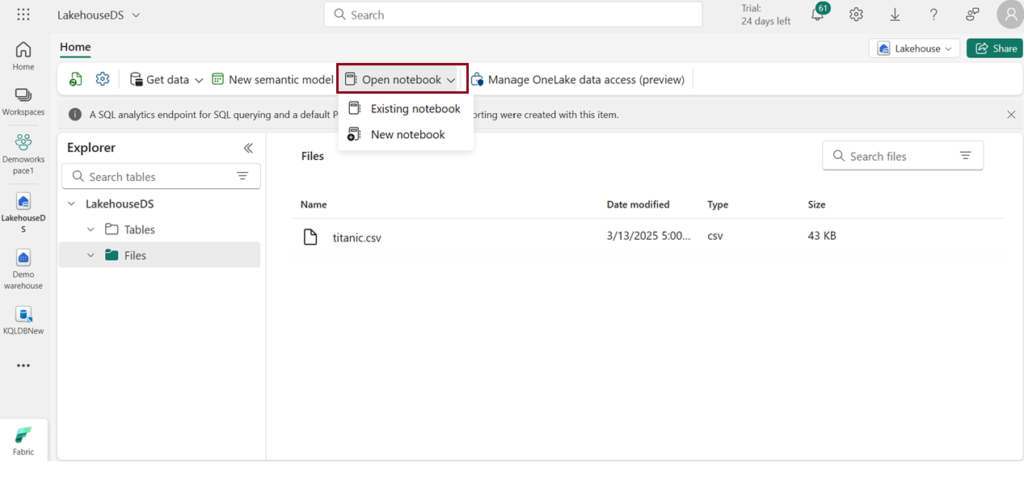
- Within a few seconds, a new notebook will open, comprising a single cell. Notebooks consist of cells that can contain either code or markdown (formatted text).
Install scikit-learn
To begin using scikit-learn, make sure it is installed in your notebook environment. You can install or upgrade scikit-learn by executing the following command:
!pip install scikit-learn
Create Machine Learning Experiment
Initiate a machine learning experiment using the MLflow API. The mlflow.set_experiment () function will generate a new machine learning experiment in case it doesn’t already exist.

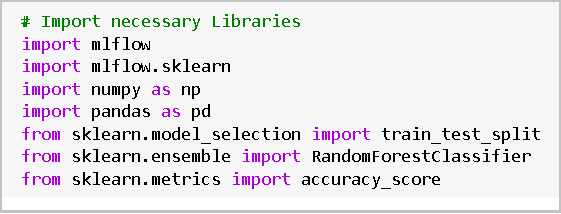
Set up the environment
Import necessary libraries including mlflow, mlflow.sklearn, numpy, pandas, and scikit-learn modules.
Load data
- Loadthe Iris dataset from scikit-learn.
- load_iris() is a function from scikit-learn that loads the Iris dataset.
- The loaded dataset is stored in the variable iris.

Selecting Features and Splitting Data
- Select relevant features for the model, including the label column (“target”). Split the data into training and testing sets.
- In the context of feature selection, X represents the feature matrix extracted from the Iris dataset. It contains measurements for sepal length, sepal width, petal length, and petal width. Similarly, y is the target variable containing the class labels (0 for setosa, 1 for versicolor, and 2 for virginica).

- The train_test_split function is used to divide the feature matrix (X) and target variable (y) into training and testing sets. The split ratio is 80% for training (X_train, y_train) and 20% for testing (X_test, y_test), and a random seed of 42 is set for reproducibility.
- This partition enables training the model on one subset and evaluating it on another, promoting an impartial evaluation of the model’s performance.
- Training a model is the process of instructing it to make predictions based on input data, adjusting internal parameters to minimize prediction errors during learning.

- The given Python code initializes a RandomForestClassifier model with 100 trees and a fixed random seed (random_state=42). It then fits (trains) the model using the training features (X_train) and corresponding labels (y_train).
Make Predictions
- Use the trained model to make predictions on the test set.

- The given Python code uses the trained machine learning model (RandomForestClassifier) to make predictions on the test set (X_test), and stores the predicted labels in the variable `y_pred`.
- Assessing the model’s performance involves evaluating its accuracy by comparing its predictions to the actual outcomes on a validation or test dataset.

- The provided Python code calculates the accuracy of the trained model by comparing the predicted labels (`y_pred`) with the actual labels (`y_test`). The resulting accuracy is stored in the variable `accuracy`, and it is then printed with two decimal places for precision.
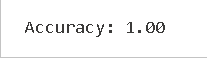
Result
- The displayed accuracy of 1.00 (100%) signifies that the trained model achieved perfect accuracy on the test set, indicating complete alignment between the model’s predictions and the actual labels in the test data.
Log Parameters and Metrics with MLflow
- Use mlflow.start_run() to start a new MLflow run and log parameters, metrics, and the trained model.
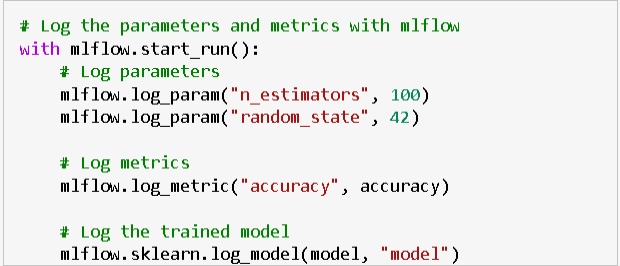
- The provided Python code uses `mlflow.start_run()` to initiate a new MLflow run. It logs parameters (`n_estimators` and `random_state`), the accuracy metric, and the trained RandomForestClassifier model (`model`).
- This step captures essential experiment details in the MLflow tracking server for comparison and reproduction of experiments.
| Tags | Microsoft Fabric |
| Useful links | |
Test Your Knowledge |
Quiz |