
Introduction:
Microsoft Fabric’s data warehouse is an advanced version of the classic data warehouse concept. It consolidates and arranges data from various departments, systems, and databases into one cohesive platform for analysis and reporting. This data warehouse supports complete SQL functionality, allowing users to insert, update, and delete data within the tables.
It allows data engineers, analysts, and data scientists to collaborate in building and querying a data warehouse that is customized to meet their unique requirements.
Building a modern data warehouse generally involves the following steps:
Data ingestion: Importing data from source systems into the data warehouse.
Data storage: Storing the data in an analytics-friendly format.
Data processing: Converting the data into a suitable format for analysis.
Data analysis and delivery: Extracting insights from the data and providing them to the business.
Microsoft Fabric streamlines this process by allowing data engineers and analysts to ingest, store, transform, and visualize data all within a single tool, offering both low-code and traditional experiences.
In this blog, we will explore the various methods available for loading data into a warehouse using Microsoft Fabric. Whether you’re a data engineer, analyst, or scientist, Microsoft Fabric offers a range of tools that can cater to different needs and expertise levels.
From simple file uploads to more advanced automation through dataflows and notebooks, we’ll dive into the different techniques that make it easy to ingest, transform, and load data into your data warehouse.
Let’s take a closer look at the different options: file upload, copy tool, copy activity, dataflows, and notebooks.
Prerequisite
- Obtain a Microsoft Fabric tenant account with an active subscription. Refer Lesson 3 Getting started with Microsoft Fabric.
- Verify that you have a Microsoft Fabric-enabled Workspace set up and ready for use. Refer Lesson 4 Fabric Workspaces and how to create one?
Step 1: How to create a warehouse?
Follow below step to create a warehouse:
- Launch fabric portal https://app.fabric.microsoft.com/
- Click on “New Item” from Top and choose warehouse under “Data warehouse” to create a warehouse environment.
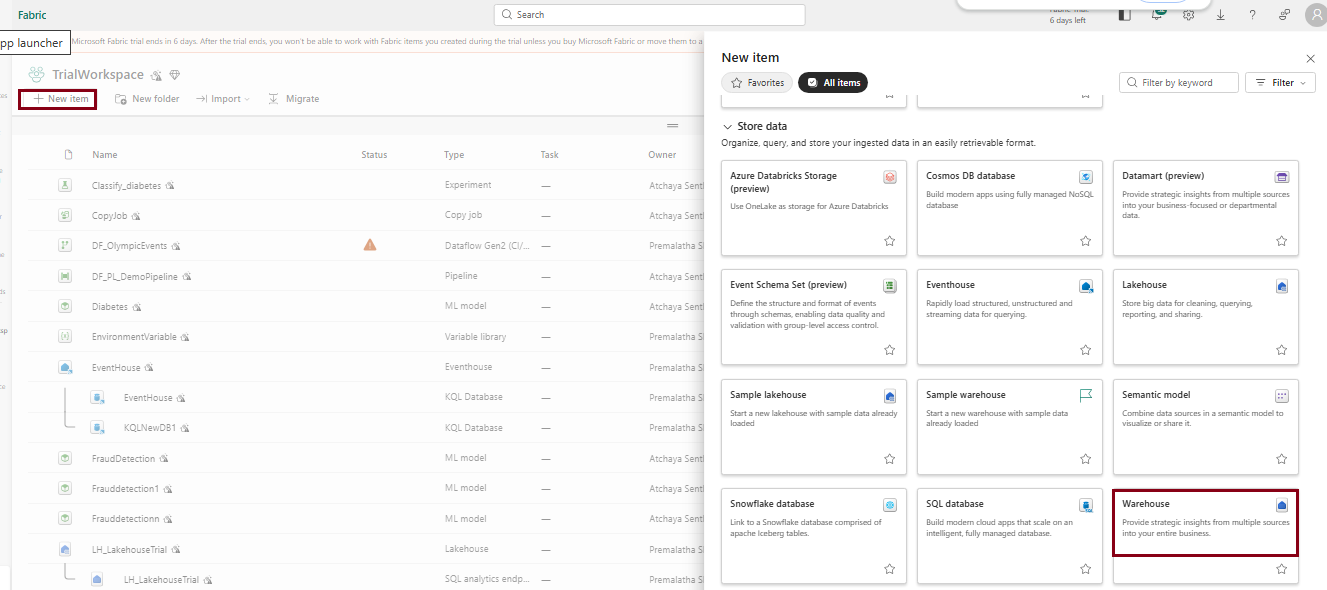
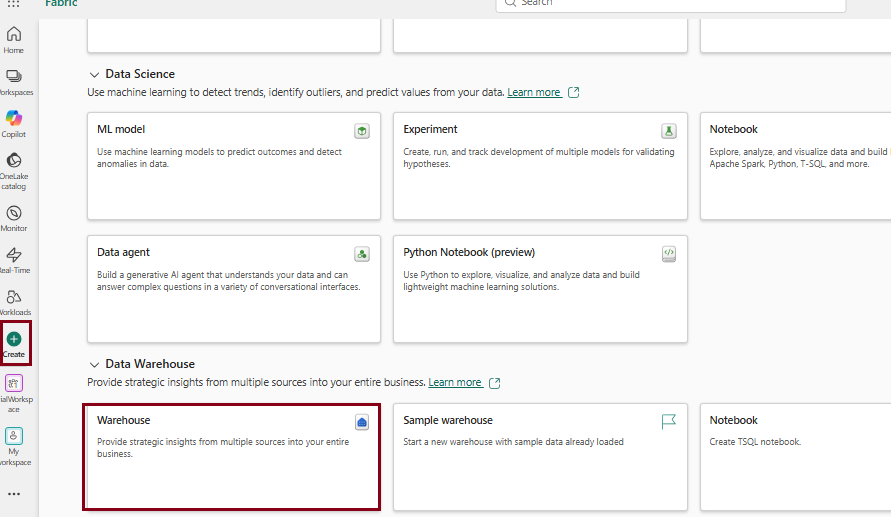
- or Click on “Create” from navigation pane on the left and choose warehouse under “Data warehouse” to create a warehouse environment
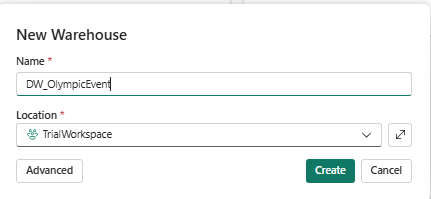
- Provide a name for your Warehouse.
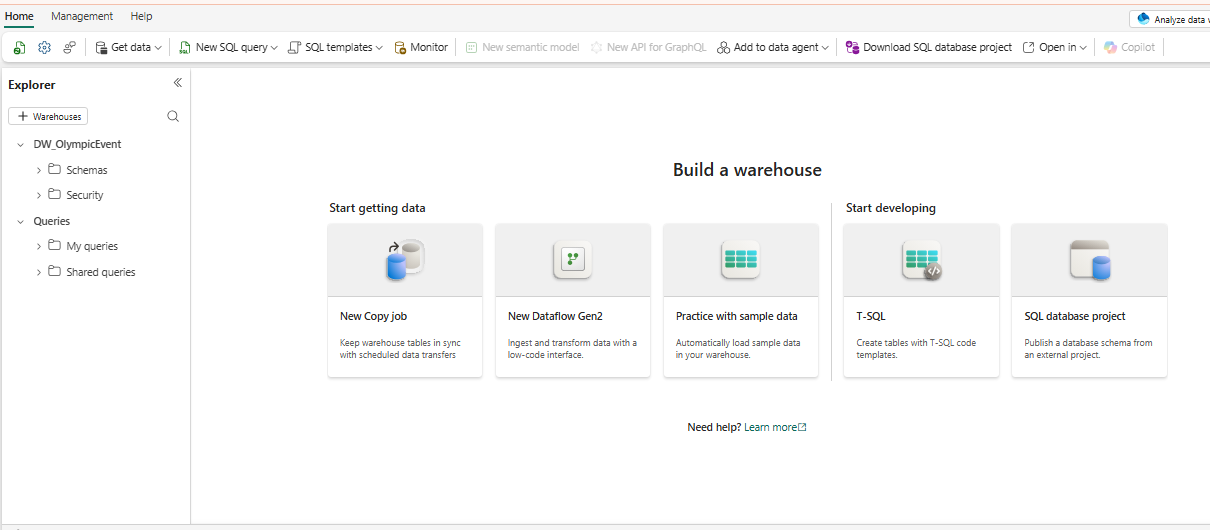
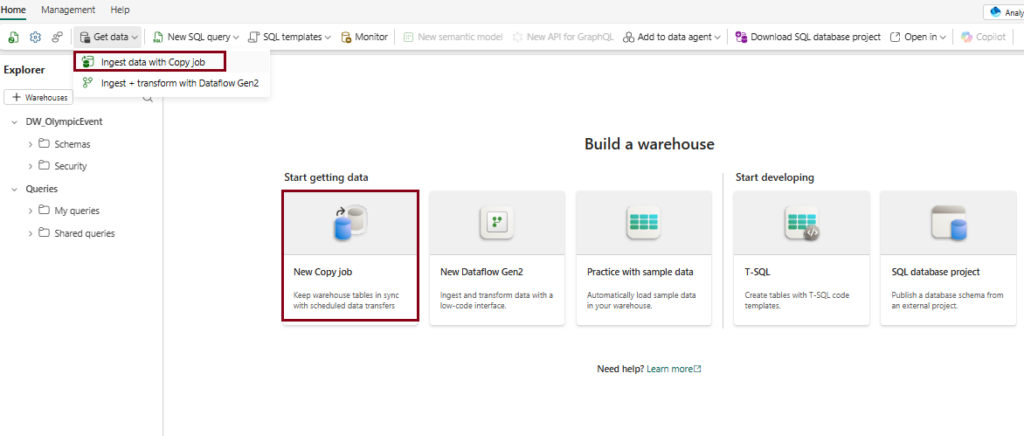
3. After creating a warehouse, the following page will appear, where you can explore various options to begin accessing the warehouse.
Method 1: Use data pipelines to load a warehouse (Copy data tool)
- The Data Pipeline is a cloud-based service that facilitates the creation of workflows for moving and transforming data. You can set up workflows that connect various data sources and manage data flows at scale.
- This is especially useful for ETL (Extract, Transform, Load) and ELT (Extract, Load, Transform) processes, allowing you to clean, manipulate, and aggregate data seamlessly.
- Azure Data Factory Integration: The pipeline service is built on Azure Data Factory’s solid foundation, which provides advanced features for complex data operations.
- All the data in the warehouse will be automatically stored in the Onelake under the Parquet format.
- Copy Job
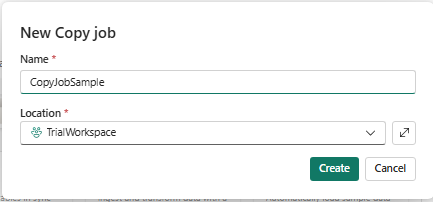
After creating a warehouse in your preferred workspace, click on “New Copy Job” on the warehouse homepage, or Under “Home” tab, choose “New Copy Job.
Provide Name for the Copy Job
Copy Job:
Copy Job is a newer feature in Microsoft Fabric Data Factory that lets you copy data between different sources and destinations without creating a full data pipeline. It provides a simple, standalone way to move data and can also be scheduled to run automatically. Copy Job supports both full and incremental data loads, including Change Data Capture (CDC) for supported SQL sources. It also includes features such as SCD Type 2 support for Fabric Warehouse, automatic data partitioning for better performance, JSON-based configuration, and event-driven execution using Activator.
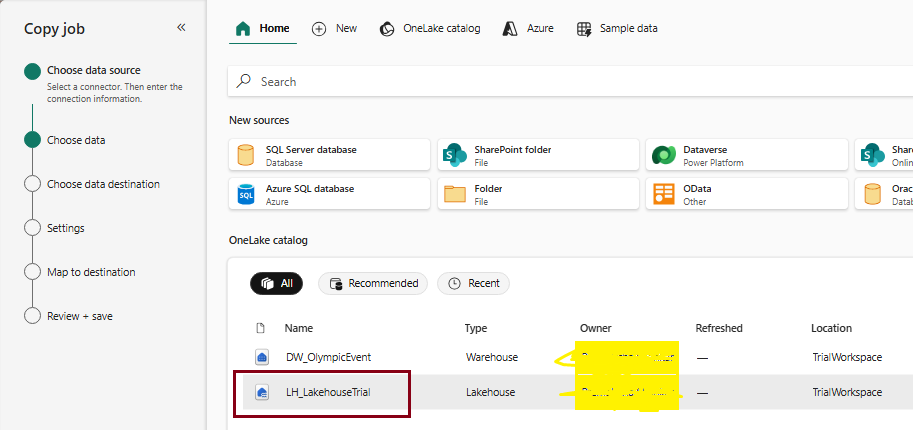
Watch the video below to learn how to load data into the warehouse from existing Lakehouse data using the “Copy Job” activity in a pipeline.
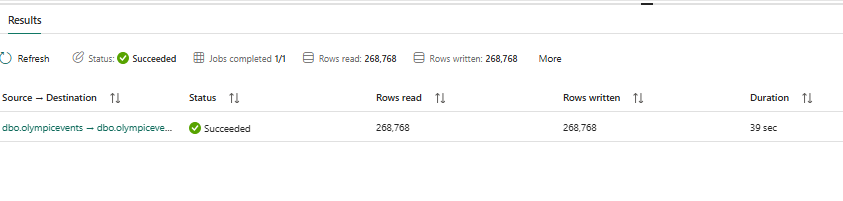
Now the pipeline succeeded and let’s check for the loaded table data in the destination i.e., Warehouse.
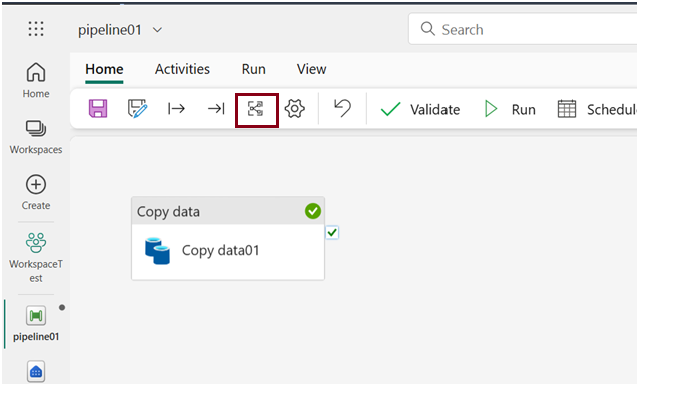
Loading data using Predefined pipeline templates:
In Microsoft Fabric, pipeline predefined templates are ready-made, reusable workflows designed to simplify common data integration tasks. These templates allow users to quickly set up pipelines for tasks like data transfer, transformation, and loading without starting from scratch. They are customizable, saving time while ensuring consistency and efficiency in building data pipelines.
Choose the below icon to choose predefined pipeline templates there you many predefined tasks to work on.
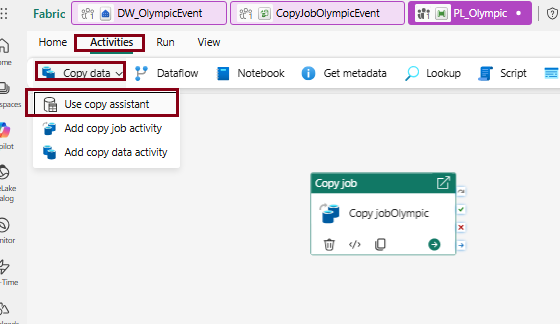
Method 2: Use data pipelines to load a warehouse (Copy data)
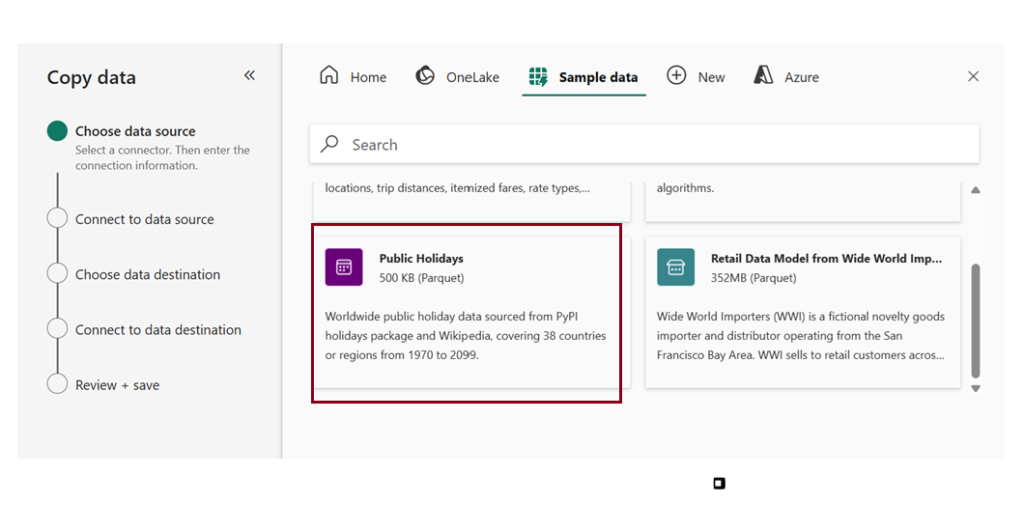
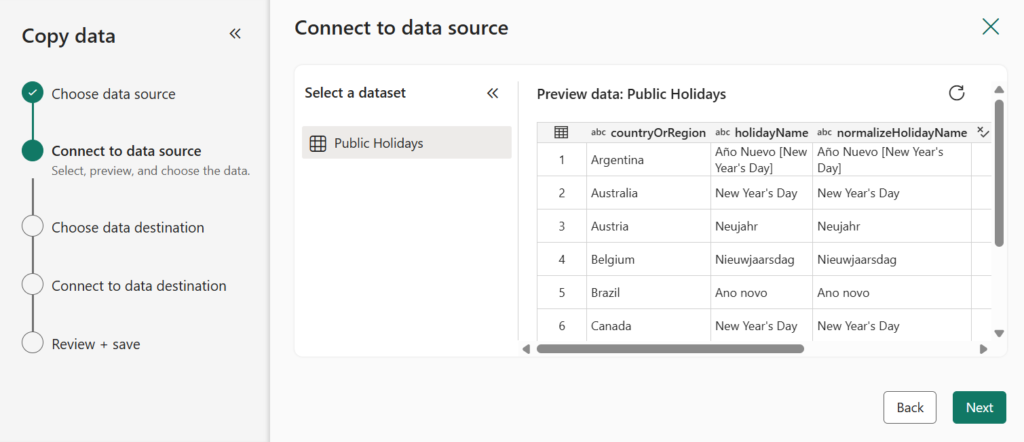
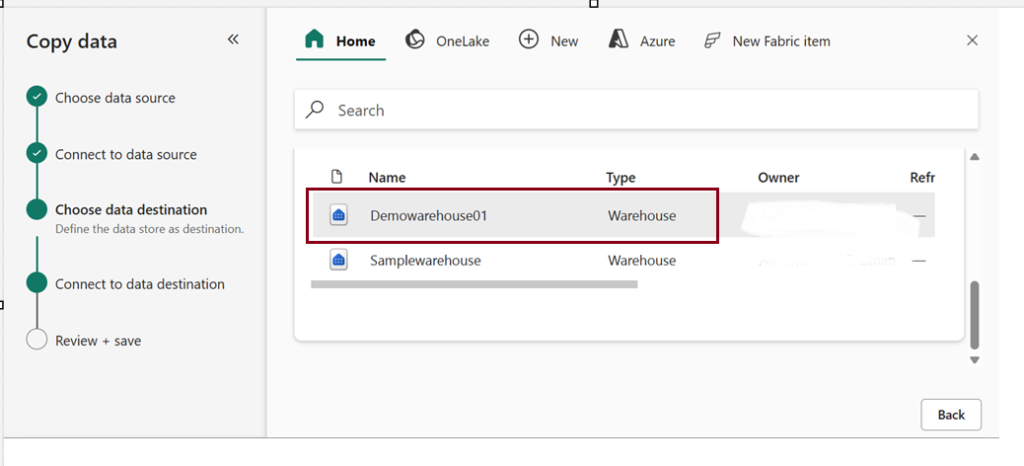
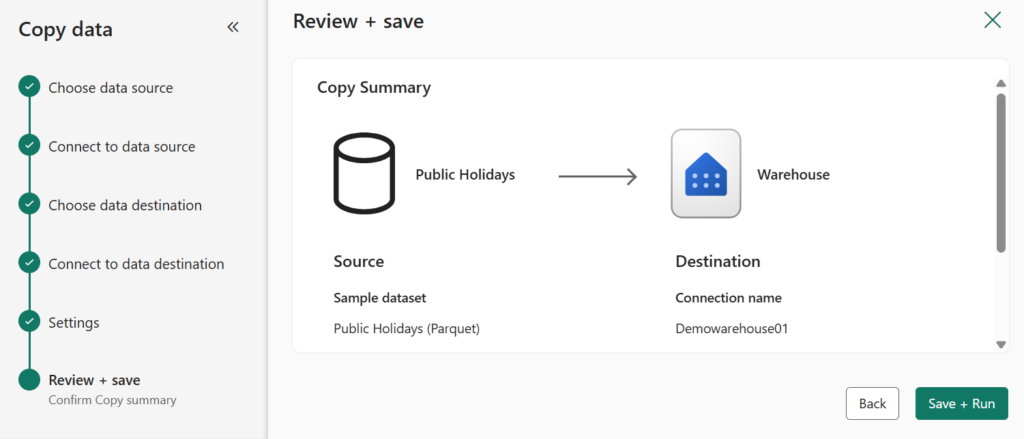
The Copy Data Assistant in Microsoft Fabric Pipeline is a guided, user-friendly tool that simplifies the process of creating a Copy Data activity. It provides a step-by-step interface that helps users configure and set up data transfer tasks between different data stores.
Here I used sample data as Source and loaded that to destination (Warehouse).
Choose Existing Warehouse as a destination.
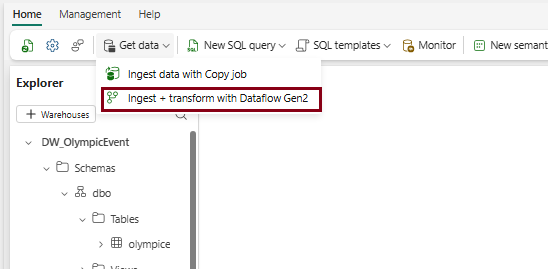
Method 3: Use “New Dataflow Gen2” to load data into a warehouse.
- Dataflow Gen2 represents the next generation of dataflows, offering a complete Power Query experience that walks you through each step of importing data into your dataflow. The creation process has been streamlined, reducing the number of steps needed.
- With Dataflow Gen2, you can use dataflows in pipelines to ingest data into a Lakehouse or warehouse, or to define datasets for Power BI reports.
- Copilot for data transformations in Dataflow Gen2 requires a paid Fabric capacity (F2 or higher) or paid Premium capacity (P1 or higher)
In this dataflow demo, I uploaded a CSV file from my local system as the source, applied some transformations, and then loaded the data into the database.
Demo 1: Creating a dataflow, uploading a CSV file as the source, and the Power Query interface appears.
Demo 2: Applying transformation and loading into destination warehouse.
- Here, I performed a simple transformation by replacing values in the “gender” column, changing “M” to 0 and “F” to 1.
- You can undo any applied transformations by deleting the applied steps on the right.
- Choose the destination appropriately.
Publish a dataflow
- After you choose your update method, the final step is to publish your dataflow.
- Any changes made in the dataflow will take effect once it is published. Therefore, always make sure to publish your dataflow after making any necessary modifications.
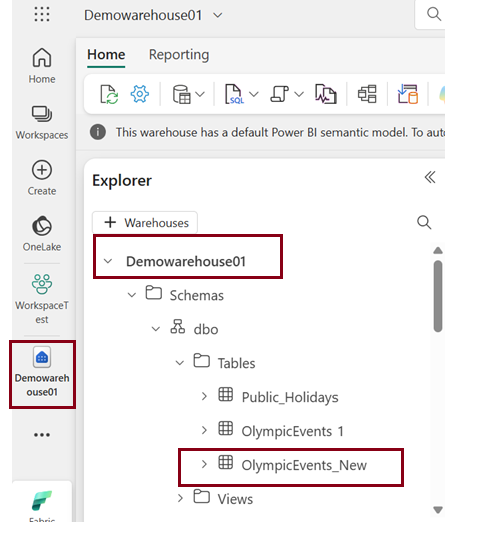
Finally check for created table in the destination warehouse.
Method 4: Use “T-SQL” to load data into a warehouse.
- SQL developers familiar with T-SQL can easily load data into Microsoft Fabric’s Warehouse since it uses the same SQL engine they are comfortable with.
- Operations like filtering, sorting, aggregating, and joining data are supported natively by the SQL engine.
Using the COPY Statement:
The COPY statement is the primary method for importing data into the Warehouse.
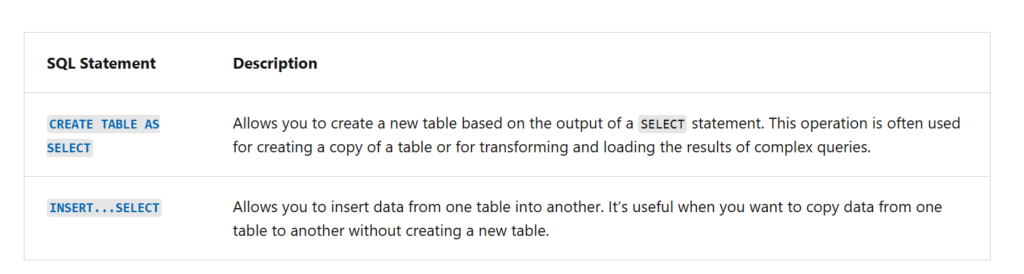
Loading Data from Other Warehouses and Lakehouses:
You can load data from other warehouses and lakehouses within the same workspace by using CREATE TABLE AS SELECT (CTAS) or INSERT…SELECT statements
These allow combining data from multiple sources across the workspace.
Source: Microsoft learn
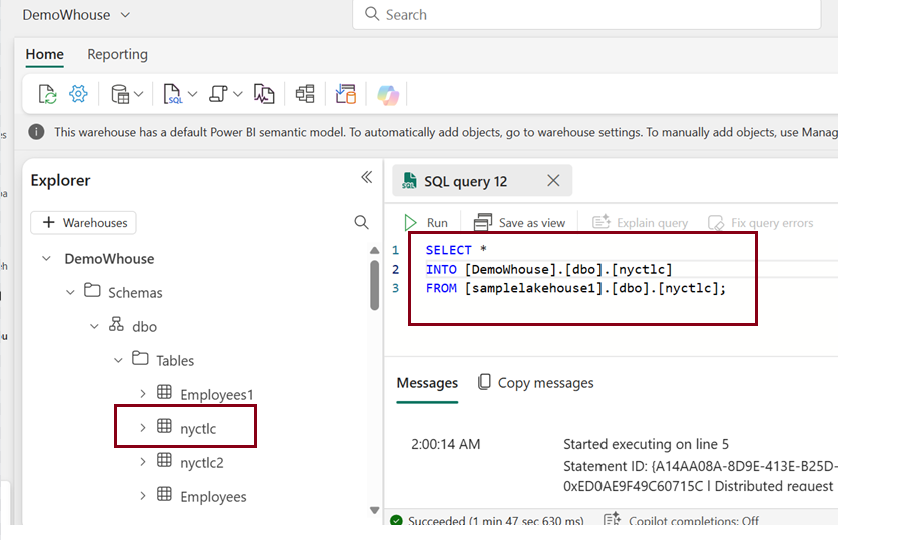
Here I copied a table “nyctlc” which is the sample data loaded in Lakehouse to warehouse using basic T-SQL query.
In situations where an analyst requires data from both a warehouse and a Lakehouse, they can utilize this feature to merge the data using SQL Joins. Once combined, the data can be loaded into the warehouse for analysis.
CREATE TABLE [Warehouse name]. [dbo].[combined_data]
AS
SELECT *
FROM [Warehouse1]. [dbo]. [Table1]
INNER JOIN [Lakehouse1]. [dbo]. [Table 2]
ON Table 1. [Common column] = Table 2. [Common column];
Load multiple files
You can load data from multiple file locations by specifying them in a comma-separated list. However, all these locations must be within the same storage account and container.
The below example shows how to use wildcards to load CSV files from two different folders in the same container:
Source: Microsoft Learn
The above command will load all CSV files from both folder0 and folder1 into my_table in the warehouse.
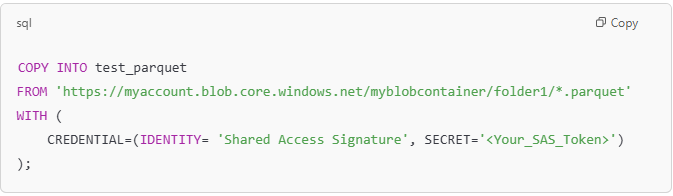
Example with PARQUET Files:
Like the CSV example, you can also load data from multiple Parquet files:

Note: It’s important to ensure that all files you are loading (whether CSV, Parquet, or other formats) have the same structure (i.e., the same columns in the same order). This ensures the data can be correctly mapped to the target table in the warehouse.
This capability allows you to efficiently load data from multiple files, especially when datasets are large or distributed across several files. Instead of loading each file individually, you can load all matching files at once, simplifying the process.
Method 5: Use “Spark Notebooks” to load data into a warehouse.
Microsoft Fabric’s notebooks offer a web-based interactive environment for coding, experimenting, and visualizing data. Supporting various languages such as Python, Scala, SQL, and R, these notebooks enable the development of Apache Spark jobs and machine learning solutions. They also provide connectivity to lakehouses, combining data lakes and data warehouses.
Refer this Lesson 27 – Using Notebooks with Microsoft Fabric for more understanding on notebooks.
Follow the link above to create a notebook in Fabric. In this section, we will explore how to write data into a warehouse using PySpark.
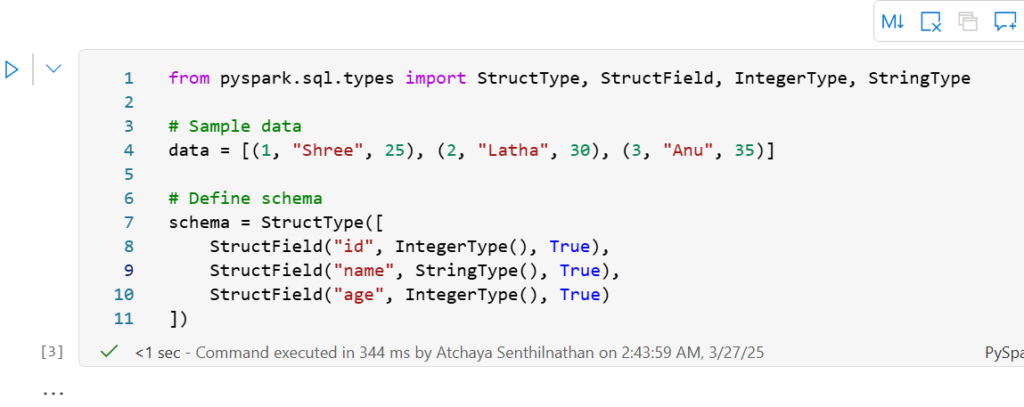
Here we are creating a sample DataFrame in PySpark and defining the data and the schema for the DataFrame.
Source: Aleksi Partanen Tech Channel
Now creating a dataframe

Below is the syntax for writing data into warehouse
#Writing data within the same workspace
df.write.mode(<mode>).synapsesql("<warehouse name>.<schema name>.<table name>")
There are four common save modes used in PySpark when writing data to destination,
ErrorIfExists (default mode):
If the table or file already exists, an error will happen, and no data will be written.
Example: Trying to create a table that already exists will stop with an error.
Ignore:
If the table or file already exists, the data won’t be written, and no error will occur.
Example: If the table already exists, nothing changes
Overwrite:
If the table or file already exists, it will be replaced with the new data. If it doesn’t exist, it will be created.
Example: The existing data is erased, and the new data is written in its place.
Append:
If the table or file already exists, the new data will be added to the existing data. If it doesn’t exist, it will be created.
Example: The new data gets added to what is already there.
Let’s explore each of the modes.
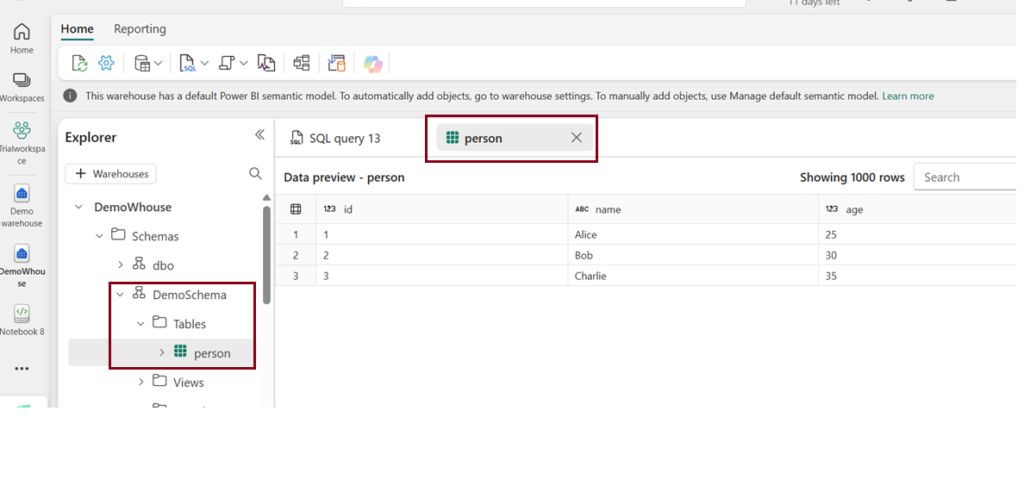
Before executing the code, we need to create a schema for the target warehouse table.
To create schema:

Ignore:
df_input.write.mode("ignore").synapsesql("DemoWhouse.DemoSchema.person")
After executing the above code, a new table named “Person” was created in the warehouse, and within the ‘DemoSchema’.
ErrorIfExists (default mode):
df_input.write.mode("errorifexists").synapsesql("DemoWhouse.DemoSchema.person")
Now when I run the above code it will throw error saying the table already exists.
Append:
df_input.write.mode("append"). synapsesql("DemoWhouse.DemoSchema.person")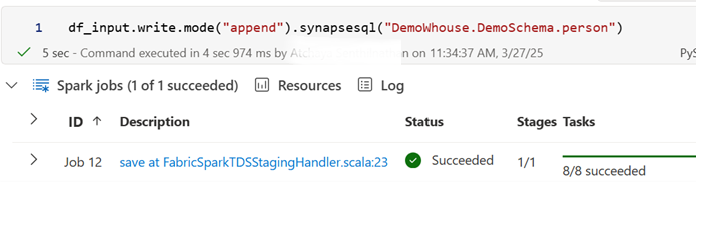
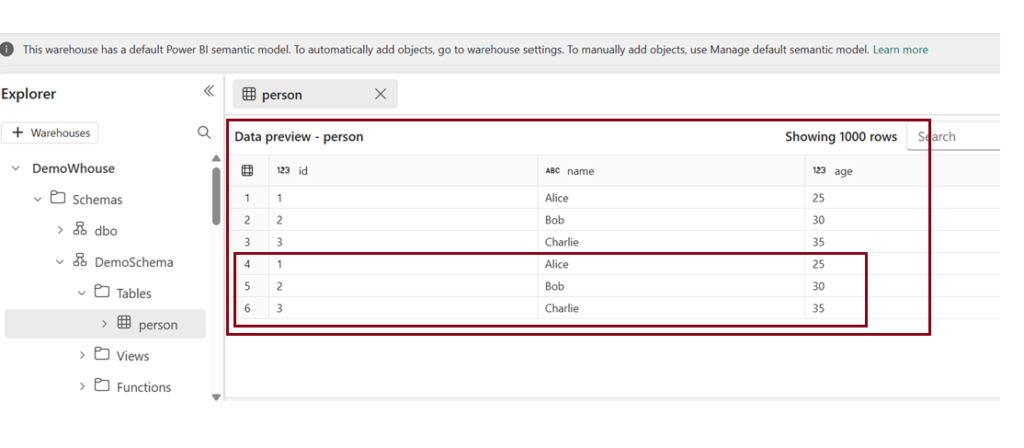
Output
Since we used “Append “ mode ,the data is appended on the same table data.
Writing Data across workspaces
In Microsoft Fabric, data often needs to be moved between different workspaces for various reasons such as collaboration, data integration, or storage optimization. Writing data from one workspace to another in Microsoft Fabric can be accomplished using several methods depending on the tools and technologies you’re leveraging, like Notebooks, Dataflows, or Pipelines.
Here lets see how to write data into different warehouses across different workspaces.
For that you need the Workspace ID to be embedded in the below code.
How to get the workspace ID?
You can find your Fabric workspace ID in the URL of the Fabric site for an item within that workspace, specifically after /groups/.
Syntax:
df.write.option(Constants.WorkspaceId, "<workspace id>").mode(<mode>).synapsesql("<warehouse name>.<schema name>.<table or view name>")Here we are writing data(person table) from DemoWhouse (warehouse) in Trial workspace -à Demo warehouse (Warehouse) in Demowarehouse1
df_input.write.option(Constants.WorkspaceId, "e6977e75-5ed7-4176-b99b-015882a59b5d").mode("overwrite").synapsesql("Demo warehouse.dbo.person")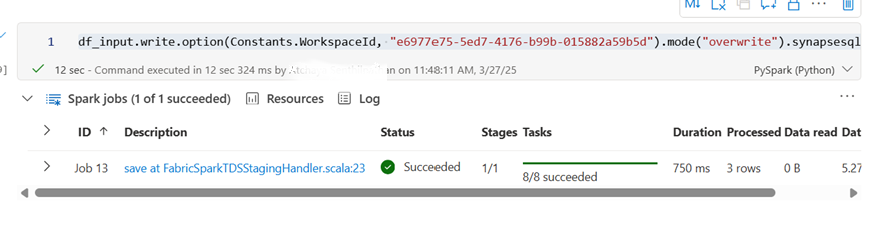
Additional Pipeline Activities for Warehouse Loading
Microsoft Fabric has introduced several new pipeline activities that make warehouse loading and data management easier:
- Refresh SQL Analytics Endpoint – Refreshes the SQL analytics endpoint to ensure it stays up to date during a pipeline run.
- Materialized Lake View Refresh – Updates materialized lake views with the latest data as part of a pipeline.
- Approval Activity – Adds a manual approval step to a pipeline before the next activity runs, supporting governance and review processes.
- Conditional Retries – Allows retries to be applied only to specific activities that need them, improving pipeline efficiency and reliability.
These new activities help simplify data loading, improve workflow management, and make Microsoft Fabric pipelines more flexible.
| Tags | Microsoft Fabric |
| Useful Links & MS Learn Modules | |
Test Your Knowledge |
Quiz |