
In the rapidly changing world of data integration and analytics, it’s vital to keep up with the newest technologies. Microsoft Fabric’s Data Factory combines Power Query and Azure Data Factory, creating a reliable and user-friendly data integration experience. This helps both data and business professionals extract, load, and transform data for their organizations.
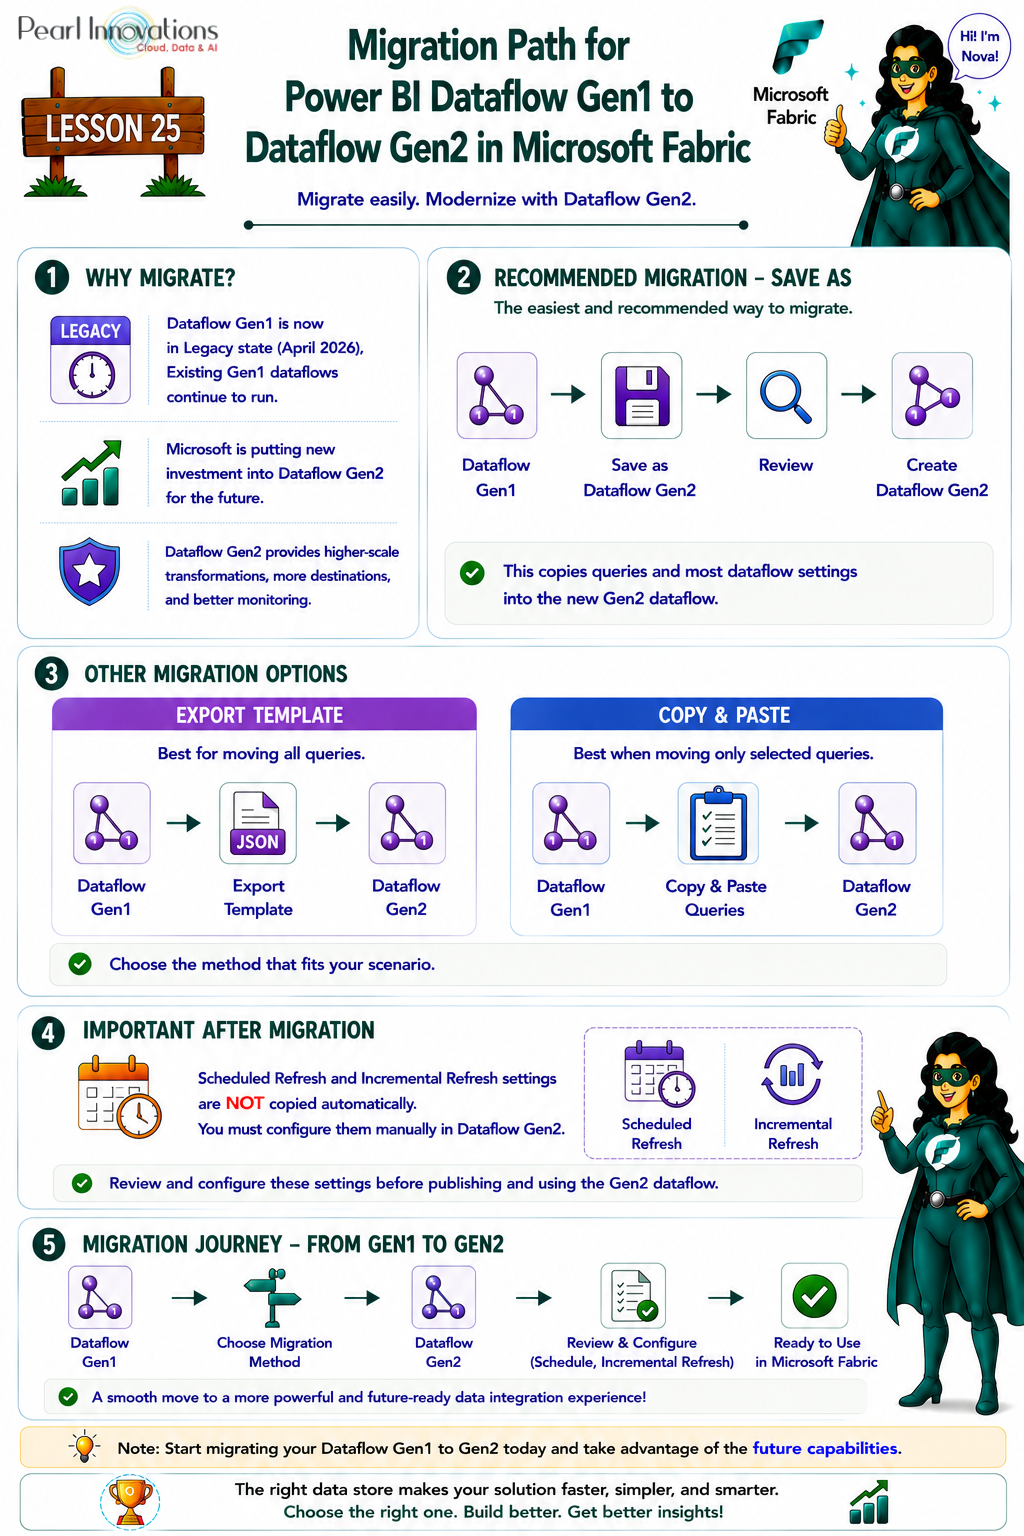
🚀 Learn It in 5 Minutes
Skip the long read.
See the key concepts in one easy-to-follow infographic.
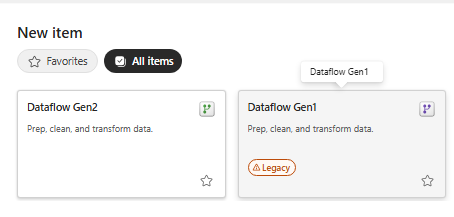
Dataflow Gen2
- Dataflow Gen 2 in Microsoft Fabric represents a significant evolution from its predecessor, offering enhanced capabilities and performance. Some key advantages include high-scale data transformations using Fabric’s compute engines, expanded output destinations, and an improved refresh history and monitoring experience.
- All new Dataflow Gen2 items are now created with CI/CD and Git integration support by default (since April 2026).
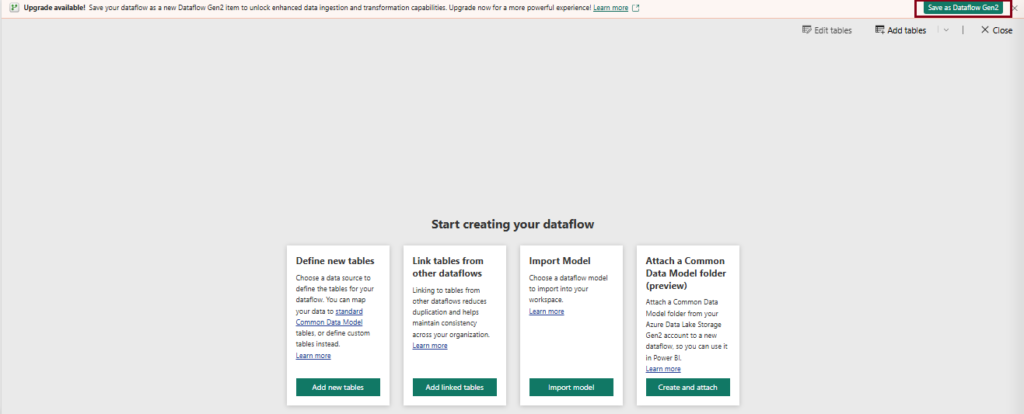
Migration Options for Dataflow Gen1 to Dataflow Gen2 in Microsoft Fabric
To migrate your existing Dataflow Gen1 to Dataflow Gen2, you have the following options
Save As Feature (Recommended)
Microsoft Fabric now provides a Save As feature, making it the easiest way to upgrade an existing Dataflow Gen1 or a Dataflow Gen2 (without CI/CD) to the latest Dataflow Gen2 (with CI/CD).
The Save As option copies all your queries and most of the dataflow settings into a new Dataflow Gen2, helping you upgrade quickly with minimal effort.
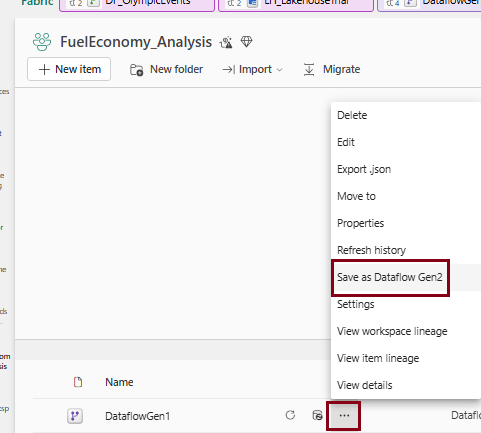
How to use the Save As feature
- In your workspace, locate the existing dataflow.
- Select the ellipsis (…) next to the dataflow.
- Choose Save as Dataflow Gen2.
- Optionally, enter a new name for the dataflow.
- Select Create.
The new Dataflow Gen2 (CI/CD) opens automatically, allowing you to review and make any necessary changes before using it.
Note: After migration, you must manually configure Scheduled Refresh and Incremental Refresh settings, as they are not copied automatically.
Which Migration Option Should You Choose?
Choose the option that best fits your needs:
- Save As – Recommended for upgrading an entire dataflow quickly. It copies all queries and most settings into a new Dataflow Gen2.
- Export Template – Best when you want to move all queries from a dataflow or another Power Query-based tool, such as Excel or Power Platform Dataflows.
- Copy and Paste – Ideal when you only need to migrate a few selected queries instead of the entire dataflow.
Export template feature
Follow the steps to use export template feature
- Navigate to your Power BI or Data Factory workspace. Locate the existing Dataflow Gen1 that you want to edit.
- Select the ellipsis (three dots) next to the Dataflow Gen1. Choose the “Edit” option from the menu.
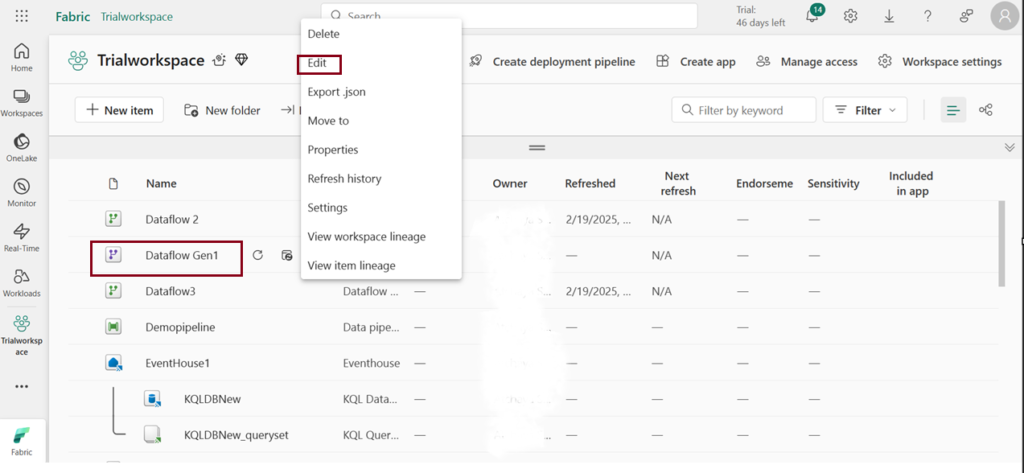
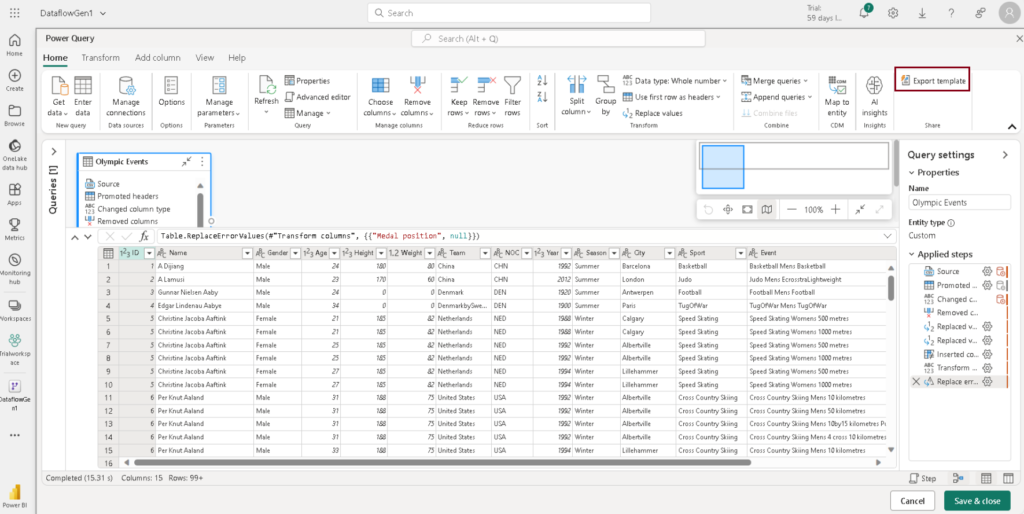
- Upon selection of the “Edit” option, a window will appear, presenting tables with their corresponding names, table types, and a log of actions taken. This user interface provides the capability to make edits and modifications to the configurations of the selected tables. To proceed further, click on the edit icon.

- In the Power Query editor’s Home tab, choose the “Export template” option from the available menu.
- In the “Export template” section, enter the desired name for the template in the “Name” field. Optionally, provide a description for the template in the “Description” field. Click OK.
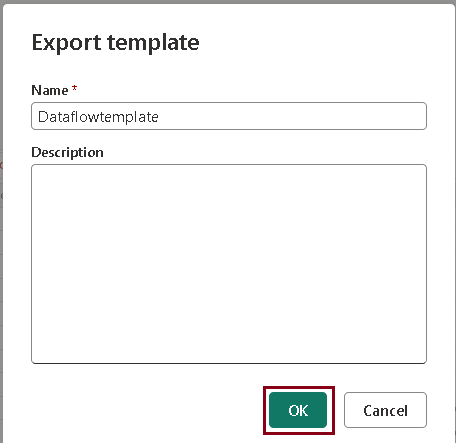
- The template is saved in your downloads folder.
- Navigate to the workspace and select New item–> Dataflow Gen2.
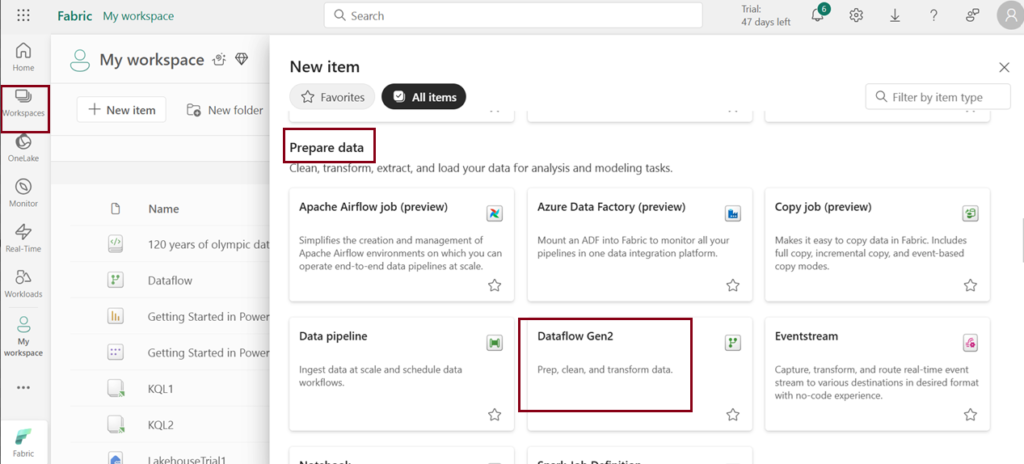
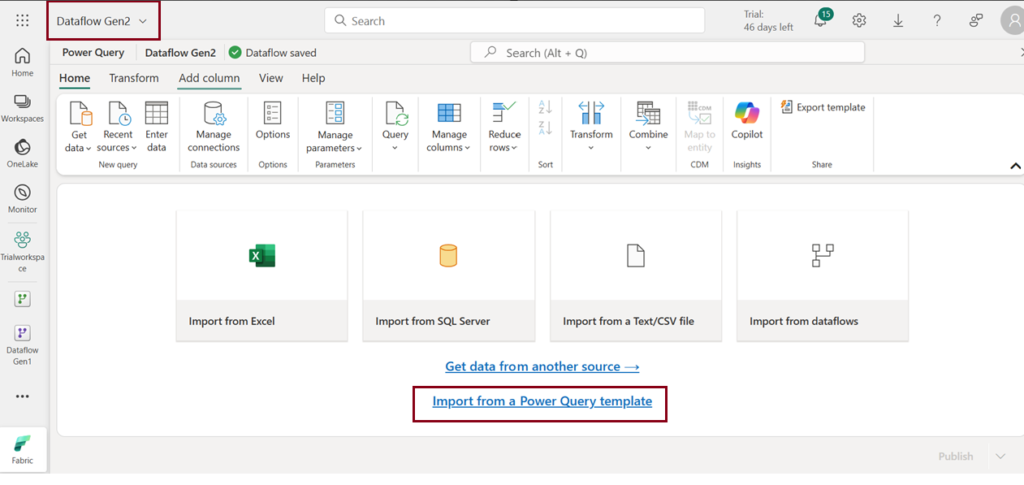
- On the Power Query Editor home page, choose “Import from a Power Query template.”
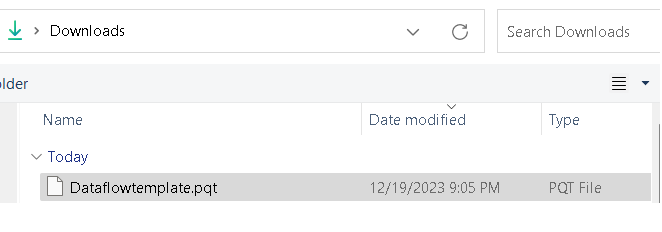
- In the Open dialog box, navigate to your default Downloads folder and choose the .pqt (Power Query Template) file saved in the previous steps. Then, click on “Open.”
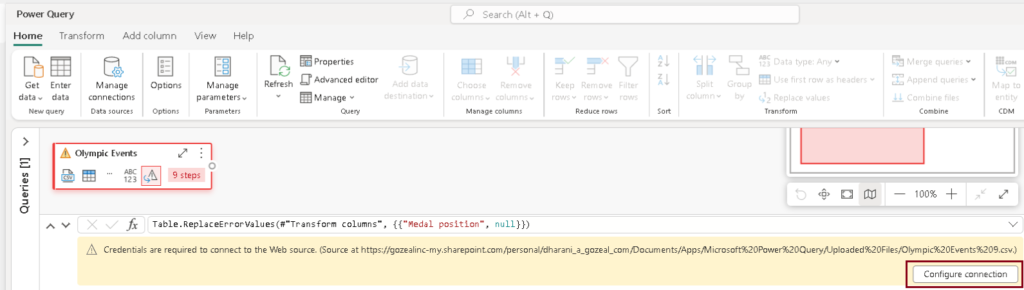
- The template has been successfully imported into your Dataflow Gen2. If prompted, enter your login details by selecting “Configure connection” and providing your credentials. Then, click “Connect” to proceed.
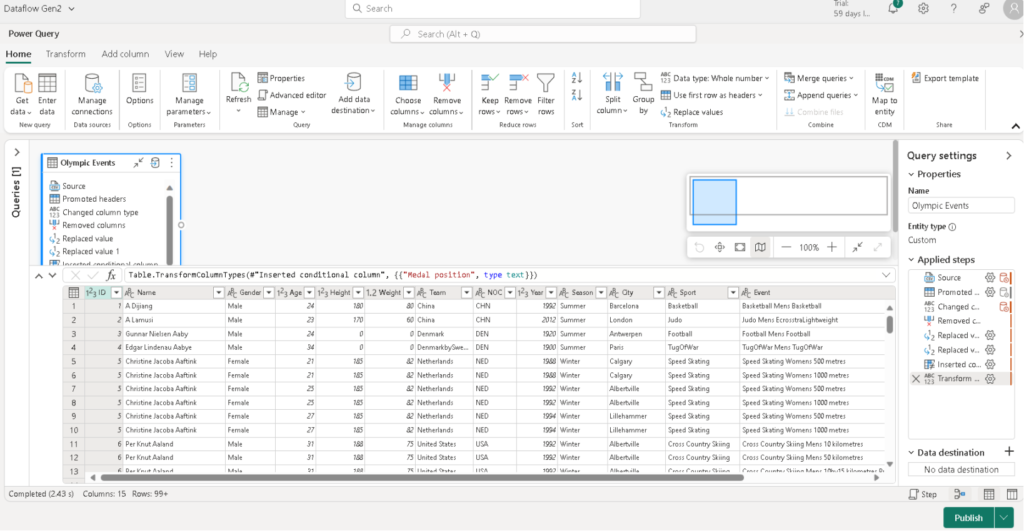
- Your Dataflow Gen1 has been successfully imported into Dataflow Gen2.
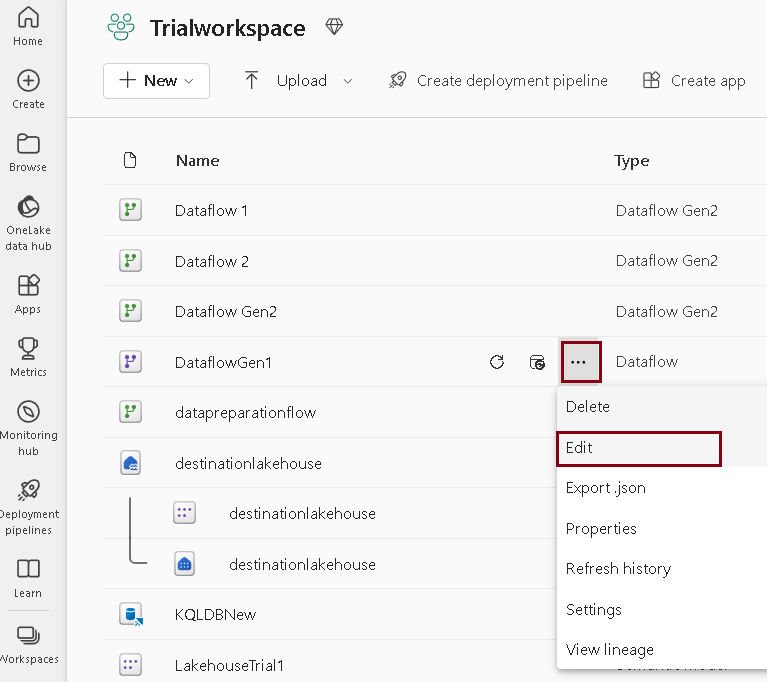
- Navigate to your Power BI or Data Factory workspace. Locate the existing Dataflow Gen1 that you want to edit.
- Select the ellipsis (three dots) next to the Dataflow Gen1. Choose the “Edit” option from the menu.
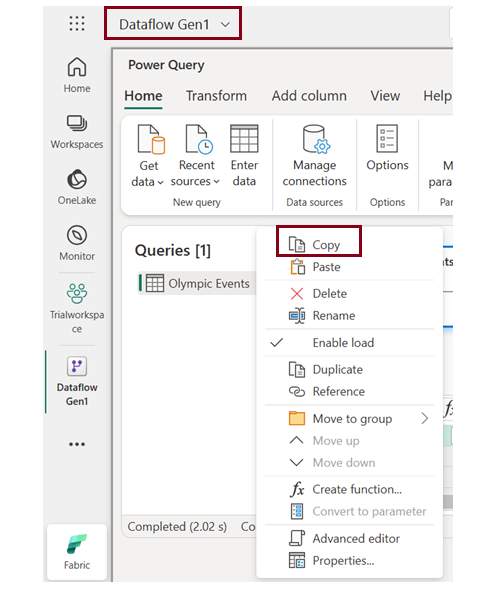
- In Power Query, choose the query or queries you want to copy. If there are several queries or folders (in Power Query) you wish to copy, hold down Ctrl while selecting them. Then, either press Ctrl+C or right-click in the selection and choose Copy.
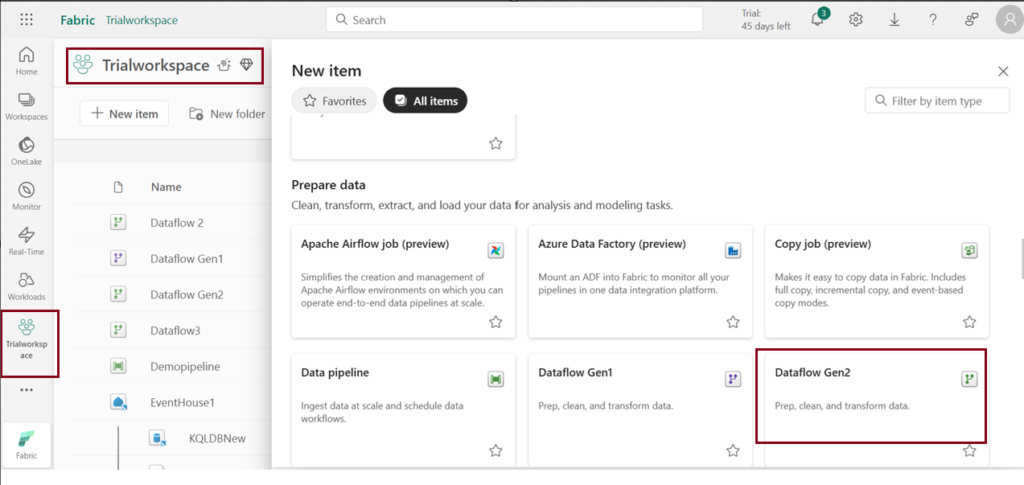
- Navigate to Data Factory workspace and select New –> Dataflow Gen2.
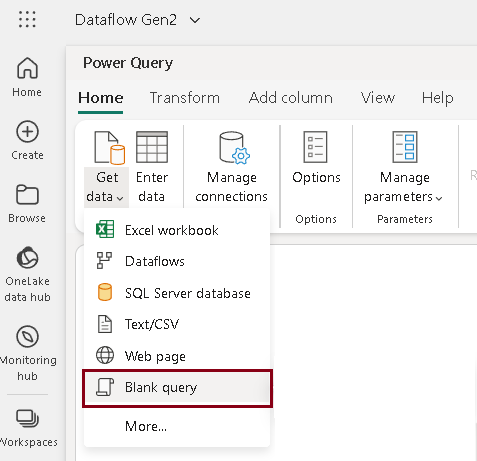
- In the Power Query editor, select Get data –> Blank query.
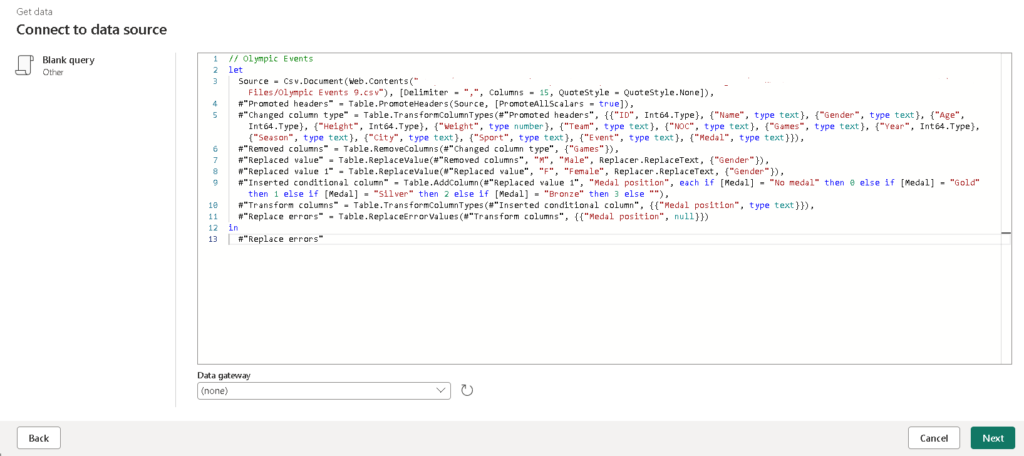
- In the Blank query dialog box, paste the query into the queries pane and click Next.
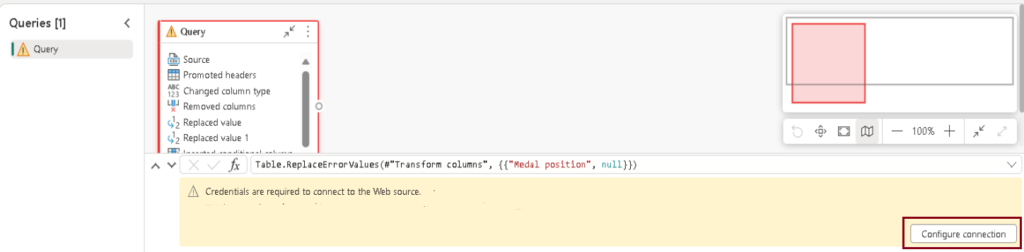
- Provide your login details by selecting “Configure connection” and enter your credentials. Click Connect.
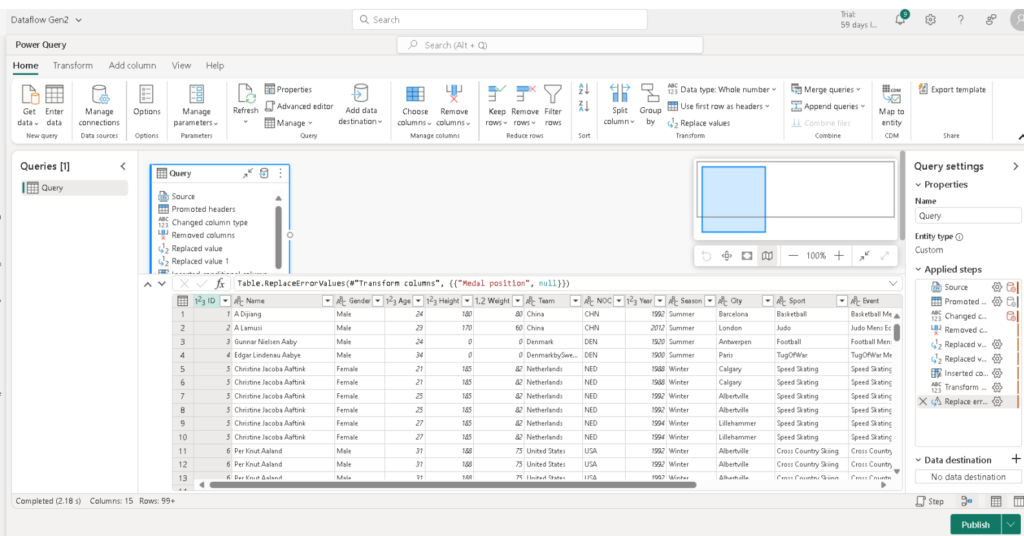
- The table is loaded into Dataflow Gen2.
| Tags | Microsoft Fabric |
| Useful links | |
| MS Learn Modules | |
Test Your Knowledge |
Quiz |