
In Lesson 9, we looked at the different compute types available in Azure Databricks, and in Lesson 10, we learned how to create and manage compute clusters. Now that you understand what compute is and how to set it up, it’s time to put it to use.
In this lesson, we move from theory to practice. You’ll create your very first Databricks notebook, connect it to compute, and run your first lines of code. Just as we saw in the last lesson how to create and configure cluster compute, you can also choose Serverless compute when setting up your Azure Databricks workspace. For this hands-on lesson, we’ll use Serverless compute so you can focus on learning notebooks without manually provisioning or managing a cluster.
By the end of this lesson, you’ll be comfortable navigating the notebook interface and ready to start writing real data engineering and analytics code in the lessons ahead.
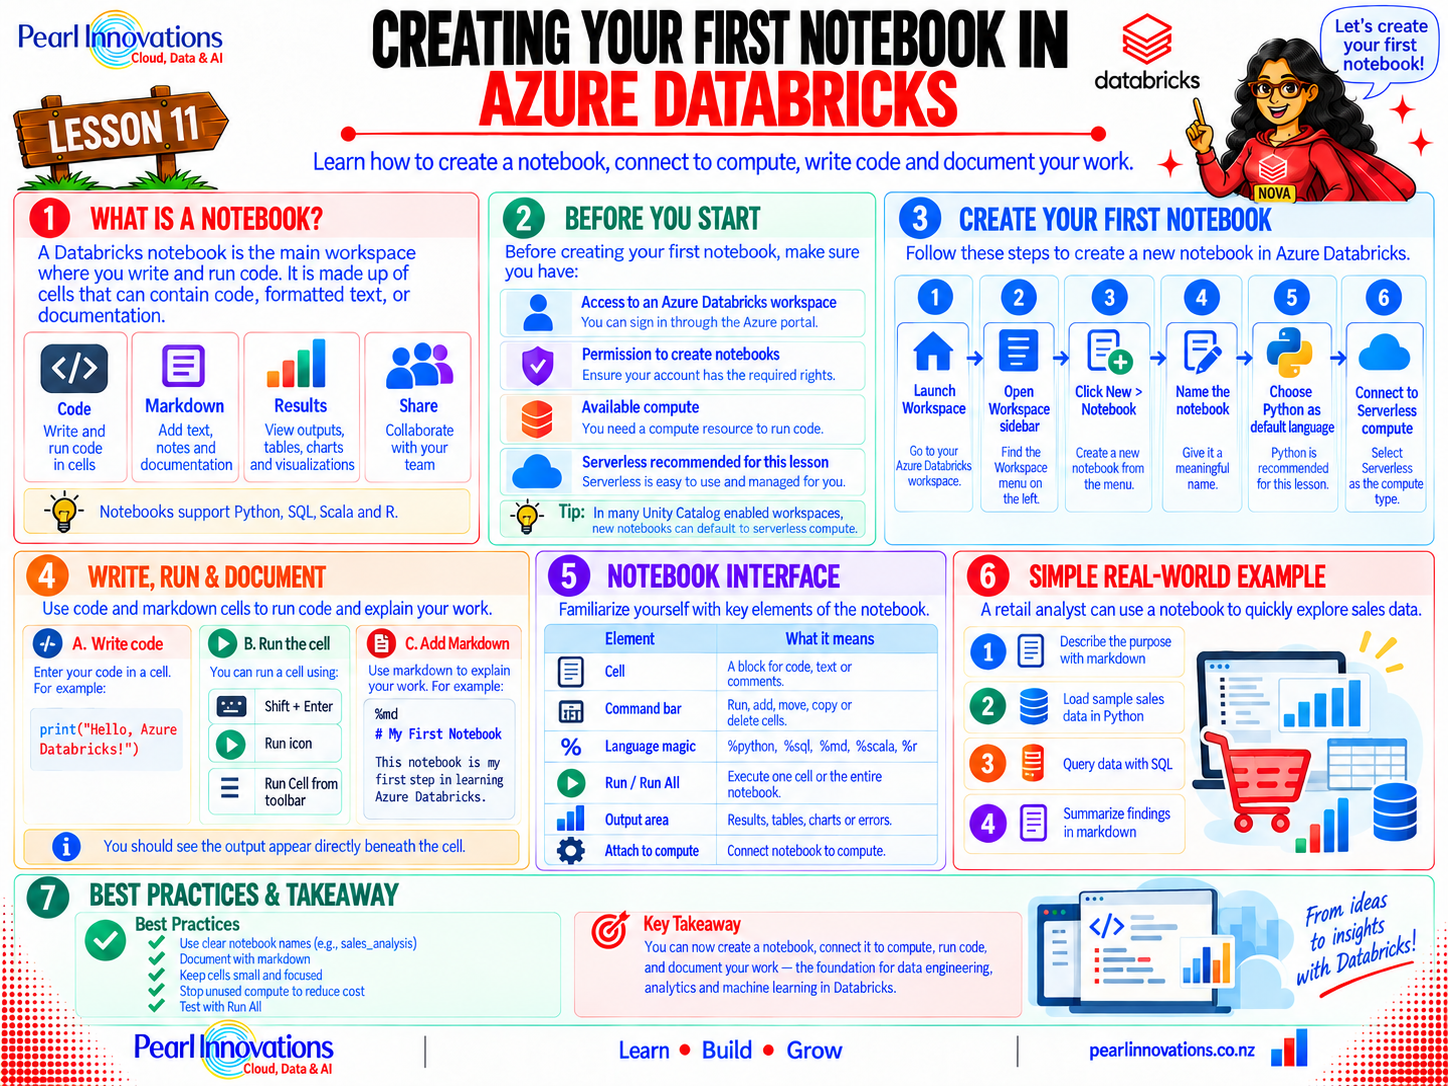
🚀 Learn It in 5 Minutes
Skip the long read.
See the key concepts in one easy-to-follow infographic.
What Is a Databricks Notebook?
A notebook is the main workspace where you write and run code in Azure Databricks. It’s made up of individual cells, and each cell can contain code, formatted text, or documentation.
Notebooks support multiple languages in the same document, including Python, SQL, Scala, and R. This means you can write a Python cell to load data, an SQL cell to query it, and a text cell to explain your thinking, all in the same notebook.
Because notebooks combine code, output, and explanation in one place, they are widely used for data exploration, ETL development, machine learning experiments, and sharing results with a team.
What You’ll Need Before You Start
Before creating your first notebook, make sure you have the following ready:
- Access to an Azure Databricks workspace
- Permission to create notebooks in that workspace
- A running compute cluster, or the ability to create one (covered in Lesson 10)
You don’t need to create or start a classic cluster for this lesson. If your workspace supports serverless notebooks, you can select Serverless from the notebook’s compute selector. In Unity Catalog-enabled workspaces, new notebooks can default to serverless compute.
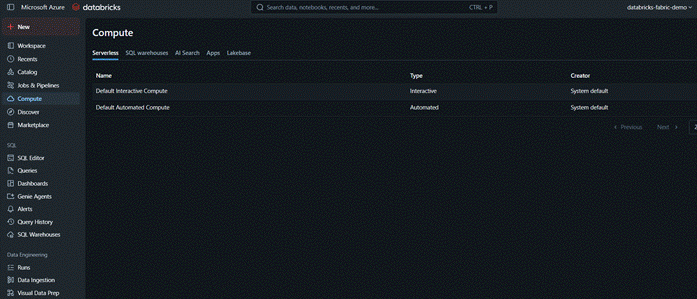
Serverless compute enabled workspace
Step-by-Step: Creating Your First Notebook
Step 1: Open Your Azure Databricks Workspace
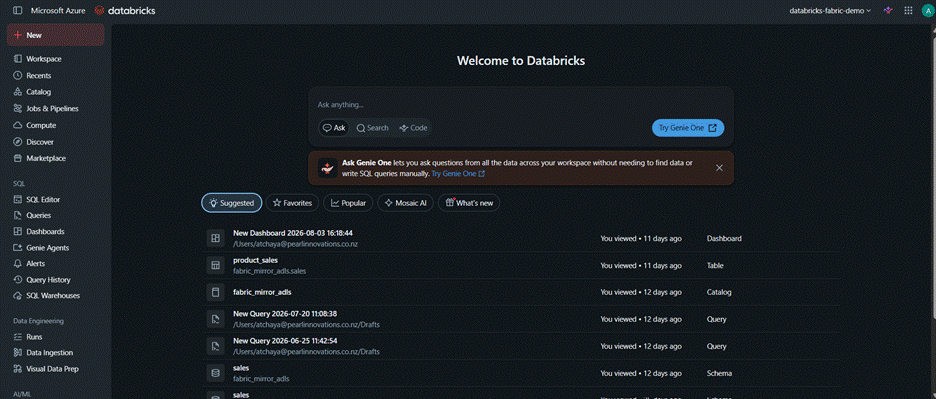
Sign in to the Azure portal, navigate to your Azure Databricks resource, and select Launch Workspace. This opens the Databricks workspace in a new browser tab, where all your notebooks, clusters, and data live.
Step 2: Go to the Workspace Sidebar
In the left-hand sidebar, select Workspace. This is where all notebooks, folders, and files are organized. You can create a notebook directly in your home folder or inside a shared folder if you’re working with a team.
Step 3: Create a New Notebook
There are two common ways to create a notebook:
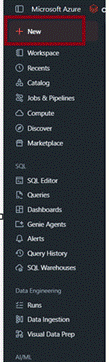
- Click the + New button in the sidebar and select Notebook
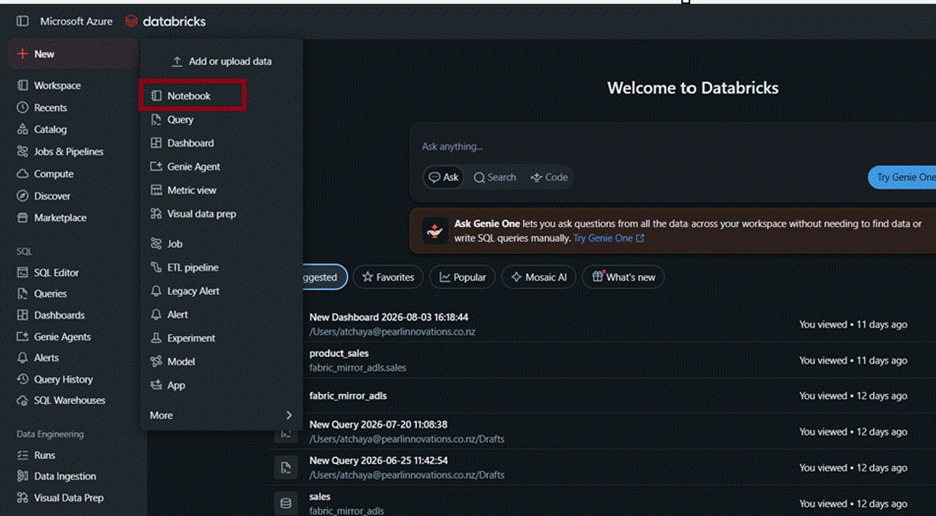
It opens the notebook creation screen, where you’ll set a few basic details before your notebook is ready to use.
Step 4: Name Your Notebook
Give your notebook a clear, descriptive name, for example, First-Notebook or Lesson11-GettingStarted. Good naming becomes especially important later, when you have dozens of notebooks in a shared workspace.
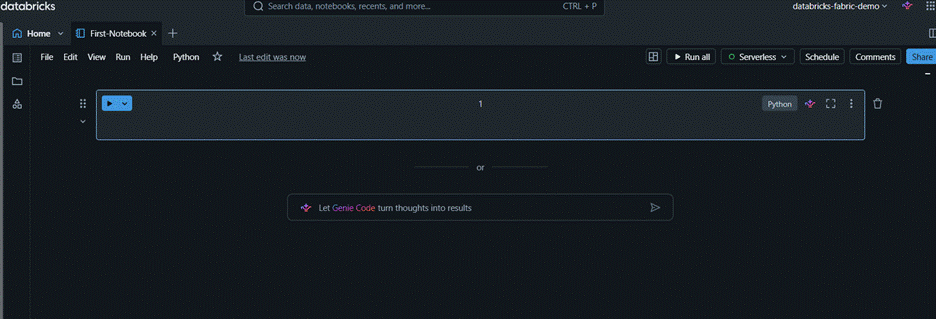
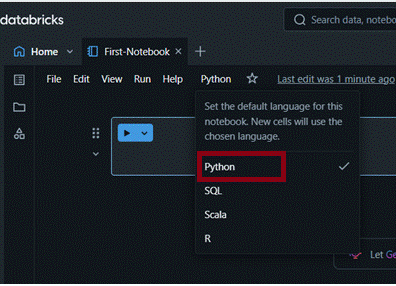
Step 5: Choose a Default Language
Select a default language for the notebook, Python, SQL, Scala, or R. This sets the language used for any cell that doesn’t specify its own language. For this lesson, choose Python, since it’s the most commonly used language in Azure Databricks.
Step 6: Connect the Notebook to Compute
Serverless lets Databricks manage the underlying compute for you. Lesson 10 still matters because it teaches you how classic compute works and how to manage it when a workload requires that level of control.
For this lesson, select Serverless from the compute dropdown near the top of the notebook. Serverless compute is managed by Databricks and provides on-demand compute for your notebook, so you don’t need to configure a driver, workers, runtime, or cluster size yourself. If Serverless is already selected, you can continue directly to the next step.
Note: serverless compute is different from the classic cluster you learned to create and manage in Lesson 10.
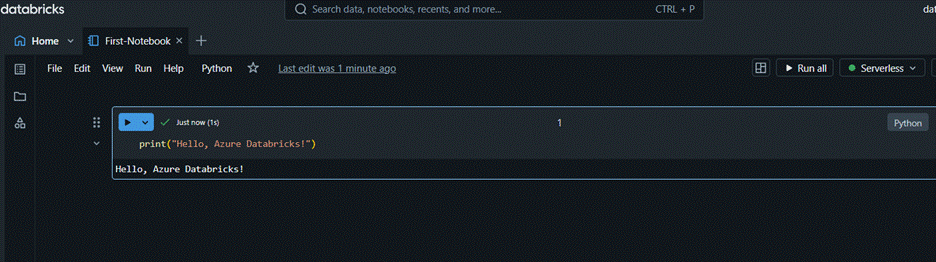
Step 7: Write Your First Code Cell
Click into the first empty cell and type the following:
print(“Hello, Azure Databricks!”)
This simple line confirms that your notebook is connected to compute and ready to run code.
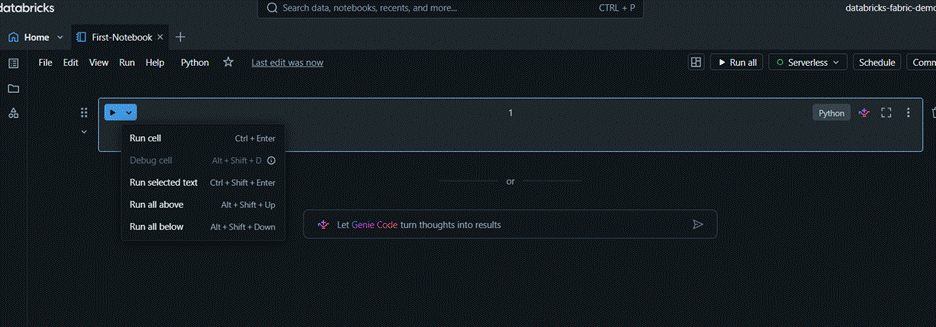
Step 8: Run the Cell
Run the cell using any of the following methods:
- Press Shift + Enter
- Click the ▶ Run icon on the left edge of the cell
- Use Run > Run Cell from the notebook toolbar
You should see the output Hello, Azure Databricks! appear directly beneath the cell. If the cluster was still starting up, Databricks automatically waits for it before running your code.
Step 9: Add a Markdown Cell
Notebooks aren’t just for code, you can document your work using Markdown. Add a new cell, type %md at the top, and press Shift + Enter:
%md
# My First Notebook
This notebook is my first step in learning Azure Databricks.
The cell renders as formatted text instead of code, which makes it easy to explain what each section of your notebook does.
Step 10: Save and Explore
Notebooks in Azure Databricks save automatically as you work, so there’s no separate save button to remember. Take a moment to explore the toolbar at the top: Run All, Clear, Comments, and Revision History are all available whenever you need them.
Understanding the Notebook Interface
Now that you’ve created a notebook, it helps to know what each part of the interface does:
| Notebook Element | What It Does |
| Cell | A single block where you write and run code, text, or comments |
| Command bar | Let’s you run, add, move, copy, or delete cells |
| Language magic (%python, %sql, %md, %scala, %r) | Overrides the notebook’s default language for a single cell |
| Run / Run All | Executes one cell, or every cell in the notebook, in order |
| Output area | Displays results, tables, charts, or error messages under a cell |
| Attach to cluster | Connects the notebook to compute so code can execute |
A Simple Real-World Example
Imagine you’re a data analyst who just joined a retail company. Your manager asks you to take a first look at recent sales data before the team builds a full reporting pipeline.
Using the notebook you just created, you could:
- Add a markdown cell describing the purpose of the notebook.
- Write a Python cell to load a sample sales file into a DataFrame.
- Switch to an SQL cell using %sql to run a quick query against the data.
- Add another markdown cell summarizing what you found.
This is exactly how real Databricks notebooks are used day to day, mixing code, queries, and explanation in a single, shareable document.
Best Practices for Beginners
- Give notebooks clear, consistent names so they’re easy to find later
- Use markdown cells to explain what each section does, future you will thank you
- Keep cells small and focused, one task per cell makes debugging much easier
- Detach or terminate clusters you’re not using, to avoid unnecessary compute costs
- Use Run All occasionally to make sure your notebook works from top to bottom, not just in the order you happened to run cells
Conclusion
You’ve just created and run your first notebook in Azure Databricks. You learned how to open the workspace, create a notebook, connect it to serverless compute, write and run code, and document your work using markdown.
This notebook is the foundation for everything that follows in this series. As you progress, you’ll use notebooks to import data, build transformations, create visualizations, and eventually train machine learning models, all within the same simple interface you just explored. You can use serverless compute for many of these learning exercises without managing classic clusters yourself.
| Tags | Creating Your First Notebook in Azure Databricks |
| Useful Links | |
| MS Learn Modules | |
|
Test Your Knowledge |
Quiz |