
In this lesson, you will create your first Azure Databricks workspace and get it ready for the notebooks, compute, and Spark workloads we will explore in the upcoming lessons.
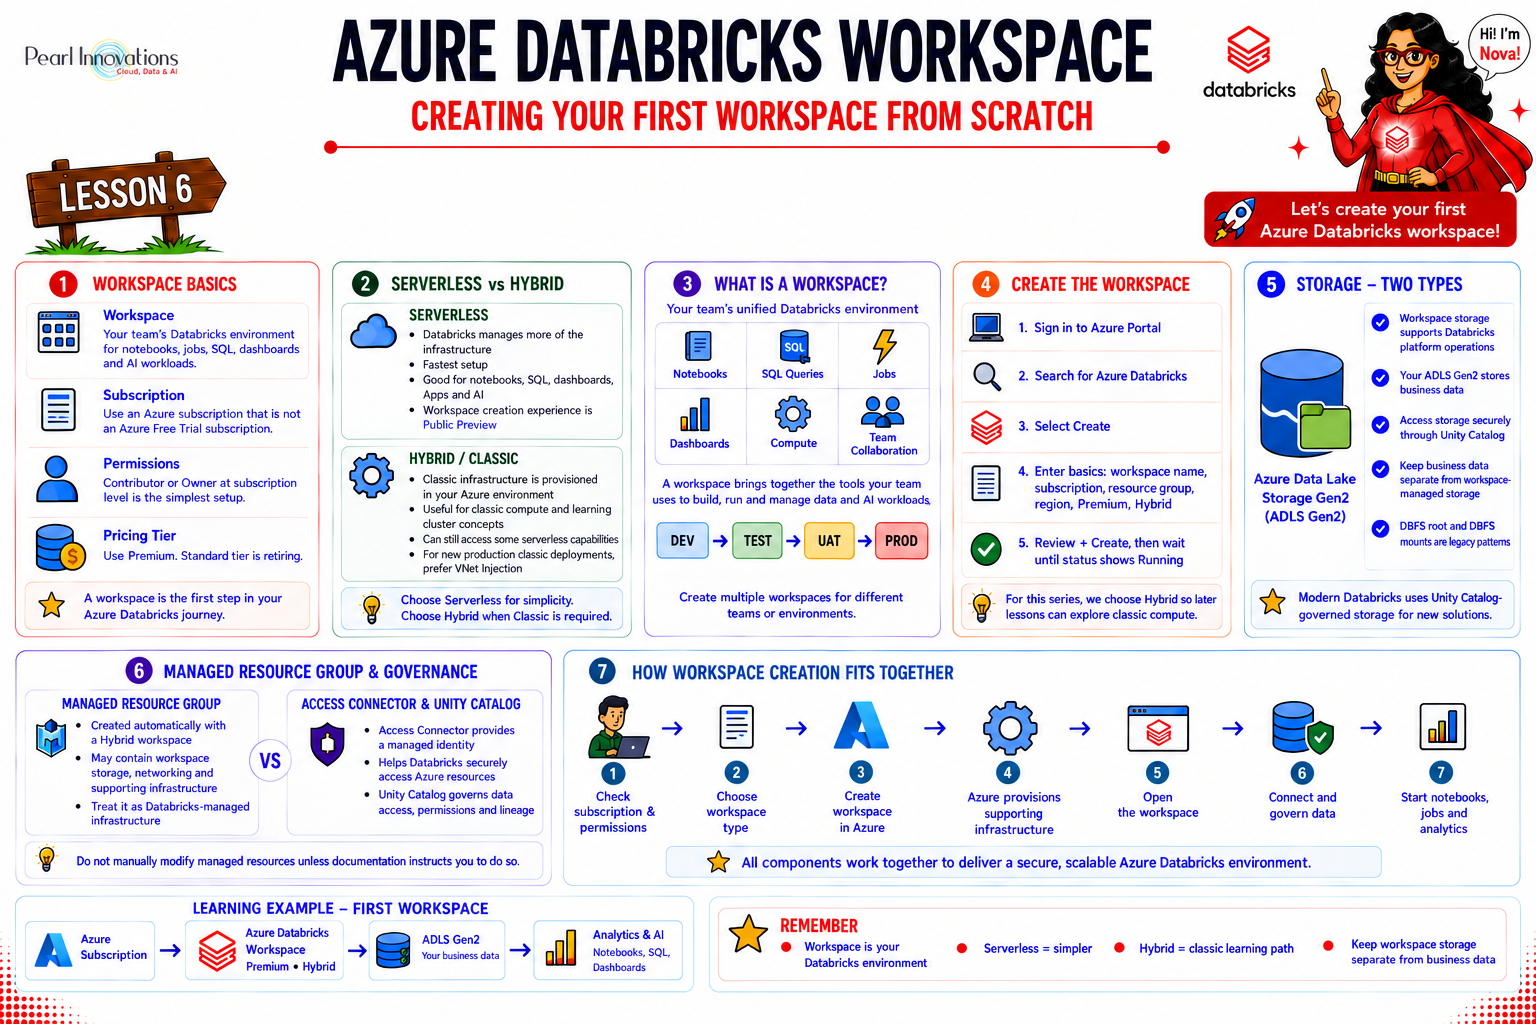
🚀 Learn It in 5 Minutes
Skip the long read.
See the key concepts in one easy-to-follow infographic.
Azure Databricks Workspace
Before creating anything, let’s understand what a workspace means. Think of an Azure Databricks workspace as your working environment for Databricks. It is the place where you work with Databricks assets such as:
- Notebooks
- SQL queries
- Dashboards
- Data
- Compute
- Jobs
- Workflows
- Files
- Git folders
- AI/ML workloads
Microsoft describes a workspace as an Azure Databricks deployment that provides a unified environment for a specified set of users. It is the central environment where you and your team sign in, create notebooks, run compute, access and work with data, build jobs and dashboards, and manage permissions through a unified Databricks experience.
The workspace brings these capabilities together, but that does not mean all of the underlying data and infrastructure are physically stored “inside” the workspace. For example, your business data may be stored in Azure Data Lake Storage and accessed through Unity Catalog, while Classic compute resources run within Azure infrastructure associated with the workspace.
So creating one is the very first practical step of your Databricks journey.
The 5-stage journey from prerequisites to a running workspace
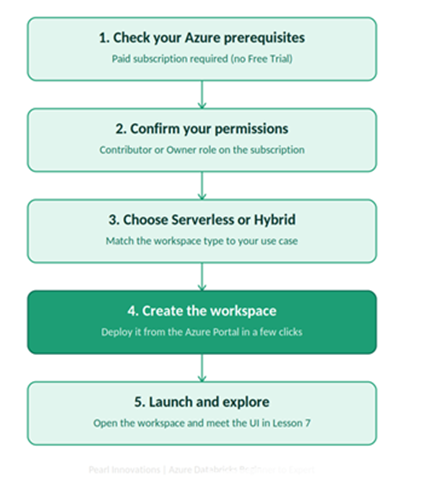
The 5-stage journey from prerequisites to a running workspace
Think of Databricks as the platform and Azure Databricks as Databricks running within the Microsoft Azure ecosystem.
Azure prerequisites
- Before creating an Azure Databricks workspace, first check the type and status of your Azure subscription.
- For most Azure Databricks workspace deployments, Microsoft documents a paid Azure subscription rather than an Azure Free Trial subscription as the prerequisite. If you are using an Azure Free Trial subscription, availability can depend on the current Databricks trial offering, workspace configuration, and Azure subscription limitations.
- If your Azure Free Trial allows you to create the workspace, you can proceed.
- The Contributor or Owner role at the subscription level, or a custom role with specific permissions, including Microsoft.Databricks/workspaces/*, rights to read and write resource groups, and permission to register the Compute, Storage, Managed Identity, and Network providers.
- If you’re working inside a company subscription rather than your own, this is the point to check with your Azure administrator and confirm you’ve been assigned the right role.
Do I need to set up storage myself?
- Choose serverless and Databricks gives you default storage automatically. No extra setup required.
- Choose hybrid (classic) and Azure provisions a storage account for you as part of the deployment but it lives in your own subscription, which matters for governance and cost tracking.
We will do exactly that in Lesson 19 when we start working with our own data lake storage.
Serverless vs Hybrid: what’s the real difference
| Serverless workspace | Hybrid (classic) workspace | |
| Compute & storage | Preconfigured and managed for you | Classic infrastructure is provisioned in your Azure environment |
| Setup speed | Fastest, with minimal infrastructure setup | More Infrastructure decisions |
| Best for | Notebooks, SQL, dashboards, Apps and many modern workloads | Workloads requiring Classic compute or specialised networking/runtime requirements |
| Beginner friendly? | Yes easiest starting point | Yes, but exposes more infrastructure concepts |
When should you choose which?
Serverless Workspace
Think of Serverless as:
“I want Databricks to manage most of the underlying infrastructure for me so I can focus on my data and workloads.”
A Serverless workspace comes preconfigured with:
- Serverless compute
- Default storage
- A fully managed Databricks experience
You can still connect the workspace to your own Azure Storage / ADLS Gen2 when you need to work with your organization’s data.
When should you choose Serverless?
Microsoft recommends Serverless as the best choice for most use cases and the easiest way to get started.
Choose Serverless when you are doing things like:
- Exploring data using notebooks
- Running SQL analytics
- Creating AI/BI dashboards
- Building Databricks Apps
- Using Genie
- Using many of Databricks’ AI capabilities
- Creating serverless Lakeflow pipelines
- Connecting to SaaS sources through Lakehouse Federation
Simple example
Suppose your team says:
“We want to explore our sales data, build dashboards and use Databricks AI features. We don’t have special infrastructure requirements.”
Serverless is a good option.
You can focus on the workload instead of spending time managing the underlying compute infrastructure.
Hybrid / Classic Workspace
Microsoft also calls Hybrid a Classic workspace.
Think of Hybrid as:
“I need a Classic Databricks environment because my workload has specific requirements that aren’t suitable for Serverless.”
A Hybrid workspace provisions storage and compute resources in your existing Azure account. Serverless compute is still available inside a Hybrid workspace.
When should you choose Hybrid/Classic?
Microsoft currently lists these scenarios:
Existing legacy Spark applications
If you’re migrating an existing Spark application that uses RDDs, Classic is appropriate.
Existing Spark application
↓
Uses Spark RDDs
↓
Classic / Hybrid
Scala or R as your primary language
If your team primarily develops in:
- Scala
- R
Classic workspace is the better choice.
Python
- Serverless is often suitable
Scala / R
- Classic may be required
Certain streaming requirements
If your streaming workload requires time-based trigger intervals, Microsoft recommends Classic.
Direct connection to on-premises/private systems
If you need to connect directly to on-premises systems or private databases through Lakeflow Connect, Classic is the appropriate choice.
For learning Azure Databricks, Serverless is a great option for beginners because it provides a more managed experience and lets you start working with Databricks without having to manage as much underlying infrastructure.
However, in this Beginner to Expert data bricks lesson series, we will be covering compute and cluster management in upcoming lessons. To make those demonstrations more practical and give us visibility into the Azure resources behind the workspace, we will create a Hybrid workspace for our hands-on environment.
For learning purposes: You can start with a Serverless workspace if your goal is simply to explore Databricks, work with notebooks, SQL, dashboards, and other managed capabilities.
For this series: We are choosing Hybrid because upcoming lessons will include hands-on demonstrations involving compute and cluster management. This gives us a broader environment to explore how Databricks works with Azure infrastructure.
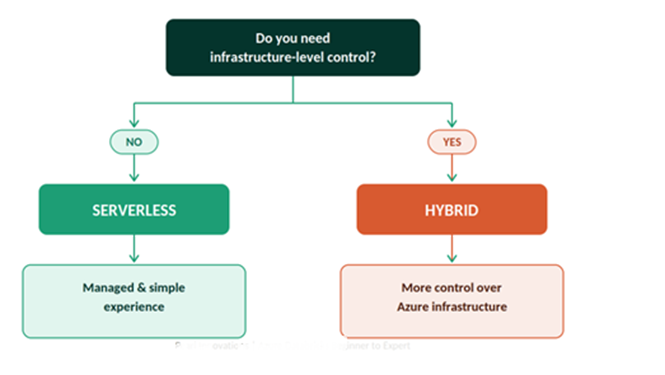
Step-by-step: Creating Your Hybrid Azure Databricks Workspace
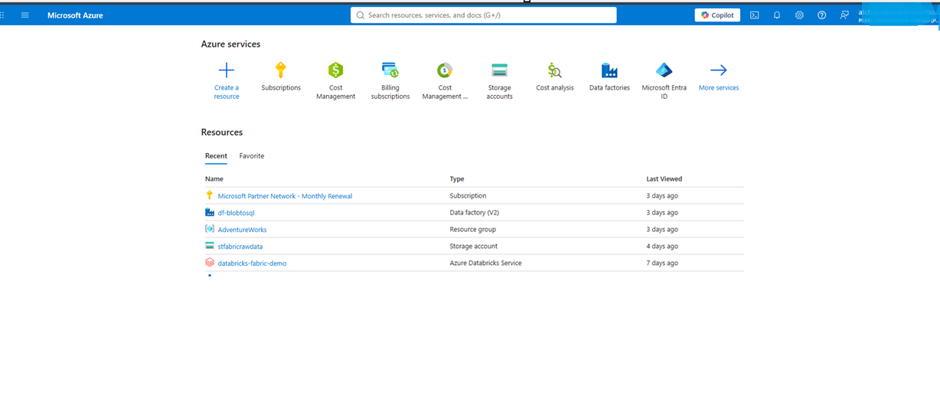
1. Sign in to the Azure Portal
- Open a browser and go to the Azure Portal.
- Sign in with the Azure account that has the required permissions on your subscription
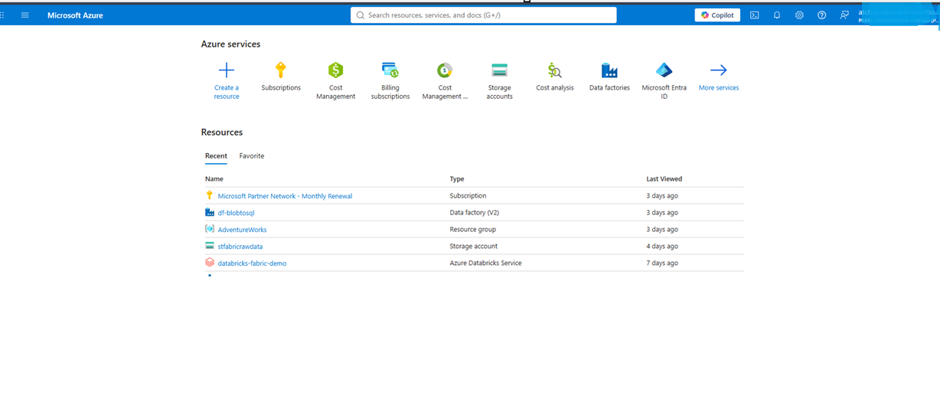
For the simplest setup, your account should have either:
- Contributor role at the subscription level, or
- Owner role at the subscription level
You can check this under:
Azure Portal → Subscriptions → Your Subscription → Access control (IAM) → Check access
Microsoft currently documents Contributor or Owner at the subscription level as the standard permissions for creating an Azure Databricks workspace.
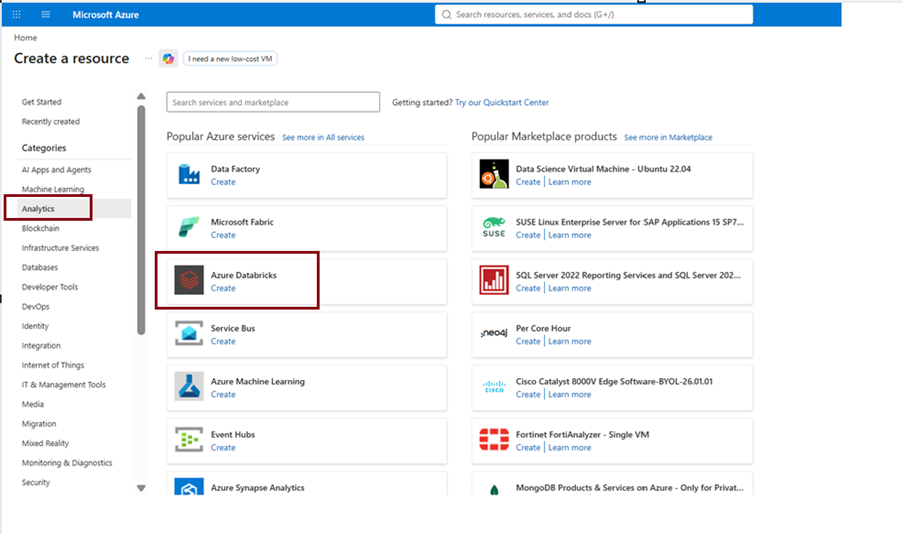
Step 2 : Start creating a resource
In the top-left corner, select “Create a resource”, then choose “Analytics”, then select “Azure Databricks” from the list.
Fill in the basics
You’ll now see a form asking for the following details:
- Workspace name – give it something recognisable, e.g. databricks-dev
- Subscription – choose your Azure subscription
- Resource group – create a new one or reuse an existing one. A resource group is simply a folder that keeps related Azure resources together
- Location – pick a region close to you
- Pricing tier – Premium
- Azure Databricks has announced the end of life of the Standard workspace tier. Existing Standard-tier customers have until October 1, 2026 to move to Premium, and Microsoft states that remaining Standard workspaces will be automatically upgraded to Premium on October 1, 2026. Because Premium is the tier going forward, we will use Premium throughout this learning series.
- Workspace type – select “Hybrid”
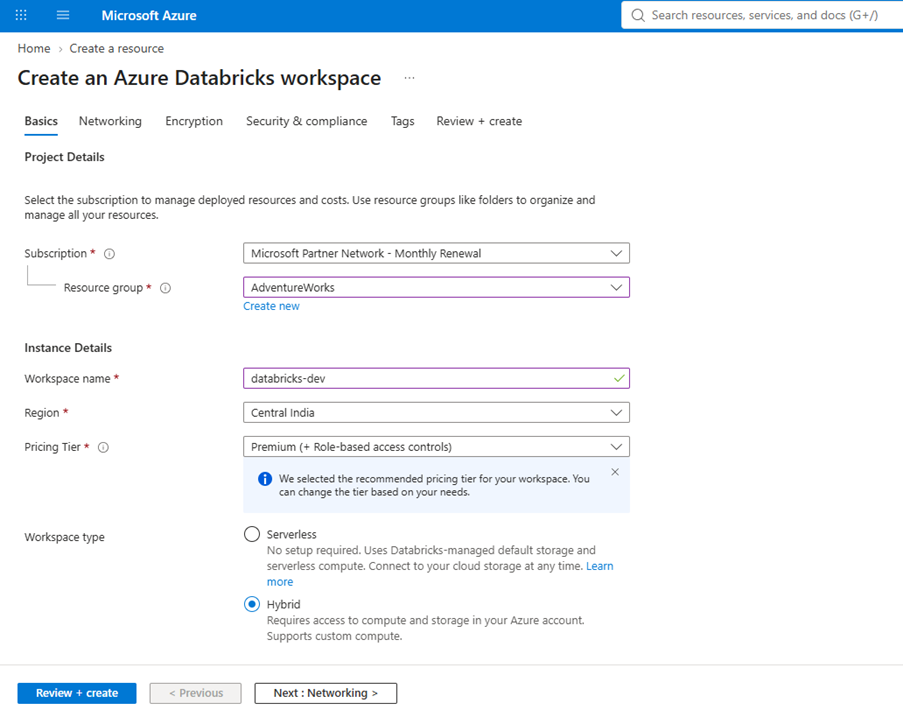
As discussed above, Azure Databricks currently provides two workspace types: Serverless and Hybrid. Choose the option that matches your workload requirements. For this hands-on lesson, we will select Hybrid so we can explore the broader Azure Databricks infrastructure experience in the upcoming lessons.
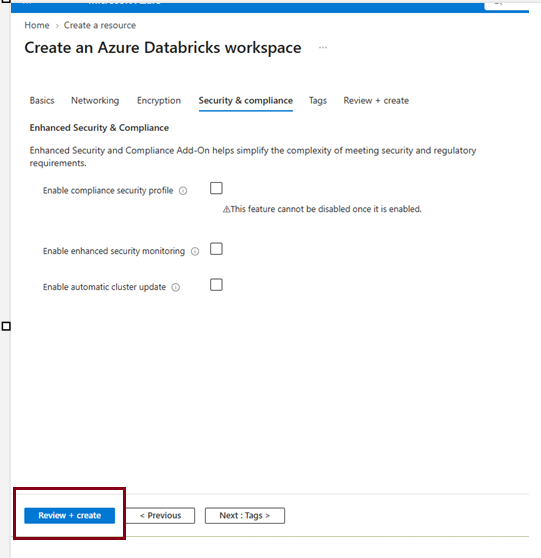
Skip other settings and click on Review+Create . once it says “Validation passed”, select “Create”.
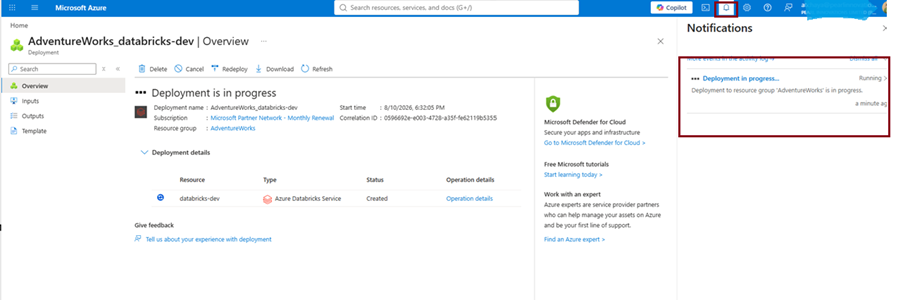
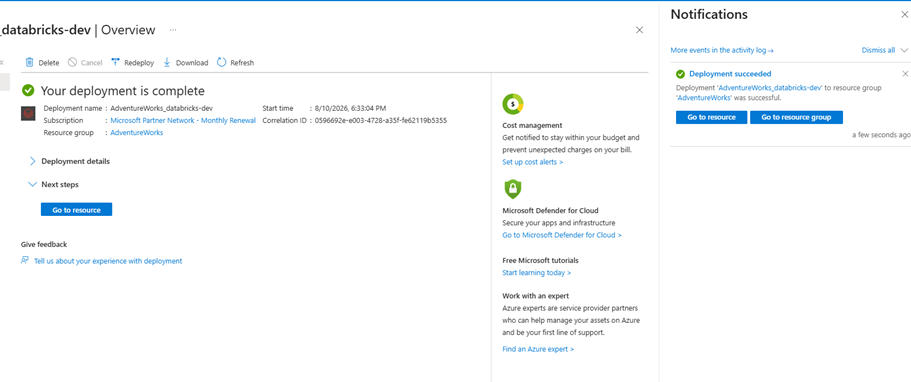
Wait for deployment
Deployment usually takes a few minutes. You can track progress under the bell icon (“Notifications”) in the top toolbar of the portal.
What Actually Gets Created Behind the Scenes?
When you create a Hybrid Azure Databricks workspace, you don’t see everything being created on the main workspace screen. Azure Databricks automatically provisions additional Azure resources that are required to run and support your workspace.
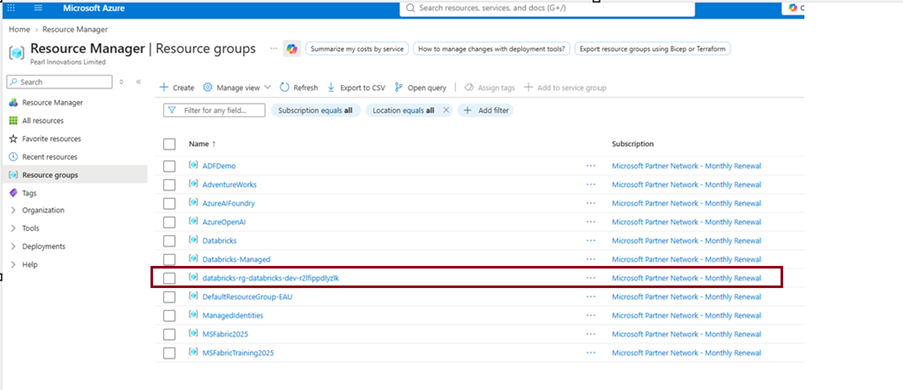
One of the most interesting things you’ll notice is that Azure creates a separate managed resource group for these supporting resources.
For example, after creating our workspace, Azure created a resource group like:
databricks-rg-databricks-dev-xxxx
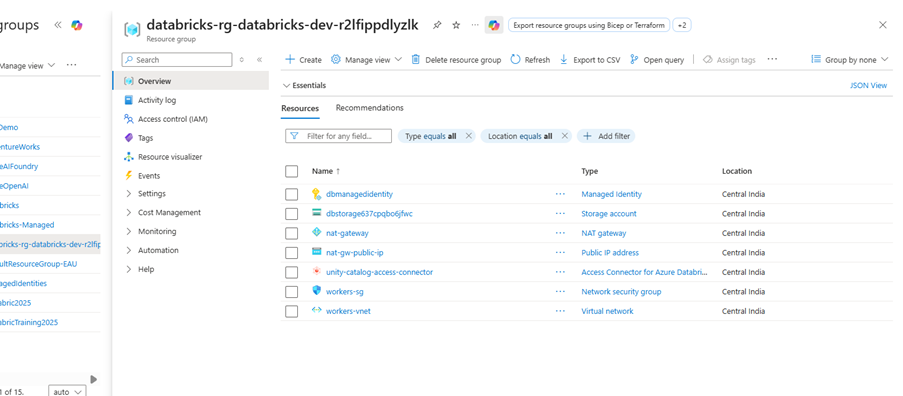
Inside this managed resource group, you may see resources such as:
- Storage account – the workspace storage account used by Azure Databricks for workspace-related data. In Classic/Hybrid workspaces.
- Managed identity – an identity used by Azure Databricks to access and manage Azure resources securely.
- Virtual network (VNet) – provides the network environment for Classic/Hybrid compute.
- Network Security Group (NSG) – controls network traffic to and from the resources.
- Access Connector for Azure Databricks – The Access Connector provides a managed identity that Azure Databricks can use to authenticate securely to Azure resources without requiring you to store usernames, passwords or storage account keys in your code. It is particularly useful when Azure Databricks needs identity-based access to Azure Storage and in Unity Catalog-related storage scenarios.
- Other supporting resources – depending on your workspace configuration, you may see resources such as NAT Gateway and a public IP address.
Why is it a separate resource group?
The separate managed resource group helps Azure Databricks organize and manage the infrastructure that supports your workspace.
You normally don’t create these resources one by one. Azure Databricks provisions them as part of the workspace deployment.
Important: Treat the managed resource group as Databricks-managed infrastructure. Do not manually delete, rename or modify resources inside it unless Microsoft or Databricks documentation explicitly instructs you to do so. Changing these resources manually can affect the operation of your workspace.
Very important: Don’t confuse two types of storage
This is where beginners often get confused.
1. Workspace Storage Account
Automatically associated with your Hybrid/Classic workspace:
Databricks
↓
Workspace Storage Account
↓
Workspace-related data
You don’t create this separately during the normal workspace deployment.
2. Your Data Lake Storage
This is your own Azure Storage/ADLS Gen2 account:
Your Storage Account
↓
ADLS Gen2
↓
bronze/
silver/
gold/
↓
Your business data
You create and manage this separately and then configure Databricks/Unity Catalog to access it.
For now, remember this simple rule:
- Workspace storage supports the Databricks workspace and platform operations.
- Your ADLS Gen2 storage contains the business data that your organisation wants Databricks to process, analyse and govern.
Launching your workspace
Once the deployment status shows “Running” on the Workspaces page: Azure Databricks can then be given secure access to that storage through Unity Catalog. For modern implementations, Unity Catalog provides governance around areas such as: Catalogs, Schemas, Tables, Volumes, Storage credentials, External locations, Permissions, Auditing and Lineage. We will explore these concepts in later lessons.
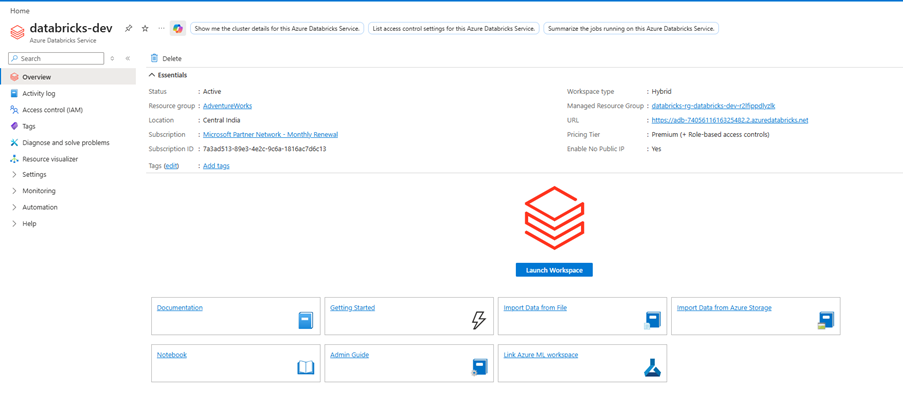
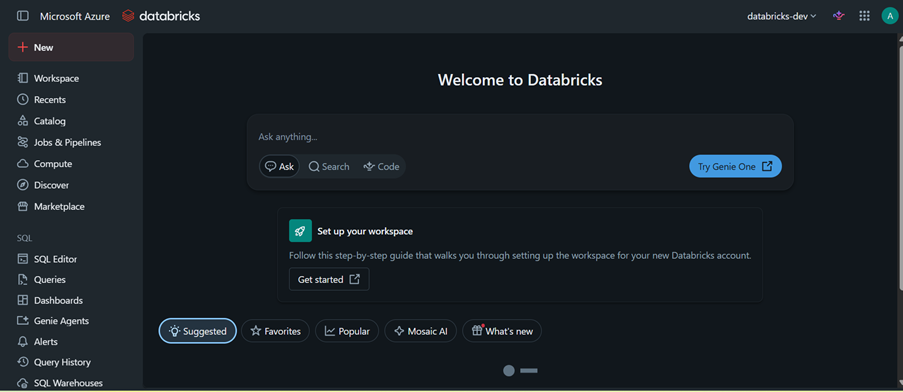
Go to the Azure Databricks account console (accounts.azuredatabricks.net) and select the Workspaces icon, or simply select “Launch Workspace” directly on your resource page in the Azure Portal.
Your account is automatically added as an admin user the first time you log in no extra setup needed.
And that’s it you’re officially inside your very own Azure Databricks workspace!
Now that your workspace is live, the next step is learning to move around it confidently.
Conclusion
In this lesson, we created our first Azure Databricks workspace and understood what a workspace provides for notebooks, compute, data, jobs, and other workloads and also learned the difference between Serverless and Hybrid/Classic workspaces and when each option is appropriate.
Explored the Azure resources created behind a Hybrid workspace, including managed storage, identity, networking, and supporting resources. Finally, distinguished workspace storage from your own ADLS Gen2 data storage and launched our workspace successfully.
Your Databricks workspace is now ready next, let’s learn how to navigate it confidently!
| Useful Links | |
| Microsoft Docs | |
|
Test Your Knowledge |
Quiz |