
In Lesson 6, we created and launched our first Azure Databricks workspace. After entering the workspace for the first time, it is natural to wonder where to begin and how the different features fit together.
In this lesson, we will take a guided tour of the Azure Databricks workspace UI , helping you understand where key tools and resources are located and how to navigate the environment confidently.
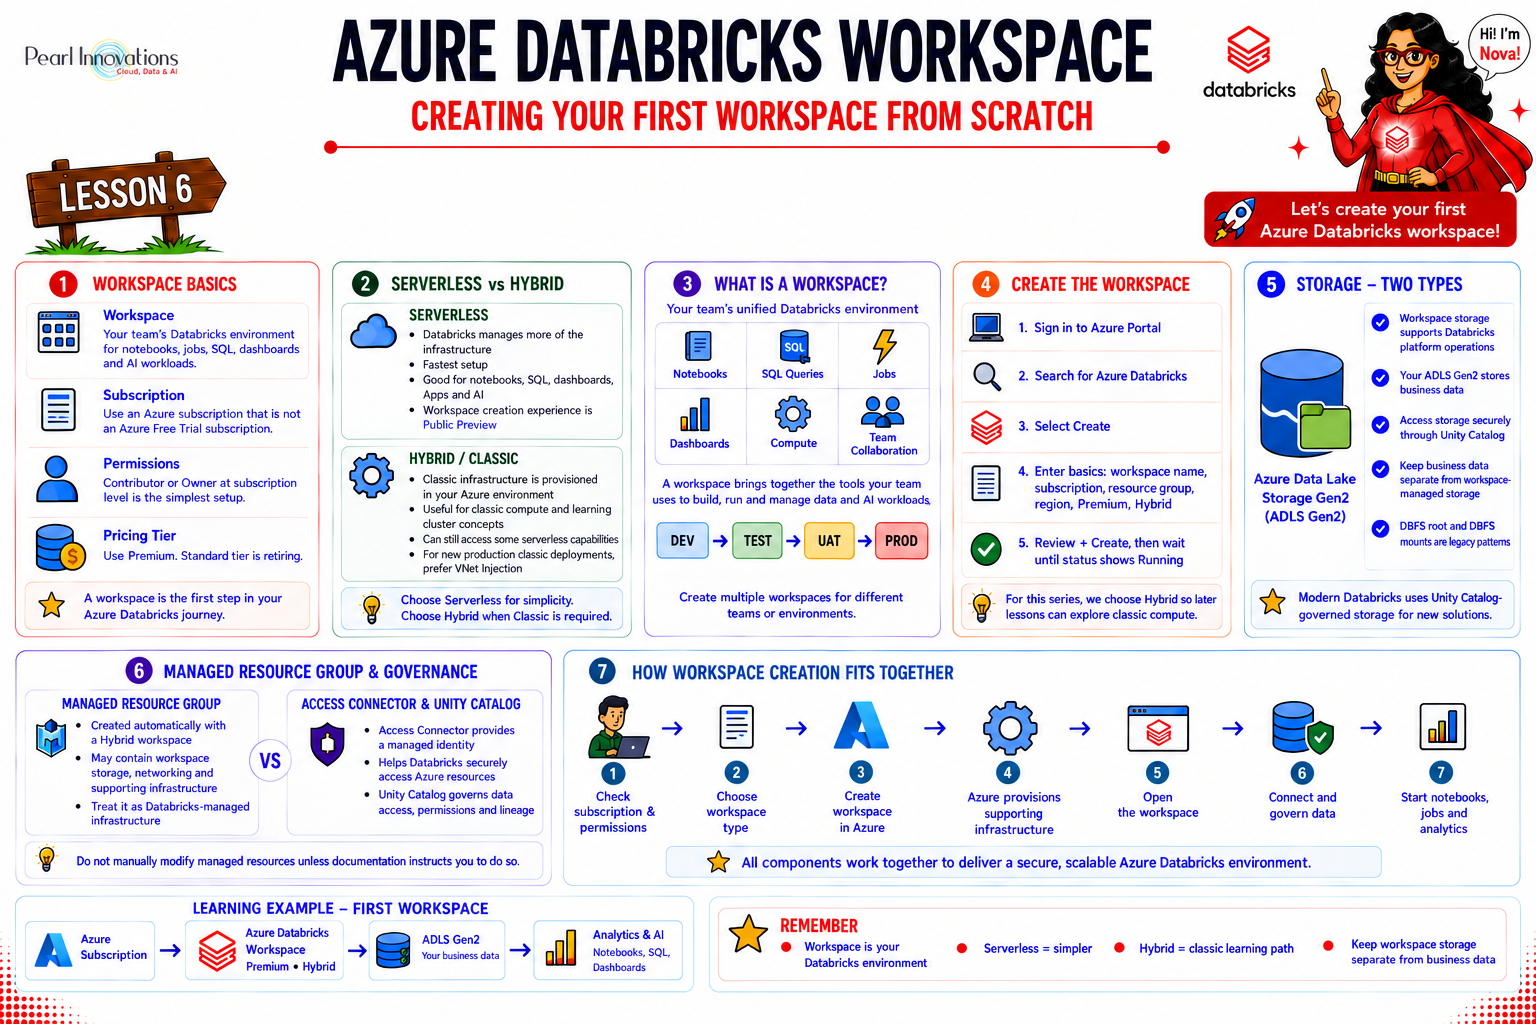
🚀 Learn It in 5 Minutes
Skip the long read.
See the key concepts in one easy-to-follow infographic.
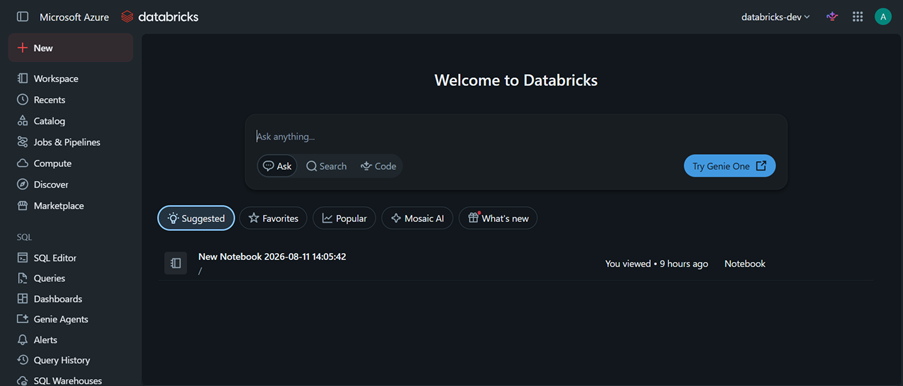
The Homepage: Your Starting Point
Every time you sign in to Azure Databricks, you begin at the homepage. Think of it as your workspace’s central launchpad a place that helps you quickly find the assets and features you need.
✨ Ask Genie Your AI-powered starting point in Databricks. It provides quick access to Ask, Search and Genie Code. Ask lets you ask questions about your data in natural language, Search helps you find workspace objects, and Genie Code helps you analyse data and author dashboards using natural language. | 👍 Suggested Displays workspace objects recommended based on your recent activity. |
| ⭐ Favourites Anything you’ve starred as a favourite shows up here for one-click access. | 🔥 Popular The most-used notebooks, dashboards, queries, and alerts across your whole team in the last 30 days. |
| 🤖 Mosaic AI A shortcut to AI and machine-learning tools and assets. | 🆕 What’s New Highlights recently released Azure Databricks features and updates. |
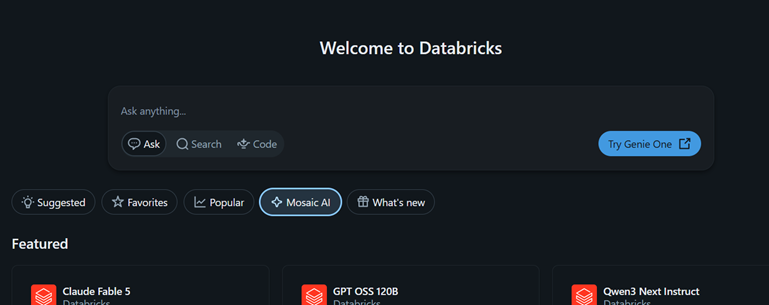
Note: If you are working in a new workspace, many of these sections may appear empty initially. That is completely normal they will become more useful as you create notebooks, run queries, and work with other Databricks assets.
2. The Sidebar: Your Main Menu
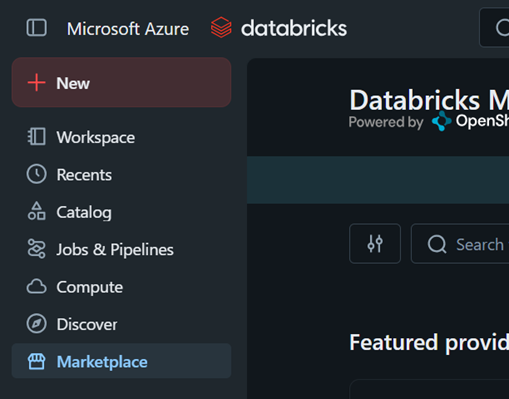
The sidebar runs along the left side of the Azure Databricks interface and serves as your primary navigation menu. It provides quick access to the most used areas of your workspace, while additional features are organized into groups based on the type of work you are performing.
| 📓 Workspace Browse and organise notebooks, files, folders, Git folders and other workspace objects. | 🕒 Recents A quick list of the last things you opened, so you never lose your place. |
| 🗄️ Catalog Explore and govern data and AI assets through Unity Catalog, including catalogs, schemas, tables, volumes and other governed objects. | ⏱️ Jobs & Pipelines Where automated tasks and data pipelines are scheduled and monitored. |
| ☁️ Compute View and manage the compute resources used to run your workloads, including Serverless and Classic compute where available. | 🧭 Discover A space to explore what’s available across the workspace. |
| 🏪 Marketplace A store-like area to find and connect to shared datasets and tools. |
Feature Groups in the Sidebar
Below the main navigation options, the sidebar organizes additional tools based on the type of work you want to perform.
- SQL group 📊 – SQL Editor, Queries, Dashboards, Genie Agents, Alerts, Query History, and SQL Warehouses. Perfect for anyone who prefers writing SQL over Python.
- Data Engineering group 🛠️ – Runs and Data Ingestion, for building and tracking your data pipelines.
- AI/ML group 🧠 – Playground, Agents, AI Gateway, Experiments, Features, Models, and Serving, covering the full journey of building and deploying AI models.
Note: You don’t need to learn all these options at once. As you progress through Databricks, you’ll gradually use the sections that match your work – SQL for analytics, Data Engineering for pipelines, and AI/ML for machine-learning and AI workloads. What appears in your sidebar can also vary depending on your workspace configuration and permissions. Some features may be unavailable if you do not have the required entitlement.
3. The “+ New” Button – Create Anything, Fast
At the top of the workspace, the + New button provides a quick way to create new Databricks resources and assets. Instead of navigating through different sections of the workspace, you can start many common tasks directly from this menu.
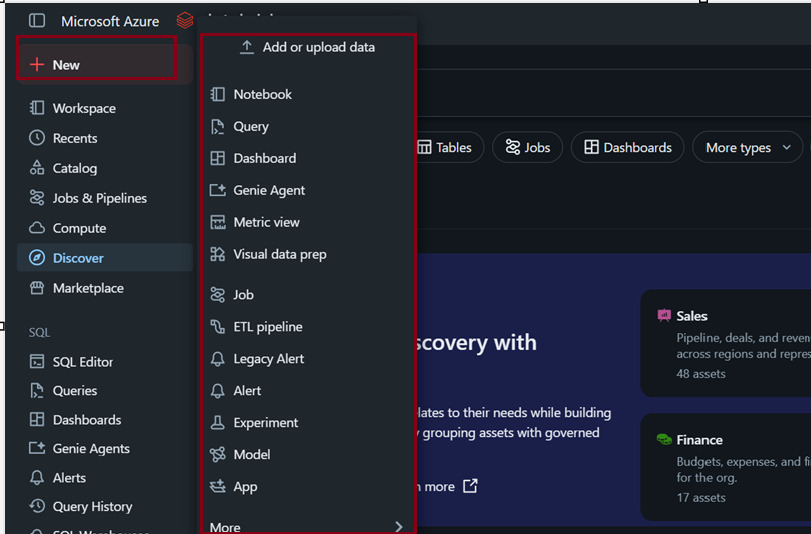
With + New, you can create:
- Workspace objects – Notebooks, queries, Git folders, dashboards, alerts, jobs, pipelines, experiments, models and serving endpoints. Git folders are the current name for what older Databricks documentation called Repos.
- Compute resources – Clusters, SQL warehouses, and ML endpoints.
- Data assets – Upload CSV or TSV files and create Delta tables or connect to external data sources.
Tip: Not sure where to start when creating something new? Click + New first. It provides a convenient list of the resources and objects you can create based on your workspace and permissions.
🔍 4. Search Bar – Find Anything Instantly
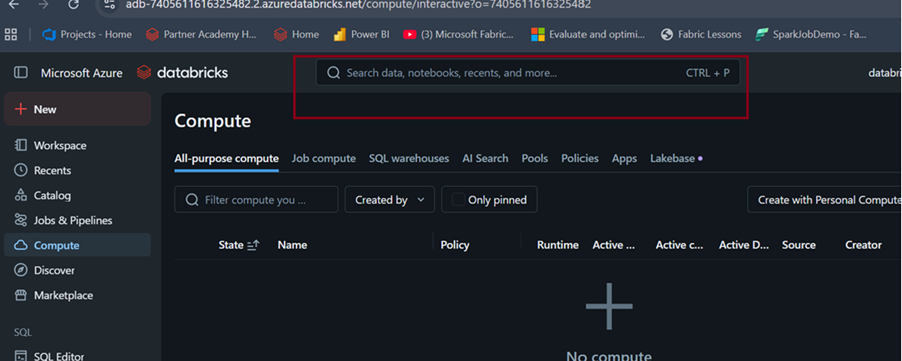
At the top of the Azure Databricks interface, the Search bar helps you quickly find assets across your workspace. Instead of navigating through different sections, you can simply enter a keyword or asset name and search across items such as notebooks, queries, dashboards, alerts, files, folders, libraries, tables, jobs, Git folders and repos.
You can also access your recently viewed items from the search interface, making it easy to return to something you were working on without searching for it again.
⚙️ 5. Settings – Your Personal Control Panel
The Settings area lets you manage your personal Databricks preferences and, for administrators, workspace-level settings. User and administrative options are organized within a unified settings experience.
Some commonly used options include:
- Profile – Manage account-related information.
- Developer – Access developer-related settings such as SQL query snippets, when SQL access is available.
- Preferences – Customize options such as language and appearance/theme.
🌗 Changing the Theme
You can switch between light and dark modes:
- Click your username in the top navigation bar.
- Select Settings.
- Open the Preferences tab.
- Under Appearance, choose:
- Prefer light
- Prefer dark
- Use system default
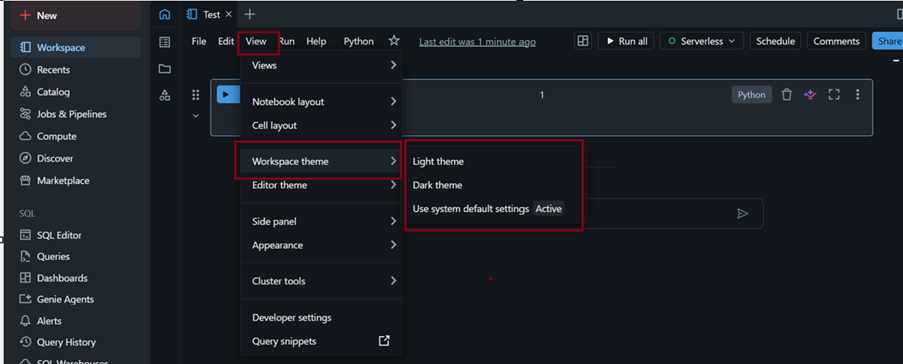
You can also change the theme while working in a notebook through View → Workspace theme.
🌐 Changing the Language
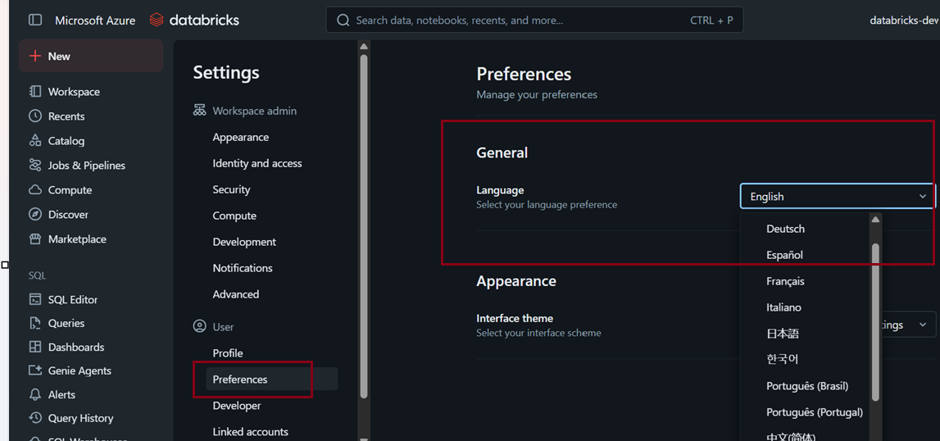
To change the Databricks interface language:
Username → Settings → Preferences → Language
Select the language you prefer, and Databricks will apply it to the supported parts of the interface.
💡 Tip:
If the Databricks interface looks different from what you see in a tutorial, check your Preferences first—your selected theme, language, and workspace configuration can affect what you see.
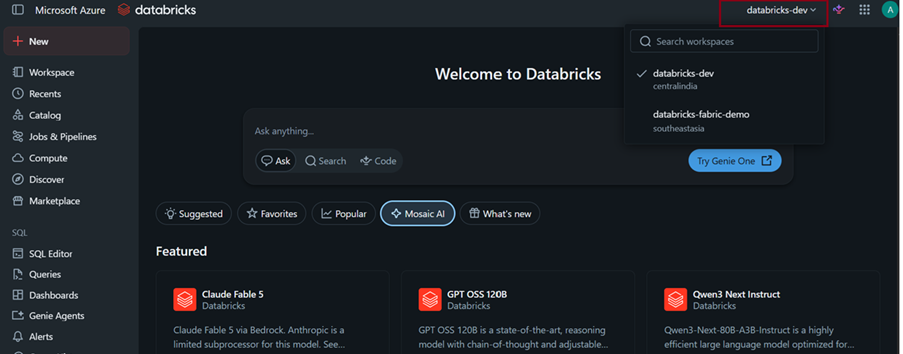
🔄 6. Switching Between Workspaces
If you have access to multiple Azure Databricks workspaces, you can switch between them without signing out and signing in again.
- Click the workspace name in the top navigation bar.
- Select the workspace you want from the drop-down list.
This makes it easy to move between different environments, such as Development, Testing, and Production, when you have access to them.
🧠 7. Switching Between Spaces
Azure Databricks Spaces help organise your work inside the editor. A Space keeps related editor tabs, a workspace folder and search context together so you can switch between projects without losing your working context.
When you switch Spaces, your open tabs are remembered, the file browser opens at the Space’s folder and workspace search defaults to that folder. Use the Spaces drop-down beside your editor tabs to create or switch between Spaces. Editor Spaces are different from Genie spaces. Genie spaces are used for natural-language data exploration with AI/BI Genie.
🧠 8. Quick Hands-On Tour — Try It Yourself
Reading about the workspace is one thing — using it yourself is another. Let’s take Databricks for a short test drive:
- Log in to your Azure Databricks workspace.
- From the sidebar, click Workspace.
- Click + New → Notebook.
- Name your notebook HelloWorkspace.
- Select Python as the programming language.
- In the first cell, enter:
print(“Hello, Databricks Workspace! 🚀”)
- Run the cell using Shift + Enter.
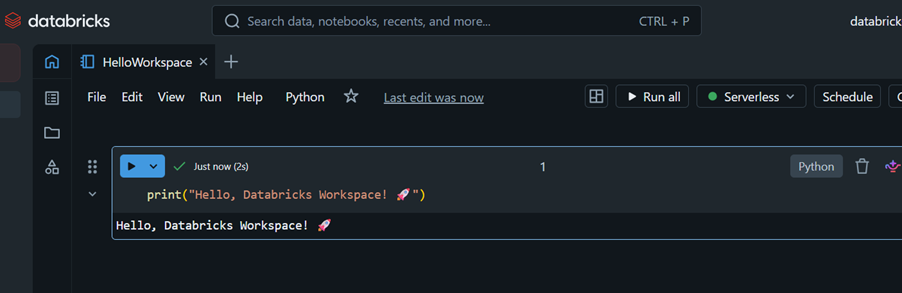
You should see the message displayed below the cell.
What just happened?
You created a notebook, wrote a simple piece of Python code, and ran it in Databricks. The code is executed using the compute resource attached to the notebook, and the result is displayed directly in the notebook.
🧱 9. Tips for Navigating Like a Pro
- 📁 Organise smartly – Keep separate folders in Workspace for different projects.
- ⭐ Favourite frequently used items – This makes them easier to find from the Homepage.
- ⌨️ Learn useful shortcuts –
Shift + Enterruns the current cell. PressEscto enter command mode, thenAto insert a cell above orBto insert one below.. - 🔍 Search before you scroll – Use the top Search bar to quickly find notebooks, tables, jobs, dashboards, and other assets.
- 🧠 Name things clearly – A meaningful name such as CustomerSalesAnalysis is much easier to understand than Untitled 12.
☁️ Why Knowing the Workspace Matters
Once you’re comfortable with the Homepage, Sidebar, Search, Workspace, and Settings, navigating Databricks becomes much easier. The goal isn’t to memorise every button. It’s to understand where to find the tools you need and what each area is used for.
By the end of this lesson, you should be able to move around your Databricks workspace confidently and be ready to start working with notebooks and data in the upcoming lessons.
Conclusion
By completing this lesson, you should now have a clear understanding of how to navigate the Azure Databricks workspace UI with confidence. You learned where to find important areas such as the Workspace, Catalog, Compute, Jobs & Pipelines, Discover, Marketplace, SQL, and AI/ML tools. You also explored how to create new resources, search for assets, customize settings, and switch between workspaces. Finally, the hands-on tour gave you your first experience creating and running a notebook. With these navigation skills in place, you are now ready to start working with Databricks notebooks and data in the upcoming lessons.
| Useful Links | |
| Microsoft Learn / Documentation | |
|
Test Your Knowledge |
Quiz |